Showing posts with label DT Katie Howard. Show all posts

Monday, 24 December 2018

Goodbye and Thanks

Happy Christmas Eve! I hope your are all ready for celebrating Christmas and whatever that entails for you and your families. I think I am as ready as I will ever be with some fresh prawns (of course!) on my to do list today as well as a few last minute groceries.

Today is my final share for 2018 as well as my final share with Scrapping Clearly so I thought I would look back and share some of my favourite creations with you. I have to say I had great difficulty in narrowing it down, as I looked through all that I have created over the year I realised how many special projects that I have made while showcasing the awesome products that Kylie keeps in store.

So, here goes:

I started the year with a Christmas page and thought it fitting to remember it now:


I do love to try and use collections and products in ways not expected! And creating a Christmas page with non-Christmas papers and embellishments was great fun!

Next on my list was this page with lots of Maggie Holmes goodness! I loved working with so many of Maggie Holmes collections and this page was a great mix of three different ones.


Seeing how well all these collections came together shows how versatile they are!

This next page is still using these wonderful collections and shows how you can use lots of different patterned papers on one page and also use them for a boy page.


Who would have thought there would be such a rainbow mix of colours in these collections?!

This next one is a favourite because I loved how the background came together. You know sometimes when you just start doing and you are not sure where you are going with something and it just somehow turns out perfectly? Yeah, well that!


And lastly, another page with a background that somehow came together perfectly was this one that I created using a small gelli plate like a stamp, and then the building up of layers before finally turning it into a completed page.


Let me tell you it was hard to narrow down to these five, I could have easily said that everything that I created over the past 12 months was my favourite. One thing I did notice was my love of colourful and fun pages seemed to be there in every creation, and I do have some favourite products and techniques - namely distress oxide inks and creating layers, especially with handmade tags!

I have linked to the original blog post for each layout if you are interested in having a look at how they came together.

But for me, I would like to say thank you so very much to the wonderful Kylie for having me as part of this awesome team and to all the girls I have shared this space with, you all rock!

I hope to still be around, maybe do a challenge when I have the chance, but life is pretty busy now with a new job and the commitment that comes with that. I am sure one day I will have the balance right! 

I wish you all a very Merry Christmas and Safe and Joyous New Year.

Katie xxx


Saturday, 15 December 2018

Inspired by the December Mood Board - Christmas Cards with DT Katie Howard

Well we are in the thick of December now, how is everyone's shopping going? Me, well I have done some, but my holidays start half way through next week so I have a little time up my sleeve to finish things off!

Today I thought I would share some simple Christmas cards inspired by the December Mood Board and cards on Pinterest (who doesn't love wasting time here?!).

So here is the Mood Board:

No automatic alt text available.

I was inspired by the natural and neutral aspects in the pictures, the trees and the wreaths and also the darker greens and this is what I came up with:


I started with a cream base card and added a background using Maggie Holmes Gather paper in Kindred, which was perfect with it's leather look and stitching. I love that it looks like I stitched on the page! I used some more of the Gather collection in Magical, So Sweet and Beautiful to cut tall triangles to make some trees. This card is perfect for using up your scraps! I added some faux stitching through the trees using a black paint pen and topped them with stars from Heidi Swapp's glitter puffy sticker alpha set (I love when they have more than just alphas!) and a chipboard star from the Crate Paper Good Vibes collection. I finished with a Christmas stamp sentiment from an old stamp set I have and there you go one quick card.


This second card is inspired by the wreaths and in keeping with the darker greens and neutral colours. This is also a great card to use up left over scraps. I started by punching out some circles in 0.5 inch and 0.75 inch sizes from the following papers from the Maggie Holmes Chasing Dreams collection: Be Happy, Garden Club, Gold Glitter acetate and Lovely and also My Story from the Gather collection (this one is a gorgeous light wood patterned paper). Once I had an assortment of circles in patterns and sizes I drew a rough circle outline and then began layering and filling in the circle. Once I had the punched circles down, I added some sequins from the Pink Paislee Birthday Bash pack which included the gold stars as well, but pick whichever sequins suit your colour scheme! The I added a puffy sticker bow from the Chasing Dreams collection and stamped a Christmas message, and a second card is born!

So a quick and simple couple of cards for you to try out and use up some of your scraps. Thanks for stopping by today and catch you next time!

Katie x


Thursday, 6 December 2018

Summer Fun - Scrapbook page with DT Katie Howard

Wow, December already, can you believe it?! For us that means hot and often sticky summer heat and lots of water play. So I thought it was only fitting to make my first share for December a fun in the summer sun kind of page, and I thought that the Crate Paper Good Vibes collection was perfect to reflect the summer fun.

So let's check out the page first:


The photos that I picked were some action "jumping in the pool" shots of my nieces. Bright, summer and fun photos and perfect with the Good Vibes papers. I started with the paper Passion which is one of my favourites as it has multi-coloured free-hand style stripes, and I am a sucker for a good stripey paper!

I started with two blocks of this paper and created two areas of interest on each side of the page. I used the reverse of the Passion paper to mat the photos so they would stand out. The revers is a gorgeous shade of blue with black dots, also a sucker for a good spotty paper!

I also layered some of the neutral kraft spotty paper All Good on both blocks, and finished each block with a hand made tag using the Hashtag paper, which is a great pink grid with geometric type lines in heavier pink, so there is design but a subtlety as well.


Here you can see the tag a little closer, and also part of the title which was using the co-ordinating puffy sticker words. Can you see the subtle stencilling I added on the background as well? I decided the small shutters stencil from Dylusions would be perfect because it reminded me of the free-hand stripey paper and I used it with some Tattered Rose distress oxide ink because this was a pretty could match to the peachy pinks in the collection and it was also nice and subtle. I also added some splatters using the Picked Raspberry to match the brighter pinks in the papers.


I cut one of the pom-pom frames in half and used it like a photo corner for the top right and bottom left photos, adding some dimension and texture to the photo cluster. I also added a cactus from the ephemera pack, I decided due to the landscaping around the pool this was probably as good a time as any to add in cactus embellishments!


The right hand side focused on a card cut from the So Chill paper, which has lots of great cut-apart cards on one side and a very usable pattern on the other. Add in some chipboard from the Chipboard sticker sheet with foil accents, again more cactus, and a ticket from the ephemera and this side was a wrap. The last thing to do was add a little journaling which I did using a black paint pen, I love how black these pens are for journaling, even if it is only on plain cardstock. And there you have it, page done!

Thanks for stopping by and see you next time,

Katie x


Tuesday, 27 November 2018

Page in the Making - Part 2 - with DT Katie Howard

Welcome back! Glad you could make it back to see how my background turned into a page. First, let's have a little reminder of what my background looked like:


And if you wanted to check out how it came together check out the blog post here.

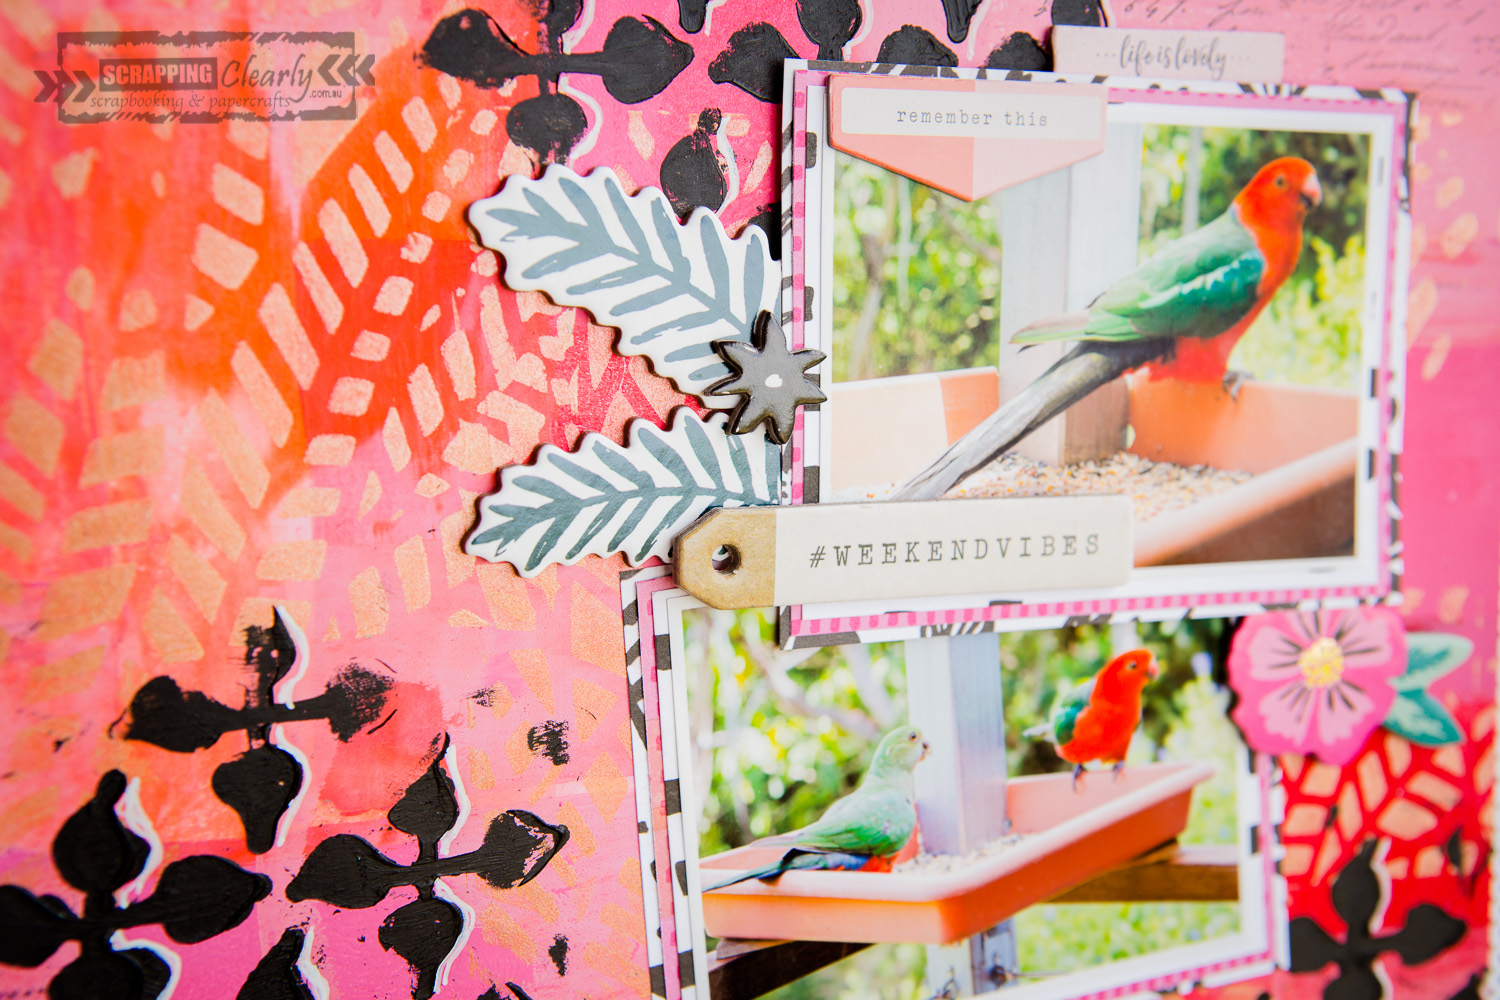
Given how bright and busy the background was I decided I didn't need to do much to create a page, pick out the right photos add a little paper and few embellishments and call it done! I decided to run with some patterned papers in black and white so they would stand out from the background and a splash of pink because it matched! I selected some papers from the Maggie Holmes Gather collection and the Crate Paper Good Vibes collection (some great black and white prints in these collections, not to mention pretty pinks!)

So without further ado, the finished page:


I backed the photos on some patterned papers, layering with black and white prints and some pink in between, just enough to help them stand out on the background. I added some foam mounting tape behind one of the photos, this helped with layering some of the chipboard under the photo too.

The chipboard came from Good Vibes chipboard sticker sheet and Maggie Holmes Gather Thicker accent. I just chose pieces that worked from a colour point of view and vaguely fit in with the theme, using one of the tags "#weekend vibes" as my title.


The last thing I did was add a little journaling using a white posca paint pen and there you have it a finished page!

Thanks for stopping by to see the completed page.

Until next time,

Katie x


Tuesday, 13 November 2018

Page in the making - with DT Katie Howard

Good Morning! How are we all today? I have to admit that I am crazy busy now with a daughter finishing up year 12, new job commitments and the rest of the usual crazy for this time of year. So I thought I would do something a little different and bring you a page in two parts. Today I will show you the background that I created and then next time the page that I created with that background!

So, this page started with inspiration of colours from this months Mood Board:

No automatic alt text available.

Full of luscious reds, pinks, peaches and corals. So what is a girl to do but pull out her paints in these sorts of colours! I selected some Dylusions and Dina Wakely paints in these colours: Peony Blush, Rose Quartz, Tangerine Dream, Ruby and Penny. Next I pulled out some stencils, the ones that I used were Dina Wakely in Wallpaper and Jungle, but there are so many to choose from! Last of all I pulled out my small gel press plate, the one I have is a 3x5 size, but you can get a set of different sizes from Ranger which would be perfect also. Don't forget your brayer for the gel plate! Then I got started!

I basically used my gel plate on a stamp block like a stamp, I didn't do anything but layer some paint  on with my brayer and stamp onto my background cardstock, just creating random blocks of colour and changing the orientation from press to press, overlapping along the way and this is what I finished with:


At this stage I let it dry a bit and pulled out a script stamp and some black ink (archival ink is perfect for this job) and stamped randomly on the page. After the stamping I grabbed the jungle stencil, loaded my gel plate with the penny (a bronze colour) paint and stamped it through onto my page.


To finish off I grabbed the wallpaper stencil, some black paint and then used a foam brush to add some detail through the stencil. Once dry I grabbed my white dylusions paint pen and made some outlines around the black for some more detail. This is the final result:


Now my background is ready to go, just to find photos and figure out a design! So tune in next time to see what I create with this background!
 
 Thanks for stopping by, until next time.

Katie x


Wednesday, 7 November 2018

From the Heart - Scrapbook page with DT Katie Howard


Hello, hello, can you believe that it is November already?! This year is going way way to quickly, not to mention I am not ready for the summer heat that comes along with the end of the year. We have been sweltering through some very humid and hot days recently and let's just say I don't cope very well when I am hot and uncomfortable 😂.

Enough chit chat, today I am sharing a page that I created inspired by the November Inspiration board.
No automatic alt text available.


Isn't it luscious?! Lots to inspire in this board. I started with the softer peachy reds and pinks for my colour palette and then the shoe inspired my to think of a ballet shoe and this made me think of my little dancer niece and from this a page was born!

Here is my final page:


I pulled out some of the bits and pieces I still have from the Maggie Holmes Gather collection, and let me say this, there are lots of beautiful soft reds, pinks and peaches in this collection, not to mention the dancer bits! It worked perfectly with my page theme.

I decided to do a colour block style background, a great way to get more patterned paper on your page without it becoming too busy overall, especially if you choose the smaller patterned papers.

I created some matting behind my photos including lifting some up on foam tape to allowing the tucking in of chipboard embellishments later on. The papers that I have used are: Details, Jane, You+Me, Kate, Magical and My Story.


I pulled out some of the ephemera that matches and decided to utilise one of the cards as a title, thought it fit well as I am sure all dancers are performing "from the heart"! There was some great acetate pieces in the ephemera as well that worked in nicely along with some chipboard from the chipboard sticker sheet and the thicker set. Remember too, if you are tucking pieces in behind a photo, cut it in half or there abouts so you can two for the price of one! I did this with the chipboard rose peeking out from the photo mat above.


I just loved the dancer silhouette acetate piece from the ephemera set, it was the perfect match for this page! I also added some splatters creating the perfect colour from mixing some of my distress oxide inks to match. I used Dried Marigold, Picked Raspberry and Worn Lipstick, and I think it created the perfect match!


I created another little cluster of embellishments at the bottom, again cutting a piece in half. This time the acetate wreath which I also tucked into the paper strip, then I layered some other pieces on top including some words/ phrases.

A relatively simple page, but packed full of interest with the embellishment clusters, layering and tucking in of embellishments.

Thanks for stopping by, see you next time.

Katie x


Monday, 22 October 2018

Inspired by the Mood Board Part 3 - with DT Katie Howard

Hello and welcome back for the third and final "Inspired by the Mood Board" post! I hope you have been enjoying seeing the many different ways that I take inspiration from a mood board and I also hope that it inspires you to look at them more closely and see all the varied possibilities that they can result in.
Today's post shows yet another different take on the board and a very different result from the previous two creations. First let's look at the mood board again to remind ourselves (in case you have forgotten!):

No automatic alt text available.

This time I took inspiration from the left and centre bottom images, in particular the foliage and flowers in the the forest picture and the frames on the wall in the centre picture. I also decided to go with the light and bright feel of the centre image, and this is the page that I created:


On my page you can see my frame in brown, drawing on the wood in the bedroom and the trees and path in the forest path picture, and then leaves, foliage and flowers from the forest in shades of green and a touch of deep purple/blue.


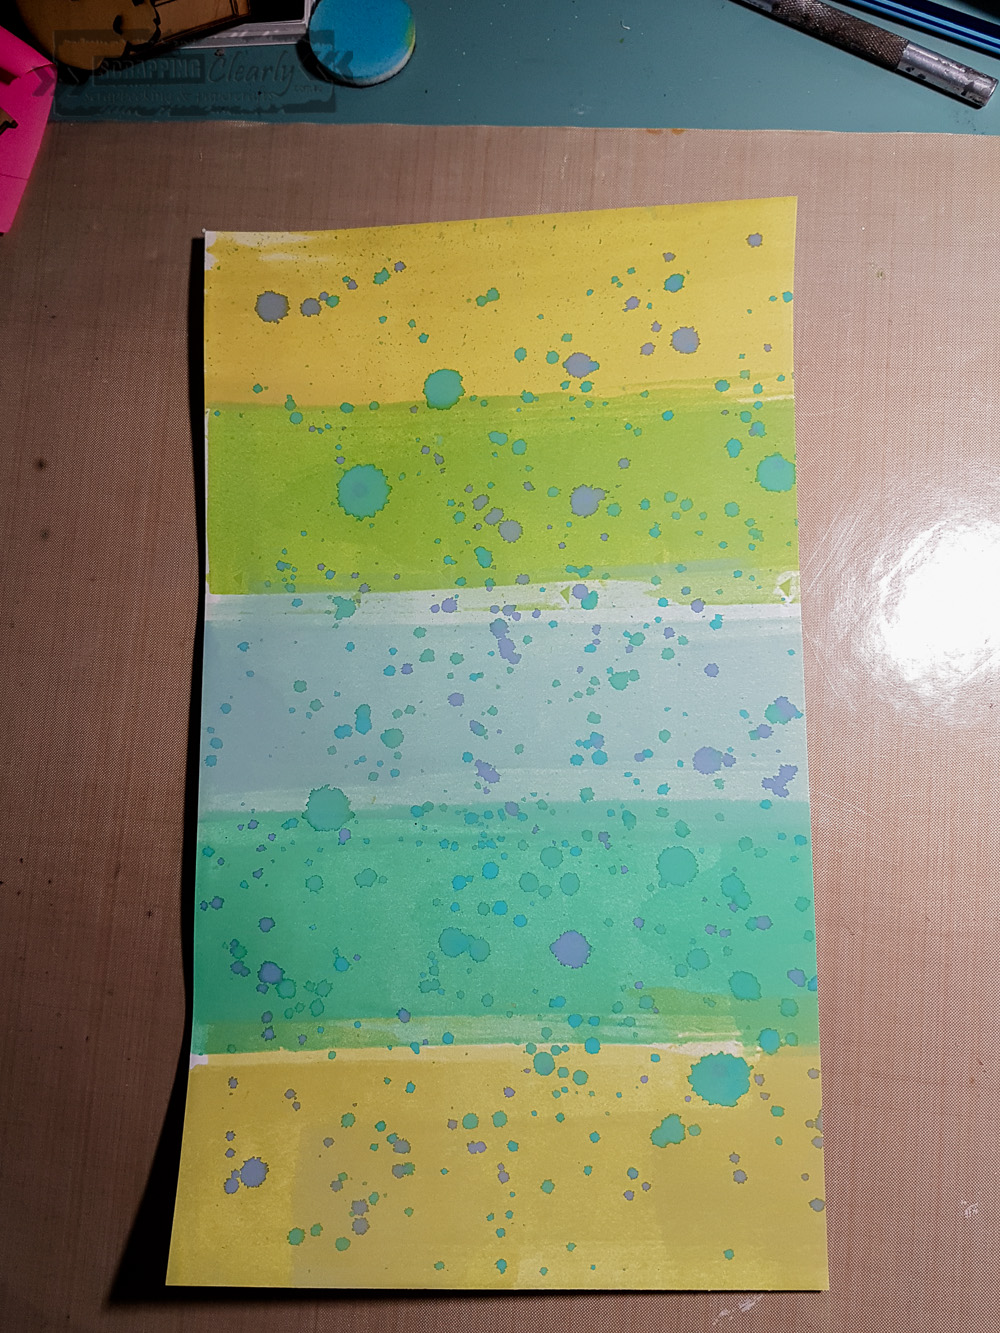
I created my own striped pattern paper using distress oxide inks and a brayer. I added some ink to my craft mat and spritzed some water to create a water colour that I then used the brayer to add to the cardstock. After I made the stripes I added some splatters using some blues and blue green inks to contrast with the shades of green already on the background. The colours that I used were: Evergreen Bough, Peeled Paint, Lucky Clover, Crushed Olive, Mowed Lawn and Peacock Feathers and Faded Jeans for the splatters. To make great splatters grab a largish round brush and pick up some of the water colour ink from your mat and simply splatter!


I decided to add some texture to my background using the Distressed Lace stencil and some white texture paste. The white on white is great for adding texture without adding distraction. To emphasize some of the detail in the pattern I grabbed some gelatos (you could use any water soluble crayon) in pale mint green and a purple and added them directly to parts of my background then used a water brush to move the colour around.

While my background was drying I cut some leaves, foliage, flowers and the frame using my electronic cutting machine and a free cut file from Scrapbook & Cards Today. There are many great free cut files around if you have a look! I used the striped background paper to cut the leaves and foliage from and love how they turned out!

Then it was just a matter of assembling the die-cuts and photos on my page. I used some of the left over striped background to finish my page.


I layered under and over the frame and the photos and didn't stick them completely down so they had more dimension where they curled up.


I finished off with a title from the Crate Paper Maggie Holmes collection Gather, using the word "loved" from the thicker set.

So, there you have it, one mood board and three different interpretations! You still have time to get in an entry for this mood board, check it out on the Facebook Group here, we would love to see your interpretation!

Until next time, thanks for stopping by,
Katie x


Saturday, 13 October 2018

Inspired by the Mood Board Part 2 - with DT Katie Howard

Hello there! I am back here today with the second installment of my how to take inspiration from mood boards, with a focus on our monthly mood board.

No automatic alt text available.
My previous page took inspiration from some of the greens and the circles from the top image on the board. Today, my inspiration is taken in part from the bottom right picture, the squares, and also from all of the greens through the images, but I also decided to include some browns as seen in the two of the bottom pictures, for some contrast.

Before I got started I decided to create my own patterned paper using my gel press, paint and stencils. Here is an assortment of the prints that I finished with, some on light card and some on deli paper.


I chose a mixture of patterns and colours from the prints on the light card and cut 3 in x 3 in squares to form the background of my page. On some of these squares I stamped using some Ground Espresso distress oxide ink and background texture type stamps to add some interest and to break up the green a bit more.


As well as stamping I used some paint pens to outline some of the shapes on the prints. I layered my photos on some brown cardstock with some of the deli paper prints and then layered this on some plain deli paper to help it stand out more from the background. I also used my tab punch to create some tabs to tuck into the layers of my photo mat, and to make sure these stood out I used a white paint pen to outline them.


Can you see the square where I added some printed deli paper over the top of the pattern? The deli paper is like tissue paper and is transparent when glued down so you can see the pattern below as well as what is printed on top. I picked up some generic branded grease proof paper from the supermarket and it works really well for this.


I used some Tim Holtz Idea-ology stickers as my journaling, consider this my "cheat" when I want to add something but don't necessarily have a big or interesting story to tell!


For my title I used some charcoal thickers as they were neutral on a bright and busy page, but to make them stand out a little more I outlined the word using a green paint pen from the first Dylusions paint pen set. The blue paint pen came from set number two, these are awesome paint pens too! 

So, there we go, same mood board, similar colours but a completely different page. I hope you tune in for my final creation inspired by the mood board later this month!

Thanks for stopping by,

Katie x


Thursday, 4 October 2018

Inspired by the October Mood Board Part 1 - with DT Katie Howard

Good Morning, I hope you are all well this fine October morning. Yes October, already, let that sink in... the downhill slide into Christmas and that is another year done and dusted. Crazy I say!!! Anyone else feeling that way? I know each year seems to disappear quicker and quicker, but sometimes it is just ridiculous how time flies.

Any way, now that is out of my system I thought I would challenge myself and hopefully all of you as well, on looking at our mood board challenges in different ways and maybe spark some inspiration that you may not have had when you first looked at the board.

So to do this properly I will be doing three posts this month, each one taking inspiration from the October mood board, and I will walk you through my thinking. So, let's start with the board!

No automatic alt text available.
Isn't it pretty? Full of glorious shades of green, well that is the first and most obvious element, but what else is there that could spark some creativity? That is what we will explore over the next few posts. 

So, for my first page inspired by the board, I was definitely inspired by the greens, but I was also inspired by the circles in the top image so I combined these two into my page.


I chose to use the softer, more blue greens that you can see in the top image. Partly because they worked really well with my photo and partly to show you don't have to include everything you see on the board, you can pick and choose which elements work for you or inspire you to create. 

So to start I cut 2.75 inch circles out of some white cardstock, I used my silhouette cutting machine to do this, but this is certainly a job you could do by hand too. Before I backed the circles with patterned paper I grabbed some of my distress oxide inks (yes these inks, again, what can I say, I LOVE them!) and used the plastic packaging technique to add some colour to the background. I was clever too, I placed another piece of white cardstock underneath and ended up with a second background for another time! The colours that I used were: Bundled Sage, Lucky Clover, Mowed Lawn and Cracked Pistachio.

To back my open circles I used appropriate green papers from the Crate Paper Maggie Holmes Gather and Chasing Dreams collections. You would be surprised at just how much green there was between these collections. I also matted my photo with some of the patterned papers and cut some tabs to tuck in behind the photo and the mat.


I also used some of the embellishments from these collections including vintage buttons, puffy stickers, cardstock stickers, ephemera and chipboard.


I used two different fonts for my title, along the lines of a sub-title and title. For the sub-title I used some Heidi Swapp glitter puffy stickers, which are cursive and fine and you can kind of join them to look like one scripty word. The little black hearts are also from this set.


For the main title I went with a more simple sans serif style font. This one also lends some subtlety through its cross hatch pattern on clear backing, giving it less weight than if it had been solid black. This one is from Pink Paislee Bella Rouge collection and comes with lots of letters and numbers in the set.


Ok, well that is part one of inspired by the mood board. I hope you will swing by for part two with another and different take on the same mood board.

Until then,

Katie x