Saturday 29 January 2022

Choc fudge brownies created by Tracey Thorne

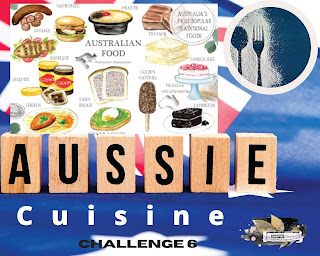
 I hope you are all enjoying the Australia Day crop over at Scrapping Clearly this week. I have still a few of the challenges to go & thought I would share my process for Challenge  6 - Cuisine. Now we are lovers of brownies ... so we like to think this is our fave Aussie food... bit partial to lamb too ... but I took the sweet option to document instead as it was a little more fun and playful to scrap.

Here is the challenge


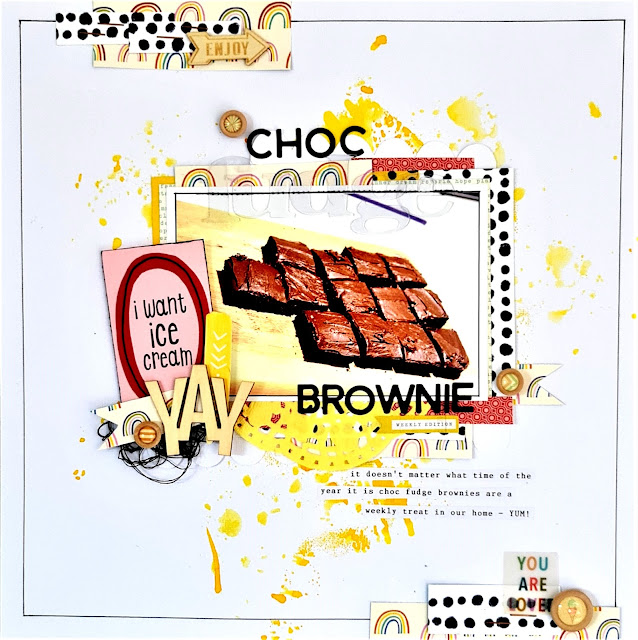
I tried to keep the mixed media to a minimum with this layout by only using two yellow spray inks - Dylusions - Lemon Zest and Heidi Swapp Colourshine - Butter . The butter is absolutely divine with an amazing shimmer. I have applied this by spraying on plastic and then kissing the page to leave ink.


I have the range of Shimelle papers called Box of Crayons & Starshine. When I first got my hands on them I found them a bit hard to work with so they have sat in my storage crate forever - possibly 3 years... so it is about time I braved the unknown and put something together. Funny thing is - these papers are AMAZING!!! They are bright, bold and quirky and were easy to use on the page.


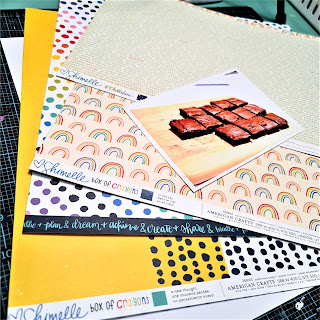
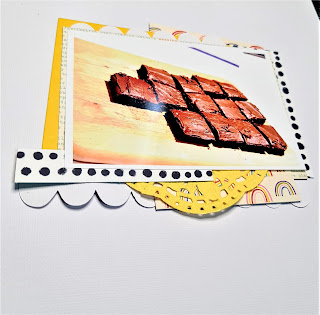
I cut a base for my photo stack out of  'A New Thought' and then mounted the photo on 'Hubble'. I also cut some ancillary pieces out of the cute rainbow cardstock called 'In the Sky' . Now a lot of paper shuffling went on to layer the photostack. Then some extra strips were cut for stapling at the top and bottom of the page... I'm loving how this is coming together now. I found a yellow doily to add at the bottom of the layers also. 


To create the embellishment stack I cut the ice-cream label from the cardstock ' In the Frame' and put a little foam tape on the back. I've then cut a little of the rainbow cardstock into a strip and cut into the end like a ribbon. I found some of my favourite Cocoa Vanilla timber words and cute timber cabochons to help tie it all together.


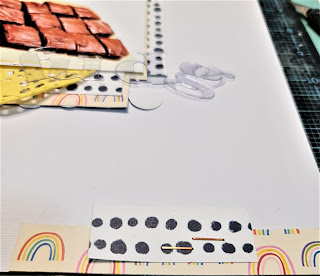
I have created the title by using a variety of fonts - Cocoa Vanilla 'Made of Awesome' sticker alpha and Heidi Swapp ghost letters


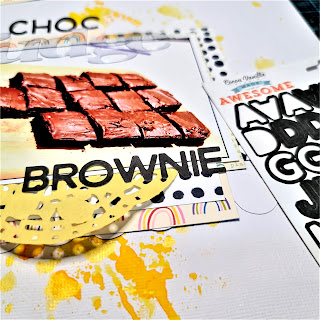
Finally the layout was finished off with a little black cotton and a black border drawn with a ruler around the outer edge....and love ...lots of love... now its time to go bake some brownies. 


have a great weekend of creativity 


Wednesday 26 January 2022

WELCOME to the Australia Day Cyber Crop Fun!

 Scrappingclearly Cyber Crop

AUSTRALIA DAY
AUSSIE AUSSIE AUSSIE
OI! OI! OI!


Hello everyone, Welcome to our Australia Cyber Crop! Australia Day is of Course on Wednesday so we have started the celebrations early. We have 6 awesome challenges for you to create with.


CHALLENGE ONE


CHALLENGE TWO


CHALLENGE THREE


CHALLENGE FOUR


CHALLENGE FIVE


CHALLENGE SIX


THE RULES OF THE CROP

  • There are 6 challenges
  • To Qualify for the QUEEN OF THE CROP you must enter all 6 Challenges, you must load no less than 3 of the Challenges and have them loaded in the assigned Challenge albums with the Scrappingclearly Share & Inspire Group by 11.00 pm 26th January Australia Day and the remaining 3 by Sunday 30th January 2022
  • Prizes will be sent to the winners via eparcel.
  • QUEEN OF THE CROP will also receive graphics to share their exciting news.


Cant wait to see all the creations.........


Amanda's take on TN Thursday! TAG ALBUM!

 Hello SC fans!

Have you been enjoying all the TN Thursday inspiration?! Some incredible projects are being shared!

Rather than weekly, I am joining in once a month. My theme will be to choose a word to focus on for each month.

And rather than a Travelers Notebook, I am using a Tag book.

Today I will share my book, as well as my inspiration for January from Kylie's prompts.

My Tag book


Before I share my inspiration, let me show you my tag book and how I created it.

I taped together enough Tab Tags for 12 months of the year. These Studio Light - World Watercolor Tags by Art by Marlene are awesome. After taping together, I applied a coat of Gesso to each page (mostly to cover the tape).

To decorate my front and back cover I used:

To colour the cover, I used a wide brush, to brush the pink and blue inks onto the tag.

Once dry, I droppered more ink onto the cover, (Including adding white this time) and used the air puffer tool to blow the ink around.

Plus I added some white splatters of the ink.

Here is the front!

For the front, I ripped and scrunched some Dina Wakley tissue paper and glued it down.

And I selected a quote from the Dina Wakley Media - Stencil - Done is Better and stenciled it on with some white modeling paste.

Finished with some white and black pen doodling!


Now for my January inspiration and word: OPTIMISM

The January TN prompts I used were: Stencils/texture; Inks and transfers.

The products in store were:


I hope I can maintain an attitude of optimism throughout January, despite the weird covid stuff happening everywhere! 

Gotta stay positive!


Thanks for looking!

Amanda


Tuesday 25 January 2022

Simples by Tracey B

 hi everyone and happy crafting Tuesday.

I woke up dreaming of modelling paste and embossing folders.

This is the result.

I started with a Bee Arty 365 Interwoven stencil and some Distress Oxide - Salty Ocean.

Then a layer of modelling paste roughly spread with a spatula. I then pressed in the emboss side of a couple of folders into the paste.   In my dream I also used an empty toilet roll but forgot about that until now! 

I then inked the folder with some more Distress Oxide (Peacock Feathers) and used it as a stamp.


Another stencil Donna Downey and more Distress Ink (Weathered wood).


I coloured some muslin with Tattered Angled Glimmer chalkboard (Cornflower Daze) and Distress spray (Ripe persimmon).

I also added some flairs, wood veneer circles (coloured with a Posca pen), washi, diecuts and left over alphas for my title.


TFL

cheers

Tracey


Thursday 20 January 2022

The Story - TN Thursday with Emma

 It's Thursday, and that means it's TN Thursday here at Scrapping Clearly.
I decided to bite the TN bullet and join in the prompt this week.
This weeks prompt is Transfer. I love a transfer. So I played.


I went with a vintage retro vibe. I used some beautiful 'Dress my Craft' Transfers over layers of book paper and a mix of Tim Holtz  design tape and Prima decorative tapes.
These were all adhered down with a Matte Gel medium. You can see this all come together in my video.


The colours in the background are made with a mix of different Distress Crayons, and I also used a gorgeous stencil from Tim Holtz with some Finnabair Jewel paste in Sparkling Onyx. It added to the vintage feel.


I used another transfer that I made into a couple of tags to feature on the left page of the journal. And again added a little colour to the tags with the crayons. 


It was so cool to play with transfers that really blended into the background and looked like the pages of a vintage book. Kylie has a great variety of styles too.

I hope you enjoy the process video.


And I can't wait to see all your journals with this weeks prompt.

See you all soon, stay safe, Em xx


Wednesday 19 January 2022

Memories, by Amanda Hartmann

 Hello SC fans!

Kylie sent me some packs of Prima Art extravagance texture pastes. She hasn't linked them in store yet, but I had fun playing with them and will let you know when they are up in the shop.


EDIT TO ADD THE LINKS to buy this awesome product in a range of colour packs:

They are a firm paste with sand-like granules, and are great if you want something a little rough and interesting to your projects. You can use them to paint and they are fine enough to go through stencils. And just wait until you see the colour range! New products are always such fun.


Here is what I created:


I started by swiping some of the texture paste to the base cardstock. I used a spatula to paint it on. I used the lightest "Powder Blue" first.

Next I found some chipboard shapes and painted them with white gesso

Next I glued some torn pieces of Dina Wakley text collage - tissue paper.

For some water colour effects, I added more colour with Tim Holtz Distress Oxides (with plastic packaging). I used "Mermaid Lagoon" and "Evergreen Bough".

To finish the background, I used a spatula to add more dashes of the Prima texture paste. I used the "Blue Green" and "Turquoise".


Looking at the close ups, you can see the muslin, tissue paper, wire, beads, bling, cogs, thread and other things I added for interest.


Thanks for looking today! 
Amanda