Saturday 29 June 2019

Last Days

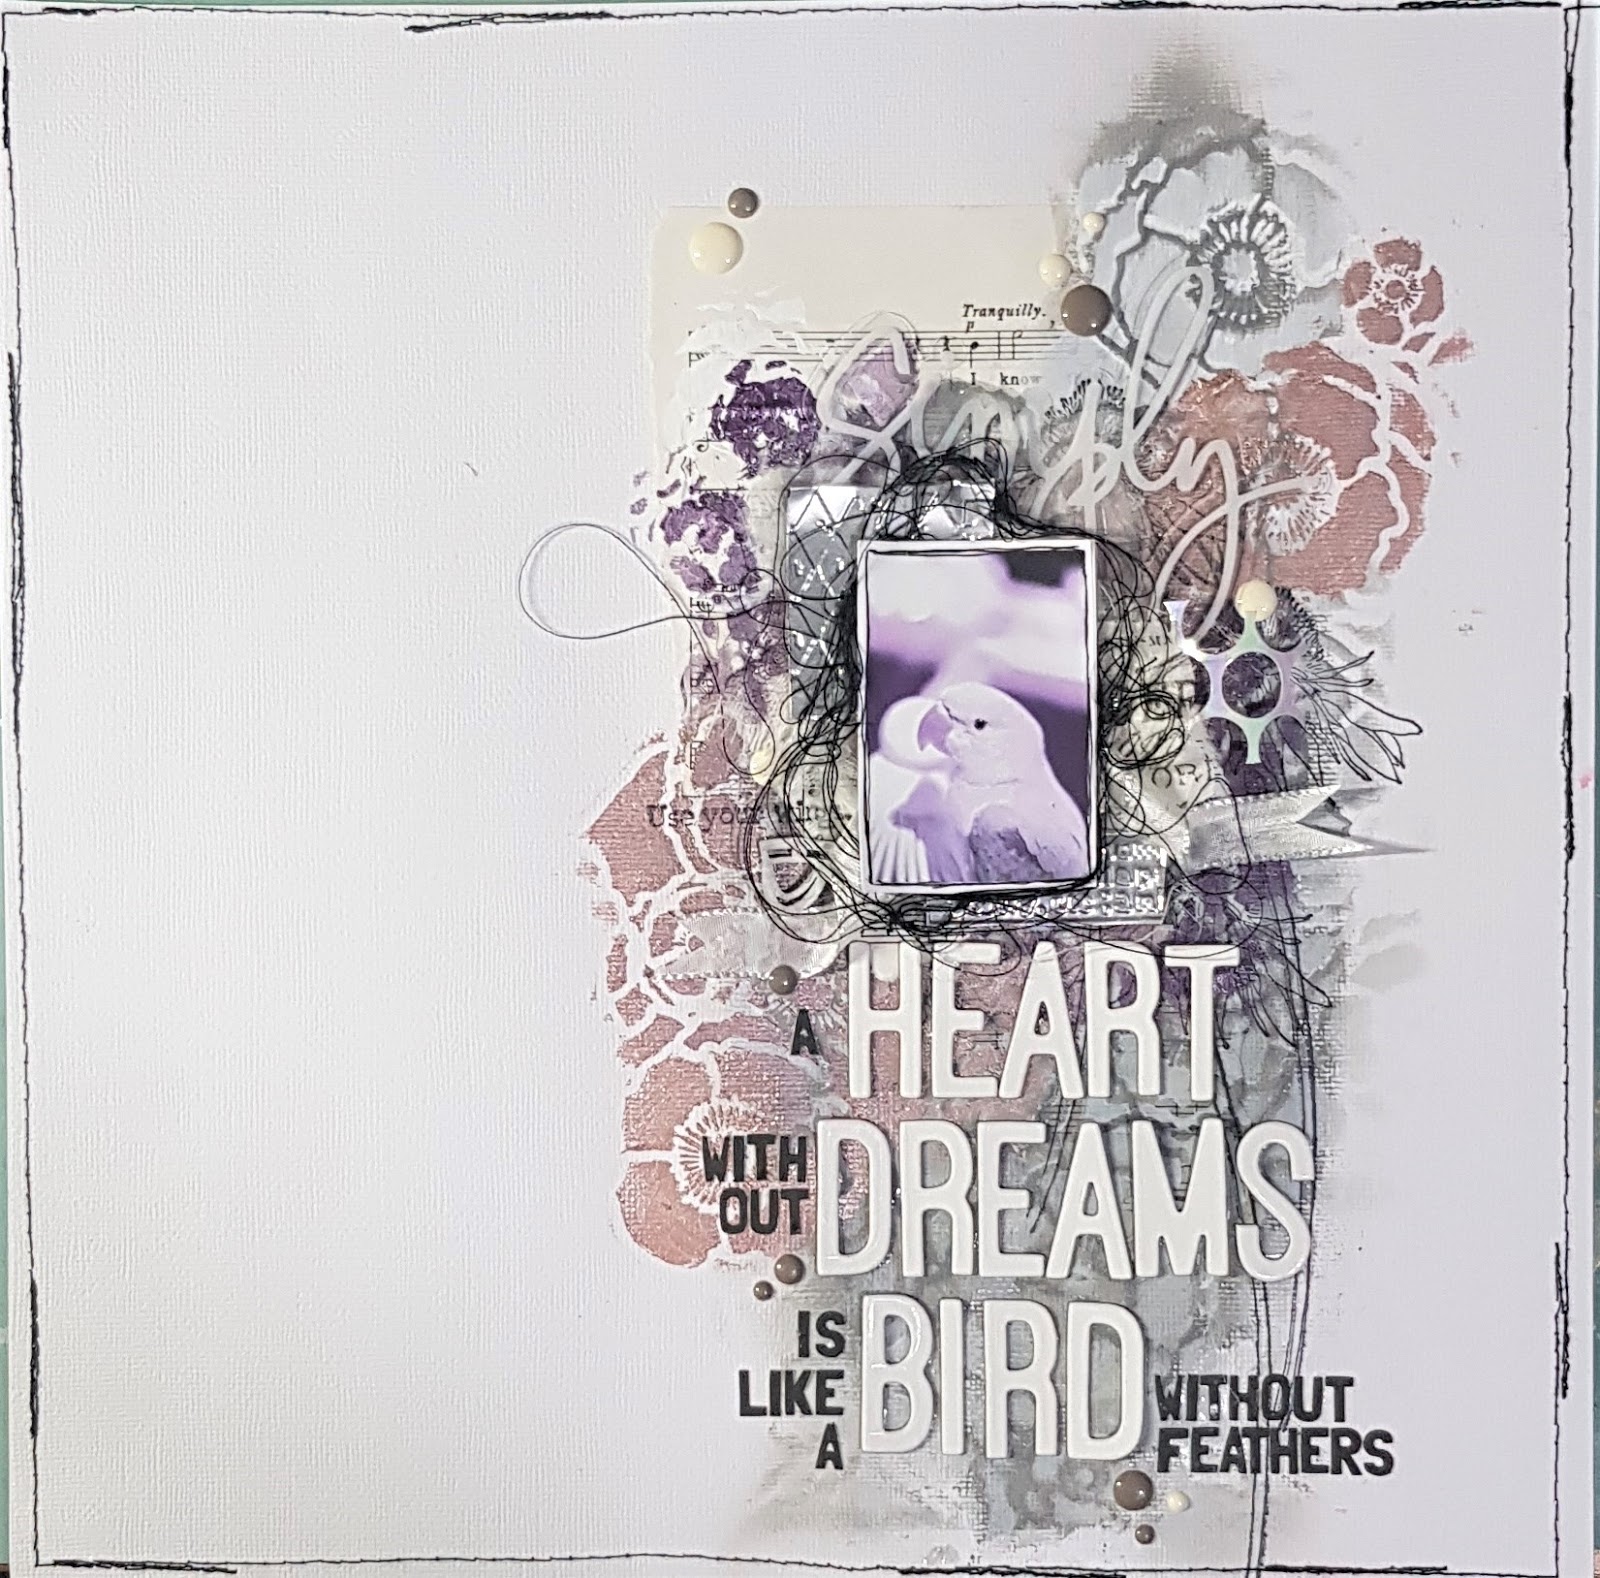
Last days to get your mojo a go go going & start creating with the moodboard for June... it is an amazing moodboard and we can't wait for you to add your little bit of awesomeness to our gallery. Today I am adding my last little bit of inspiration and last share of the moodboard for this month... I have taken some inspiration from the parrot in the pic, the dandelions and all the fabulous colours... I hope you enjoy my share.

I have glued a torn piece of music paper to my cardstock and added a few strokes of Dylusions Slate Grey over this. I have then popped  TCW distressed lace stencil over it and rubbed off the excess with a baby wipe. Then the stencil was popped back on and I added some white gesso.


Still using the stencil I have added extra layers of colour using Finnabair Art Alchemy Spark paints in shades of Iris potion & Butterfly spells. I have then added a little stamping using Stampers Anonymous stamps with Ranger Archival black ink.


I have layered my photo on an embossed tin cut out, some Tim Holtz tissue paper &Heidi Swapp Rayon ribbon, as well as some muslin, organza and some perforated paper in opalescent white.


A few little extras were Kinder Kreations chipboard painted with white gesso, black cotton, epoxy dots in grey and white, Basic Grey Font stickers and Heidi Swapp alphabet in white. 


 I hope this has sparked your creative spirit this weekend to sneak in a quick layout of love and upload to our Scrapping Clearly Inspire group page on Facebook.


Friday 28 June 2019

June Moodboard Inspired - With Emma

Hi SC friends,
Emma here with you all on this last Friday of the month. And today I'm sharing a layout that was again inspired by the monthly moodboard.

Those soft pinks, grey's and hits of purple really are stunning and can be interpreted any way.
This is how I felt it this time.....


I used some awesome products for this page.
 Firstly I Stamped a large Floral flower which is part of the Art by Marlene stamps, this one is named Floral Escape, onto a piece of white card stock. Then I started to add my colour. 
Using Art Alchemy in Romance pink and Distress Oxide in Victorian Velvet, I "water coloured" over the image and once dry cut it in half.


My background work also consists of the above mentioned colours plus a Lindy's Starburst spray in silver, just to add a few grey notes to the background.
Once these were dry i added a Stone effect paste through a stunning 6x6 TCW stencil, choosing the Distressed Lace pattern.


My stamping is one of the awesome Stamps from Studio Light this one being from the grunge collection.
So very very cool!

The tags are a combination of what i had in my stash and mixed with some i made myself with a sheet from Fancy Pants designs 6x6 paper pad Golden Days.

All these layered up behind my photo.


Beautiful 2Crafty chipboard tucked in my layers painted with that gorgeous Metalique Art Alchemy paint. I also chose to paint the glass dome with this paint to create an embellishment unique to this page.


Final touch is the Small Talk stickers by Tim Holtz. 

That's pretty much it for this page. 
I have been loving the creations that have come through so far.

Next month another stunning board for us all to play with will be revealed.
And I look forward to sharing more of it with you soon.

Happy creating friends and will see you all soon.
Em xx


Tuesday 25 June 2019

Tiny Dancer

Hi everyone,

Back again with another LO inspired by this month's mood board


I started with some old pink patterned paper.   I knew I was going to cover most of it up but I just wanted a subtle colour for the background.   I coated it with some Liquitex gesso  and when dry, mixed some modelling paste with some Dina Wakley paint in Elephant and used that through a flower stencil in my background.   I dry brushed on a bit more paint and rubbed it back with a babywipe, repeating the process until I was happy.   I added some Tattered Angels Glimmer Mist in granite and a little Prima Water colour pencils along with a Stabilo pencil adding water to move them around. 


I used some Cocoa Vanilla Life is Beautiful Alphabet Stickers for my title, some Enamel Accents and Liquid Pearls to form little dots and a scattering of Finnabair Art Ingredients Mica Flakes stuck on with gel medium.


I finished by matting my photo base using some old pattered paper and some embellishments from my stash.


Thanks for stopping by.   Hope you've been inspired.


Monday 24 June 2019

Weekend away in the country

Away for a weekend of creative bliss with like minded friends, surrounded by trees I was inspired.

I tried a few different styles and techniques in my art journals. That is what they are for, trying something outside your comfort zone.


This first tree, I was trying to do something textural with a palette knife, texture paste and acrylic paints. This was made on the canvas paper in the Dina Wakley mixed media journal.

I mixed each tone of acrylic paint I wanted to use into the light and fluffy paste and applied with the palette knife to get height and texture. I let the colours dry in between adding another.


I didn't know how I would go with this as it was soft and delicate, two things I am not. LOL.
I found a picture in a magazine at the house we were staying in and was inspired to try and replicate it.

I have used the Dina Wakley 6x6 white journal for this as it needed good quality water colour paper.
I used scribble sticks to achieve this look.


I have used the mixed media journal again for this one. The water colour paper. I used a KinderKreations stencil for the tree trunk.
Umber acrylic paint and a sponge through this stencil.
I then broke out some water colour paints.
I spritzed the paints and also spritzed the page and just kept adding pigment and water until I was happy with it.

Hope you enjoyed my tree frenzy this week.
Happy crafting everyone.

Saturday 22 June 2019

Little Creations

Little Creations can be fun. I had a nice conversation the other day with fellow creator Leanne Jago - her art is absolutely organic and evokes so much feeling. After looking at a few of her recent pieces my mojo was ignited to create my own little piece of art ready for the start of a new journey to create myself a  journal. I am sharing with you today my first page .... moodboard inspired of course 😉


I  have prepped four pieces of calico in readiness using Liquitex modelling paste. I have coated both sides, drying with my heat tool. They were torn so the edges are nice and raw and they measure approximately 5 inches square.


I have added the first coat of colour using Dylusions Rose Quartz paint.
Square 1 - I have used a brayer & the paint as a solid background.
Square 2 - A paintbrush & Tim Holtz mini layered stencil 
Square 3 - A paintbrush & Tim Holtz mini layered stencil #7 
Square 4 - A paintbrush & Tim Holtz mini layered stencil #27 


  I found this amazing face on a sheet of  Paper Arts Whimsical 3 .... I have fussy-cut it out and will be using it on Square 2 with a few other layers.


Time to create layers -I added some white gesso to the pink as this is where I will be adding my words later. I then sewed a black border around the edge before adding some Dina Wakley Media Collage paper, Tim Holtz tissue paper, an offcut of calico that was painted using Dylusions Slate Grey. Each layer I have adhered with a little more black stiching. finally I have used a little fine Tulle.


 I then added a little stamping using Lavinia's Stamp - Fairy Barnacle . I also stamped it on a small tag and layered atop of some more Tim Holtz tissue paper. 


 I have aged the edges with a mixture of these three beauties - Tim Holtz Distress spray stain in Antique Linen and Tea Dye and Adirondack Colour Wash in Espresso. I applied them using my fingers - because that is how Leanne has shown me to do this step - she is a clever chic & knows that this is the best way to get it in just the right place.😘


I have added some quirky words I found on some sheet music - I think they fit perfectly especially with the look that the girl is giving. 


The finished page... Cocoa Parties


 Thanks for popping in and checking out my new creation... I hope you have a beautiful day full of creative goodness... till next time ... take care & get messy xx

 
tracey

Thursday 20 June 2019

Floral Art Journalling - With Karyn Schultz!

Hi Scrapping Clearly Lovelies!!

It's Karyn here, and today I have an art journal page to share with you made using lots of goodies available in the Scrapping Clearly Store.


I'm also playing along with the June Moodboard Challenge. We would love for you to join the challenge and be in the running to win a Scrapping Clearly voucher - you have until June 30 and you enter by uploading your photo to the album in the facebook group here.


I stamped some Art by Marlene flower stamps onto watercolour paper using black archival ink. I stamped lots of images in preparation for this and other projects. I then added colour to one of the large flowers using some of the new DMW paint colours (carnation, heather, mineral). To add more depth of colour to the flower I added some colour pencil shading, then I added black and white highlights with markers. 


In my Small Dylusions journal I added some background colour using the new DMW paint colours (carnation, heather, mineral) - I applied, slightly watered down, with a paint brush.

I added some background stamping ( Carabelle Studio 'Scribbles in my journal' ).Then I added some stencilling using Fabel-Castell whipped spackle
 

I finished the page with the Art by Marlene coloured image and some leaves (also from the same stamp set).  


I added some word stickers from the Art-by-Marlene sticker book and some splatters of watercolour paint from the Art-by-Marlene paint set


I drew around the edge of the page with a Fude Ball pen.
 

Thanks so much for stopping by 

Crafty Hugs xx