Showing posts with label Lindys. Show all posts

Tuesday, 5 March 2019

Own your dreams - with Emma.

It's Tuesday which means it's my share today.
And I have drawn inspiration from the SC mood board for the month of March.
Have you seen it yet?
Check it out here...….


And here is how I interpreted it...…


I really focused on the colour from the board for this one.
I used a mix of ingredients including Dylusions Ink Spray in Crushed grape, a Lindy's shimmer in Silent night Silver, Ranger Enamel Accent in Caribean coast.
I also flicked a little Distress Oxide around and I chose Hickory Smoke.


I used the purple and turquoise shades to really enhance the Fairy Orb stamp. Love this stamp!!


The Metals I painted with a black gesso and then rubbed some Art Alchemy Wax over the top to add some depth and sheen.


Behind my image I layered one of the Heidi Swapp Decorative tag that I added colour to, which you can see me do in my video that I have created. Plus I cut a tag out of a sheet from Heidi swapp die cut paper.


Lastly a couple of Tim Holtz Small talk quotes and a few art pebbles thrown around for good measure.

I will be back next week with another interpretation of the mood board for you all.

I cant wait to see how you play with the board.
I would love you to check out my video here....


Till next week, Em xx

Tuesday, 5 February 2019

Mr Fantastic - with Emma.

Hello SC friends.
Emma here with you today to share a masculine and fun layout.
I found this image on Pinterest and loved the cheekiness of it straight away, and just knew how I was going to use it.


I started by using a plain white cardstock and then opted to use a sheet of Ella & Viv graffiti  (I chose The Blues) and cut it into tags, using a variety of the colours on the sheet to poke through.

Before I started building my page I grabbed Jo Sonja texture paste in black and a Tim Holtz stencil -Ruled- and created my background texture.
I love how thick this paste is.


I then wanted just a little colour flicked around my page so I used 2 colours, 1 Lindy's Moon shadow in Buccaneer Bay Blue and the other a watered down Art Anthology in Baby blue Eyes.
Being careful to only flick a little.


I painted then chipboard with Art Alchemy Acrylic in Light Patina and then rubbed Metallique Wax over the top once dry. Love this slight grunge feel it gave to the chippy.

Then I started the layering with the tags I had created some thread and chippy. Foam tapping as I went.


Because of the cheekiness of the photo I chose a couple of quotes from the Small Talk range by Tim Holtz. Very useful and playful stickers. 


Lastly my title is from Cocoa Vanilla Boys Rule die cut pack.

And that's it for me today.
Thanks for visiting me today and I'll be back next week to share some moodboard inspo.

Till then, Em xx


Tuesday, 15 January 2019

Live your Life - with Emma

Welcome to Tuesday everyone!! 
Today I’m sharing a layout with you that is loosely based on the mood board for this month. 
The image I found for this page I feel is almost a portrait of me, With our cat Augustus. 
And I’ve used plenty of ScrappingClearly products. 


I started with applying clear Gesso over the base sheet and then once dry started to apply my stamps.
I started with a Lavinia stamp and used the small stones along the base of where I was going to apply the flowers.
Then wanting to use paper flowers and fabric flowers I stamped on smooth white card some flowers off the Jane Davenport building a Bouquet stamp set. I then painted them with a couple of Distress Oxides. I Chose to use Tattered Rose and Antique linen, to match the mood board a little.


Then I added with a paint brush some Lindy's sprays to drip down the page. I chose Moon Shadow Bucket o Blood and Magnolia Magenta.

Once dry I started to layer my Inkadinkado cling stamps, I used the fossil leaves.


I used a little of Art alchemy wax in Rose Gold on my finger and rubbed over the texture paste I had put down earlier.

Once all the flowers and image were adhered down I added some glass pebbles and Tim Holtz small talk stickers to relate to me and life. finally I flicked a little Liquidex Titanium White over the page.


That's all from me today. I hope you enjoyed this page I created for you.
I hope you get a chance to play along too.
I'll catch you all next week.
Em xx


Saturday, 29 December 2018

Life's a Wild Ride - with Emma

Hi SC friends.

Emma here with you today to share a very easy quick layout.


Once I had chosen my base sheet, I applied a coat of clear gesso so the inks I used later would run nicely. And then through a hexagon stencil rubbed a Distress Oxide in Victoria Velvet just under where I was going to focus my design.

Then with a couple of Lindy's Moon shadow mists, I chose Buccaneer Bay Blue and Bucket O Blood Red I flicked them over the page.


I added a little script stamp and as a real feature used Jane Davenport clear stamps Build a Bouquet, love these flowers so much. And they have such a cool impact that was all the stamping I needed.


This page really showcases one of Heidi Swapps fun ephamera pack.

Building with a couple of the tags and acetate pieces this page just came together easy.

  
Finally I added a few sentiments from Tim Holtz Small Talk stickers.


It was fun to create something quick and easy.

I hope you get some creative time over the holidays and I look forward to seeing you all in the new year.

Till then, Em xx


Tuesday, 4 December 2018

Brothers - layout with Emma.

Hi everyone.
Emma here on the SC blog with my first creation for December.
I chose to scrap an actual photo this time....I know right...shock horror, LOL!
And I chose my boys.


I started by using the B side of a sheet from the Cocoa Vanilla Boys Rule collection.
I then started to create tags for behind my picture by using a sheet of the very cool Ella & Viv Graffiti range. I chose 'word'. I love these papers so much, but as a background paper, it can be a little busy, so to use as tags or layers, it's just perfect.


In amongst my tags I used a little bit of a sheet from Heidi Swapp's die cut pieces. These are 6x6 sheets that have a range of cuts, I picked the grid one and cut random strips for the texture to come through.


The Cocoa Vanilla Ephermera bits also got a little work out on this layout, using the stars mostly and the 'brothers' title. 


The colours on my background sheet, (before I added my layers) are a combination of Dylusions Ink Spray in Vanilla Custard and a Distress Oxide in Mustard seed.
I then also flicked a little bit of Lindy's Moon Shadow Mist around.


That's it from me for today.
I'll be back again soon to share something sparkly to go with this months moodboard, which I highly encourage you to check out and play along with.

Until we meet again, Em xx


Thursday, 25 January 2018

2018 Goals - A Scrapbook Page by Karyn Schultz!

Hi Scrapping Clearly Lovelies!!! 

It's Karyn here,
and today I have another scrapbook page to share with you
made using the Pink Fresh Studio "Escape the ordinary" collection
available in the Scrapping Clearly Store.


I started with a sheet of white cardstock and I added some Lindy's Moon Shadow Mist "Tawny Turquoise"
first using a 'painting with plastic' technique then I added some splatters. 


Once this was dry I added a white paper doily under my photo and layered it
with a strip of Transform paper from the "Escape the ordinary" collection
along with 2 cards cut from the Search paper.


Across the page, I added other elements cut from the Search paper
as well as stitched hearts and some sequins.


with BoBunny gold glitter paste and also added them to my page.


I created my title using gold wood veneers. I added strips cut from the Search and Wander papers
along the bottom, then I journalled around the edge of the page with my goals for 2018! 


The Lindy's Moon Shadow Mist "Tawny Turquoise" is a really interesting colour
- it appears as a vintage brown colour but has a lovely turquoise shimmer when it dries
- it is hard to photograph but is gorgeous in real life :) 


Thanks so much for stopping by 
Crafty Hugs xx

Saturday, 17 June 2017

Mixed Media Canvas by Tania

Hi again! Today I'm sharing a small, mixed media canvas, using lots of goodies from the Scrappingclearly store!!!

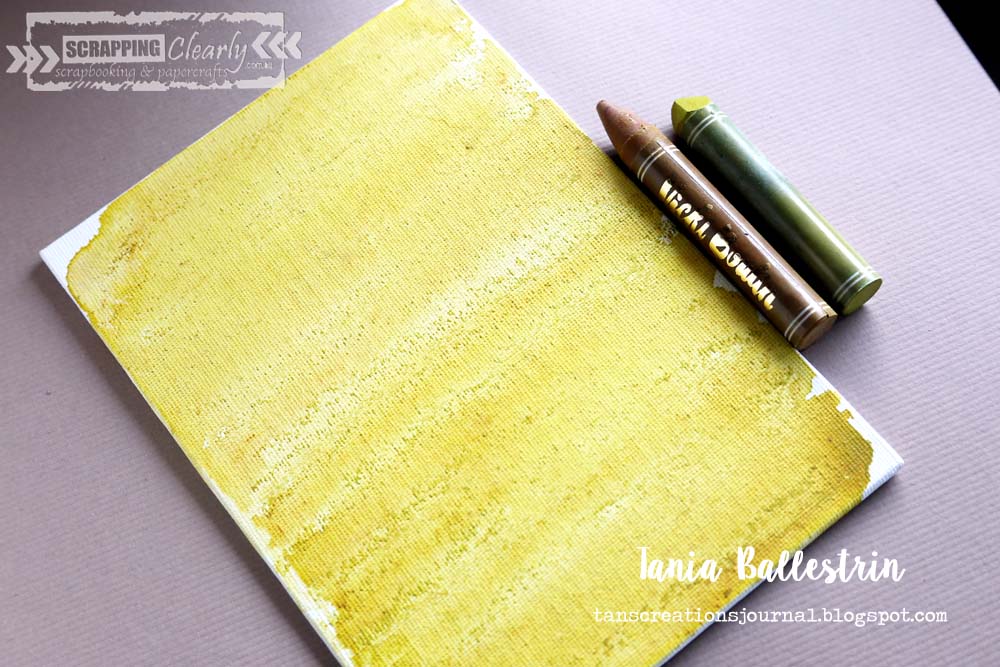
I started with a blank canvas, gave it a layer of Gesso and added my background layer of colour with the Vicki Boutin Art Crayons, I am so loving at the moment!! By simply colouring directly to the canvas, I alternated with two different colours, then went over the top of them with a generous amount of water and a brush. The colour was rich , just as I wanted.


When this was dry, I added some black crayon to a stamp and spritzed with water, and did some random stamping. the image doesn't come out crisp when you use this technique, however, as it's mixed media, I didn't mind.


I added a few more layers of very faint stamping before stencilling with a TCW stencil and some more colour from a few of the crayons, then went over the top with some BLING, Colourblast paste and a fab Dina Wakley stencil. The stamp set I used in this project is the Finnabair Dream On set.


Mixed Media is really all about layers, and I felt that I was only just beginning to get the look I was after. I have some Liquitex Glass Beads and blended them with some of the Pebble Rock from Michelle Grant. (Just painted the Glass Beads on really thick and then sprinkled the pebble rock on top.) Once that was dry, I gave a coat of white Gesso over the top, and then painted with some Lindys Color Shots, (which are a powder you mix with water or any wet mediums to colour.)


By now I was looking for some more texture and height for my canvas, so I found a piece of black elastic, (recycled from clothing tags), and a piece of corrugated cardboard as anchors for my embellishments. I coloured the cardboard with the Art Crayon, before attatching to the canvas on top of the elastic.


I embellished with some pretty, Prima and Cocoa Vanilla flowers flowers! Stamped butterflies and title from the Finnabair pack and some Heidi Swapp Lace, which I coloured with the Art Crayons and water.. Above you can see I doubled up on the stamped butterfly images for extra depth! I finished it off by adding some Range enamel accents in black!


Below you can see the shine from the Bling Colourpaste!!!! It's awesome.


I really wasn't sure where this little canvas was going at the beginning of this creative sitting, but I'm pretty happy with the way it turned out, hope you enjoyed my process and make sure you have a look at the challenges this month. I will be back next time with my take on this month's mood board.


Thursday, 24 November 2016

Happy Memory - Mood Board Challenge

Good Morning Arty Peeps

Peg here today to share my mood board page.
There is still a week to get your entry in, post it here on FB.
Check below for the board.

I found an old pic of my baby girl recently, one she talks about fondly,
so it had to be scrapped. Here's that page...

I created a mixed media background on heavy weight cardstock using...
then Finnabair mica powder mixed with Tim Holtz crazing medium over the whole page.

I used a piece of patterned paper coloured with Dylusions ink spray and a strip of Hambly transparency under the photo and title. The transparency is secured to the left of my page with book binding tape. I love this paper clip from American Crafts too.

I used both pieces of Dusty Attic chipboard to create a border on the right, covering them with gesso first, then Dylusions paint and ink spray and finally, while still wet, Finnabair mica powder for texture and shine.

I managed to drop my black inkpad on my page by accident so to make it look deliberate I did it a few more times along the top and bottom edges.

Using some regular and mini bubble wrap I stamped around the edge of my layout with Dylusions paints. Under the photo is a Prima flower cut in two pieces and a Prima gem sprig. The chippy heart and 'happy' stickers are from this pack, and the wood veneer 'memory' I coloured black with an alcohol marker.  

We'd love you to play along too
with this mood board.
And post your project here.

Thanks for coming by today,
see you next time.
Stay arty,