Showing posts with label Pebbles. Show all posts

Wednesday, 23 October 2019

Epic Adventure Mini Album | Sue Plumb


Hi everyone! It's Sue Plumb back again to share my final guest designer project with you. Today I am sharing a special mini album I created to document an epic adventure I had with my sister - a surprise weekend away to celebrate her birthday that was organised by her partner (and a few sneaky scrappy gals you may recognise!)


There is so much to love packed into this album - not just the memories, but some beautiful products too. I have found myself using a lot more patterned papers lately, and falling in love with paper all over again.

So, let's get started on this album. I began with a pile of photos and a small 6 ring binder-style planner I had purchased at Kmart. I opened it up and removed everything from the inside, leaving me with the cover only. 


I started by making myself a "kit" of coordinating items to work from that included a variety of patterned papers; stickers; and die cut ephemera.


I chose a number of patterned papers from the Simple Stories 'Heart' and Heidi Swapp 'Emerson Lane' collections; with some odd sheets from Pink Paislee and Websters Pages added in. My main criteria when choosing the papers for my kit was colour choice - with both the A and B sides of each one needing to fit my chosen palette.


I started by cutting the sheets of paper into smaller "pages" - trimming each one into a variety of different sizes and shapes. I then used a few different decorative border punches to punch along some of the edges. 


Now it was time to sort the pages into some sort of order. I shuffled and stacked them, making sure that the sizes were mixed up and that colours and patterns on facing pages were complimentary to one another. I then punched each page using a 6-hole punch (check out the gorgeous DCWV 6-hole gold punch in the store HERE); adding some hole reinforcer stickers as I placed them into the binder.


With all of my pages in place, it was time to start adding my photos. (I do admit that the order of the pages did get shuffled a little as I began to work my way through the book.)


I treated each page just like a tiny scrapbook layout - I had a background, photo/s and now they just needed embellishments. I didn't want to use anything bulky because I wanted to make sure the pages would lay flat, so I chose a mix of stickers and die cuts to use.


To coordinate with the papers I had chosen, I used the Simple Stories 'Heart' Cardstock Stickers; and the Heidi Swapp 'Emerson Lane' Stickers and matching Ephemera


Throughout the album I added extra interest to some of the pages by adding "tip-ins" (extra interactive flaps) using tags / ephemera / pieces of paper, which I fastened with washi tape. (There is even a set of coordinating 'Emerson Lane' Washi Tapes!)


I left some of the pages in the album photo-free and kept them simply decorative. You can see how having a good variety of different page sizes, colours and patterns adds plenty of visual interest.


I did choose a couple of embellishments that were slightly dimensional to use in my album - the super cute Pebbles 'Spring Fling' Puffy Stickers - Flowers; and the 1 Canoe 2 'Globe Gallery' 3D Butterflies.


I made an effort to include handwritten journalling on as many of the pages as I could - using a variety of labels, journal tags and even paper offcuts to write on.


Another way to switch things up in the album is to add the photos sidewards - just as I did with the landscape shot, which allowed it to be printed larger.


Never be afraid to punch directly through a photo to turn it into a page itself; and when dealing with small pages, sometimes it is better to embellish over part of the photo.


When working on a small scale like this, especially with papers featuring bold patterns, it is better to keep to the "less is more" rule with embellishments.


Look at the papers you have and see what can be fussy cut from them to use as embellishments, such as flowers, labels, shapes and quotes.


Another way to add extra interactive elements to your album is to include small envelopes, such as the Heidi Swapp Memory Planner Envelopes I used,  which can be used to hold memorabilia, journalling or even extra photos (just like I did in my special "sealed section").


This is by no means all the pages from my album - there are just too many pages to share here (and some still to be completed). Once I have them all finished I will try and film an album flip through to share with you in the Scrapping Clearly Facebook group. 

Thanks so much to Kylie and the wonderful team for having me as a guest this month - I have so enjoyed sharing my projects with you.

Thursday, 30 November 2017

Stash busting Christmas cards!

Hello there Scrappers!
If you are anything like me, you have a rather large stash of older products,
collections that are mostly used but you still have bits and pieces left,
and you can't throw anything away - ever!
Because you never know when it will come in handy!

Well, I decided to make some Christmas cards with what I have on hand.
Preferably not Christmas ranges - there's nothing like challenge, right?!
First up, I saw my sheet of Pebbles – DIY Home Collection – Washi Tape Paper ...
this was perfect for a washi background!


THIS PAPER from the Pebbles DIY Home collection even featured a deer head that I cut out with a paper punch.

For my second card, I used some journal cards from My Mind’s Eye – On Trend 2 Collection – Journal Cards.
Using journal cards is one of my favourite things to do on cards - it makes creating easy!


I added some Heidi Shine on the background for some shimmer
and diecut the deer out of glitter cardstock.
Do you make Christmas cards?
Do you use non-Christmas ranges?
I'd love to see some!
Come over and share your creations in our Facebook Group.

Til next time,
Happy creating :)


Tuesday, 24 October 2017

You had us at WOOF - by Chloe

Hello there!  Has anyone had some time to create with the challenges we have this month?

I just loved the sketch and got started on it right away!


I loved the idea of a busy patterned background so I incorporated that in my page...


I've used papers from the gorgeous Pebbles DIY Home collection ... the wood grain effect being perfect for my photos :)


I added some Gelatos to the background for a hint of colour ... I'm not great at big messy mixed media backgrounds!


I mixed and matched ranges too - using some Cocoa Vanilla Studio You Rock embellies for a masculine feel. 
They matched perfectly!

Other products used:

Monday, 4 September 2017

WK8 2017 with Melinda

Hey, hey my scrappy friends!! It's Melinda here with you today and I am back again today with my latest share! 

Once again I am using the very fun and Spring-y collection "Spring Fling" by Pebbles. I love the fun colours and patterns on that neutral kraft base in this collection and found week 8 missing all the cards and journalling in our album so figured this would be a fun collection to complete this week in our album!


Here is the left hand side of the spread


I have used some of the neutral kraft papers as my base cards (Celebration, Party Time, Patchwork and Spring Fling) and also some of the adorable 3x4 cut apart cards from the Cut Out's sheet.

I don't know how well you know your PL page protectors but for the right hand side of this week I have used a panoramic protector to include a few extra photo's and stories. Here is a look at the whole opened right hand side of the week.


And this is the the front of the folding part of the protector


For embellishing I have kept it pretty simple using a few pieces from the ephemera pack, cutting up some of the pieces from the Me To You patterned paper and the gorgeous floral puffy stickers - which by the way - I have used the WHOLE sheet!! Yep, it's done! Who else gets that little kick from using the last of a sticker sheet?!


For my title card and a couple of sub-titles on cards I have used these leather looking alphas by WRMK.

Due to the business and high contrast of the white against the kraft I decided that using my typewriter was the best bet for my journalling so grabbed some off cuts of some vanilla coloured cardstock, typed them up my words and trimmed into journalling strips. Easy, done and I love the flow it creates from card to card and page to page!


My motto for this year's PL is very much "get it done" rather than "make it perfect" and I am really loving how some of these pages are coming together!

I have no idea what I'll be creating for my next ScrappingClearly project but until then, happy scrapping!!


Melinda
xx

Thursday, 31 August 2017

Beautiful with Melinda

Hey again scrappy friends! I know it was only yesterday I shared but I am here with you again today to share my take on the August moodboard challenge!

If you have yet to see it here is a quick refresher!


And you do still have some time up your sleeves if you've been meaning to and simply haven't gotten to it yet!! Load up your entry here in the FB group!

Here is my take on the challenge and it is quiet simple for me but I really love the finished page! I have used the very spring like "Spring Fling" collection by Pebbles and can't wait to pull this out again and get creating again!


This is another page where I am scrapping a Honeymoon photo. We headed to Malaysia for our Honeymoon 10 years ago and spent some time in Langkawi and also KL. As tourists, of course, we had to visit the tourist places and one of our stops was the KL Butterfly Park and I did this page as a kind of "title" page for this part of our album.

I started with this paper for my background and love the neutral base colour it gives as a background!


I have used the gorgeous puffy stickers and some of the ephemera pieces from the Spring Fling collection by Pebbles for my simple clusters along with a label from my stash which I cut in half.


This gorgeous title piece is gold glitter by Heidi Swapp and the glitter doesn't come off - winning!!
The other alpha is from my stash.


Like I said, a pretty simple layout but I love it!

I hope I have given you some last minute inspiration to join in on the challenges for August and I'll see you again next month!

Happy scrapping!

Melinda

Saturday, 17 June 2017

Mixed Media Canvas by Tania

Hi again! Today I'm sharing a small, mixed media canvas, using lots of goodies from the Scrappingclearly store!!!

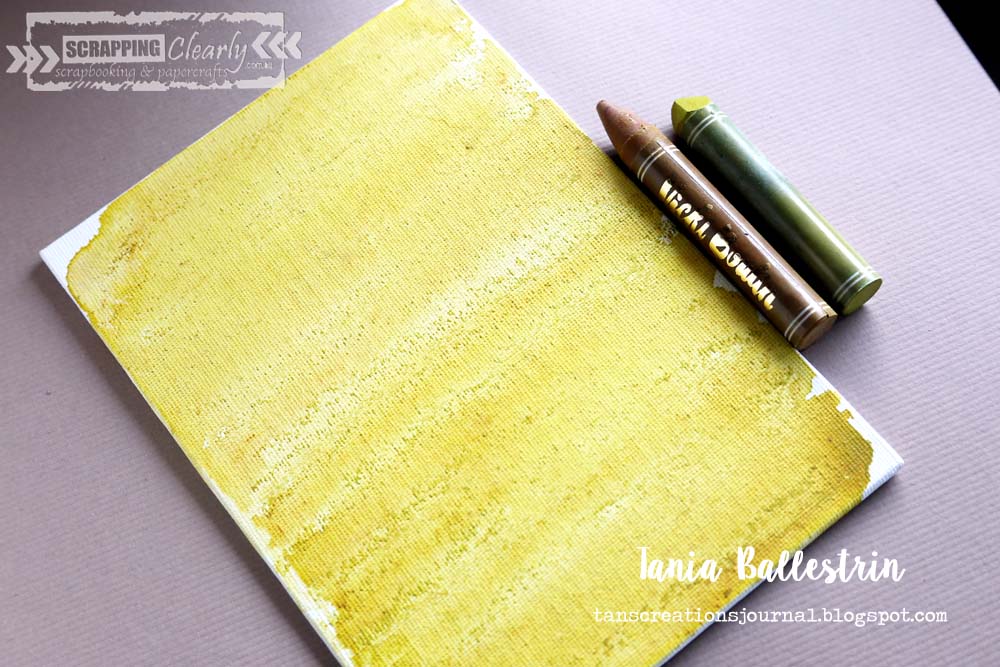
I started with a blank canvas, gave it a layer of Gesso and added my background layer of colour with the Vicki Boutin Art Crayons, I am so loving at the moment!! By simply colouring directly to the canvas, I alternated with two different colours, then went over the top of them with a generous amount of water and a brush. The colour was rich , just as I wanted.


When this was dry, I added some black crayon to a stamp and spritzed with water, and did some random stamping. the image doesn't come out crisp when you use this technique, however, as it's mixed media, I didn't mind.


I added a few more layers of very faint stamping before stencilling with a TCW stencil and some more colour from a few of the crayons, then went over the top with some BLING, Colourblast paste and a fab Dina Wakley stencil. The stamp set I used in this project is the Finnabair Dream On set.


Mixed Media is really all about layers, and I felt that I was only just beginning to get the look I was after. I have some Liquitex Glass Beads and blended them with some of the Pebble Rock from Michelle Grant. (Just painted the Glass Beads on really thick and then sprinkled the pebble rock on top.) Once that was dry, I gave a coat of white Gesso over the top, and then painted with some Lindys Color Shots, (which are a powder you mix with water or any wet mediums to colour.)


By now I was looking for some more texture and height for my canvas, so I found a piece of black elastic, (recycled from clothing tags), and a piece of corrugated cardboard as anchors for my embellishments. I coloured the cardboard with the Art Crayon, before attatching to the canvas on top of the elastic.


I embellished with some pretty, Prima and Cocoa Vanilla flowers flowers! Stamped butterflies and title from the Finnabair pack and some Heidi Swapp Lace, which I coloured with the Art Crayons and water.. Above you can see I doubled up on the stamped butterfly images for extra depth! I finished it off by adding some Range enamel accents in black!


Below you can see the shine from the Bling Colourpaste!!!! It's awesome.


I really wasn't sure where this little canvas was going at the beginning of this creative sitting, but I'm pretty happy with the way it turned out, hope you enjoyed my process and make sure you have a look at the challenges this month. I will be back next time with my take on this month's mood board.