Showing posts with label washi. Show all posts

Tuesday, 29 March 2022

Get away by Tracey B

 Hi everyone,

I'm sorry I've been MIA for a couple of weeks but I've been without Internet (Thanks Telstra).   

I thought I didn't spend a lot of time online until it wasn't an option - then I really missed it!

This next layout is about how to rescue a page when something doesn't go exactly to plan.


I started with a page of Pink Paislee Citrus Bliss patterned paper, a TCW stencil, some impasto and some very cheap washi tape.


As you can tell my stencil was just a little dirty.   I did know this but thought it was permanent - not so - I finished up with a yellow tinge in my impasto.   OK I thought, I can live with that.

Then my washi tape tore the paper when I was lifting it.


OK - can't live with that but rather than throw it away, I used more washi to solved the problem and created a frame.   Plenty of lovely washi in the shop.


I didn't take progress photos but I sprinkled on some Lindy's Magical Shaker (Afternoon Denim Delight) and gave it a spritz with water.

I then scraped through some Light and Fluffy through a rose stencil.   Because the Magicals was still a little wet, the Light and Fluffy was tinged blue - I'm OK with that.

I used a Kaisercraft Floral Circle Frame and die cut some scrap papers and used a Posca pen to colour a Heidi Swapp wood veneer word for my title.


I layered by photo with some Heidi Swapp Pineapple Crush patterned paper (Sun Chaser) and a Heidi Swapp jumbo tag.

here's the finished layout.


Other products I used include

Distress Ink (Pumis stone)

Grid stamp

Kaisercraft die cut elements

Chipboard buttons

Twine

Heidi Swapp Art Walk stickers

Heidi Swapp Favorite Things Puffy stickers 

Heart paper clip

Rub ons


Happy Crafting
cheers
Tracey


Saturday, 3 August 2019

August journal entry

I tend to neglect my journal. When I do have a play in it I like to add quotes, meaningful ones. After all this is a book I am creating for me. This months Moodboard prompt with its hints of peach, pink and grey was perfect for what evolved on my page. The beginning of this page was quite different to what I had envisaged... but I am glad that the different layers of paint have made it find its own identity. So here is the Moodboard prompt - I can see a lot of different takes on this amazing prompt over the coming weeks.


I started by painting the page with Dylusions Slate Grey and then used Dylusions Rose Quartz through a Donna Downey stencil. I then used my Fude Ball pen to accentuate the pink shapes. I then added a few smears of Dylusions Vanilla Custard paint on the page.


Then I got stuck - walked away for a couple of days & then dug out a few stamps and randomly stamped on the page - it looked bad... but hey that is okay because I have Gesso 😍. The stamps I used were : Carabelle Edges in my journal, Stampers Anonymous - Tim Holtz, The gesso was painted all over the page and then I popped the Donna Downey stencil over it and rubbed off portions with a wet paper towel. Once dried I used a Fude ball black pen to highlight a few of the hexagons.


Next was to add  a few paper layers to help define the feature picture. I used a couple of Project Life cards, Dina Wakley Media Collage paper, Washi tape, cotton, and an offcut from last weeks layout - Escape the ordinary collection.


Next I added the feature picture. It is a sticker by Paula Macmillan Perich. I adhered it to some card and then glued it atop of the layers.


For the title I unearthed my old Making Memories Rub- Ons. They are so old and very unavailable... vintage nearly... they worked beautifully with my page. A couple of the letters did not totally adhere so I used a Fude Ball pen to tidy them up. It is amazing how some of our older Scrapping supplies work so well with all the new - they really do meld together well.


I added some Faber Castell Texture Luxe in silver through a stencil. Then a little more stamping on the outer edges of the page and a doodled border using a Fude Ball. For a little more colour I also added Art Alchemy Acrylic paint Sparks - Ginger Magic


I hope you have enjoyed my take on this months Moodboard and it has inspired you to use some of your older scrapping supplies with the newer items therefore making room for more newer items.


Until next time ... create a little something amazing for you. xx

tracey

Tuesday, 6 November 2018

November Moodboard Inspiration with Leonie


Hello! 
I hope by now you have seen our November Moodboard.
If not take a peek below. 
Today I have two Art Journal spreads based on this moodboard.
All entries can be added to the album in our Facebook group


My first share is an Art Journal spread in a Travellers Notebook.
To begin with I used Dylusions Paints and various stencils on the base. 
The paint brush stencil is from Kinder Kreations.  I used Liquitex Super Heavy Gesso with the KK stencil. 
I then pulled out some ephemera and added the woman and butterfly image along with an old stamp. 
Liquitex Matte Gel Medium was used to adhere the ephemera. 
Lastly I outlined the paintbrushes with a black Fude Ball pen and added a typewritten quote and some doodling. 


I was on a bit of a roll by this stage so I put together another little spread.
This one using Crafters Workshop and Flutterbys stencils.
I also used Dina Wakley Collage papers, Washi tape and Acrylic Paints.


Hope you've been inspired. 

Thanks for stopping by today, 
we hope you can join in on our November Moodboard.
Happy Crafting 
Leonie Neal-Dawson


Monday, 2 July 2018

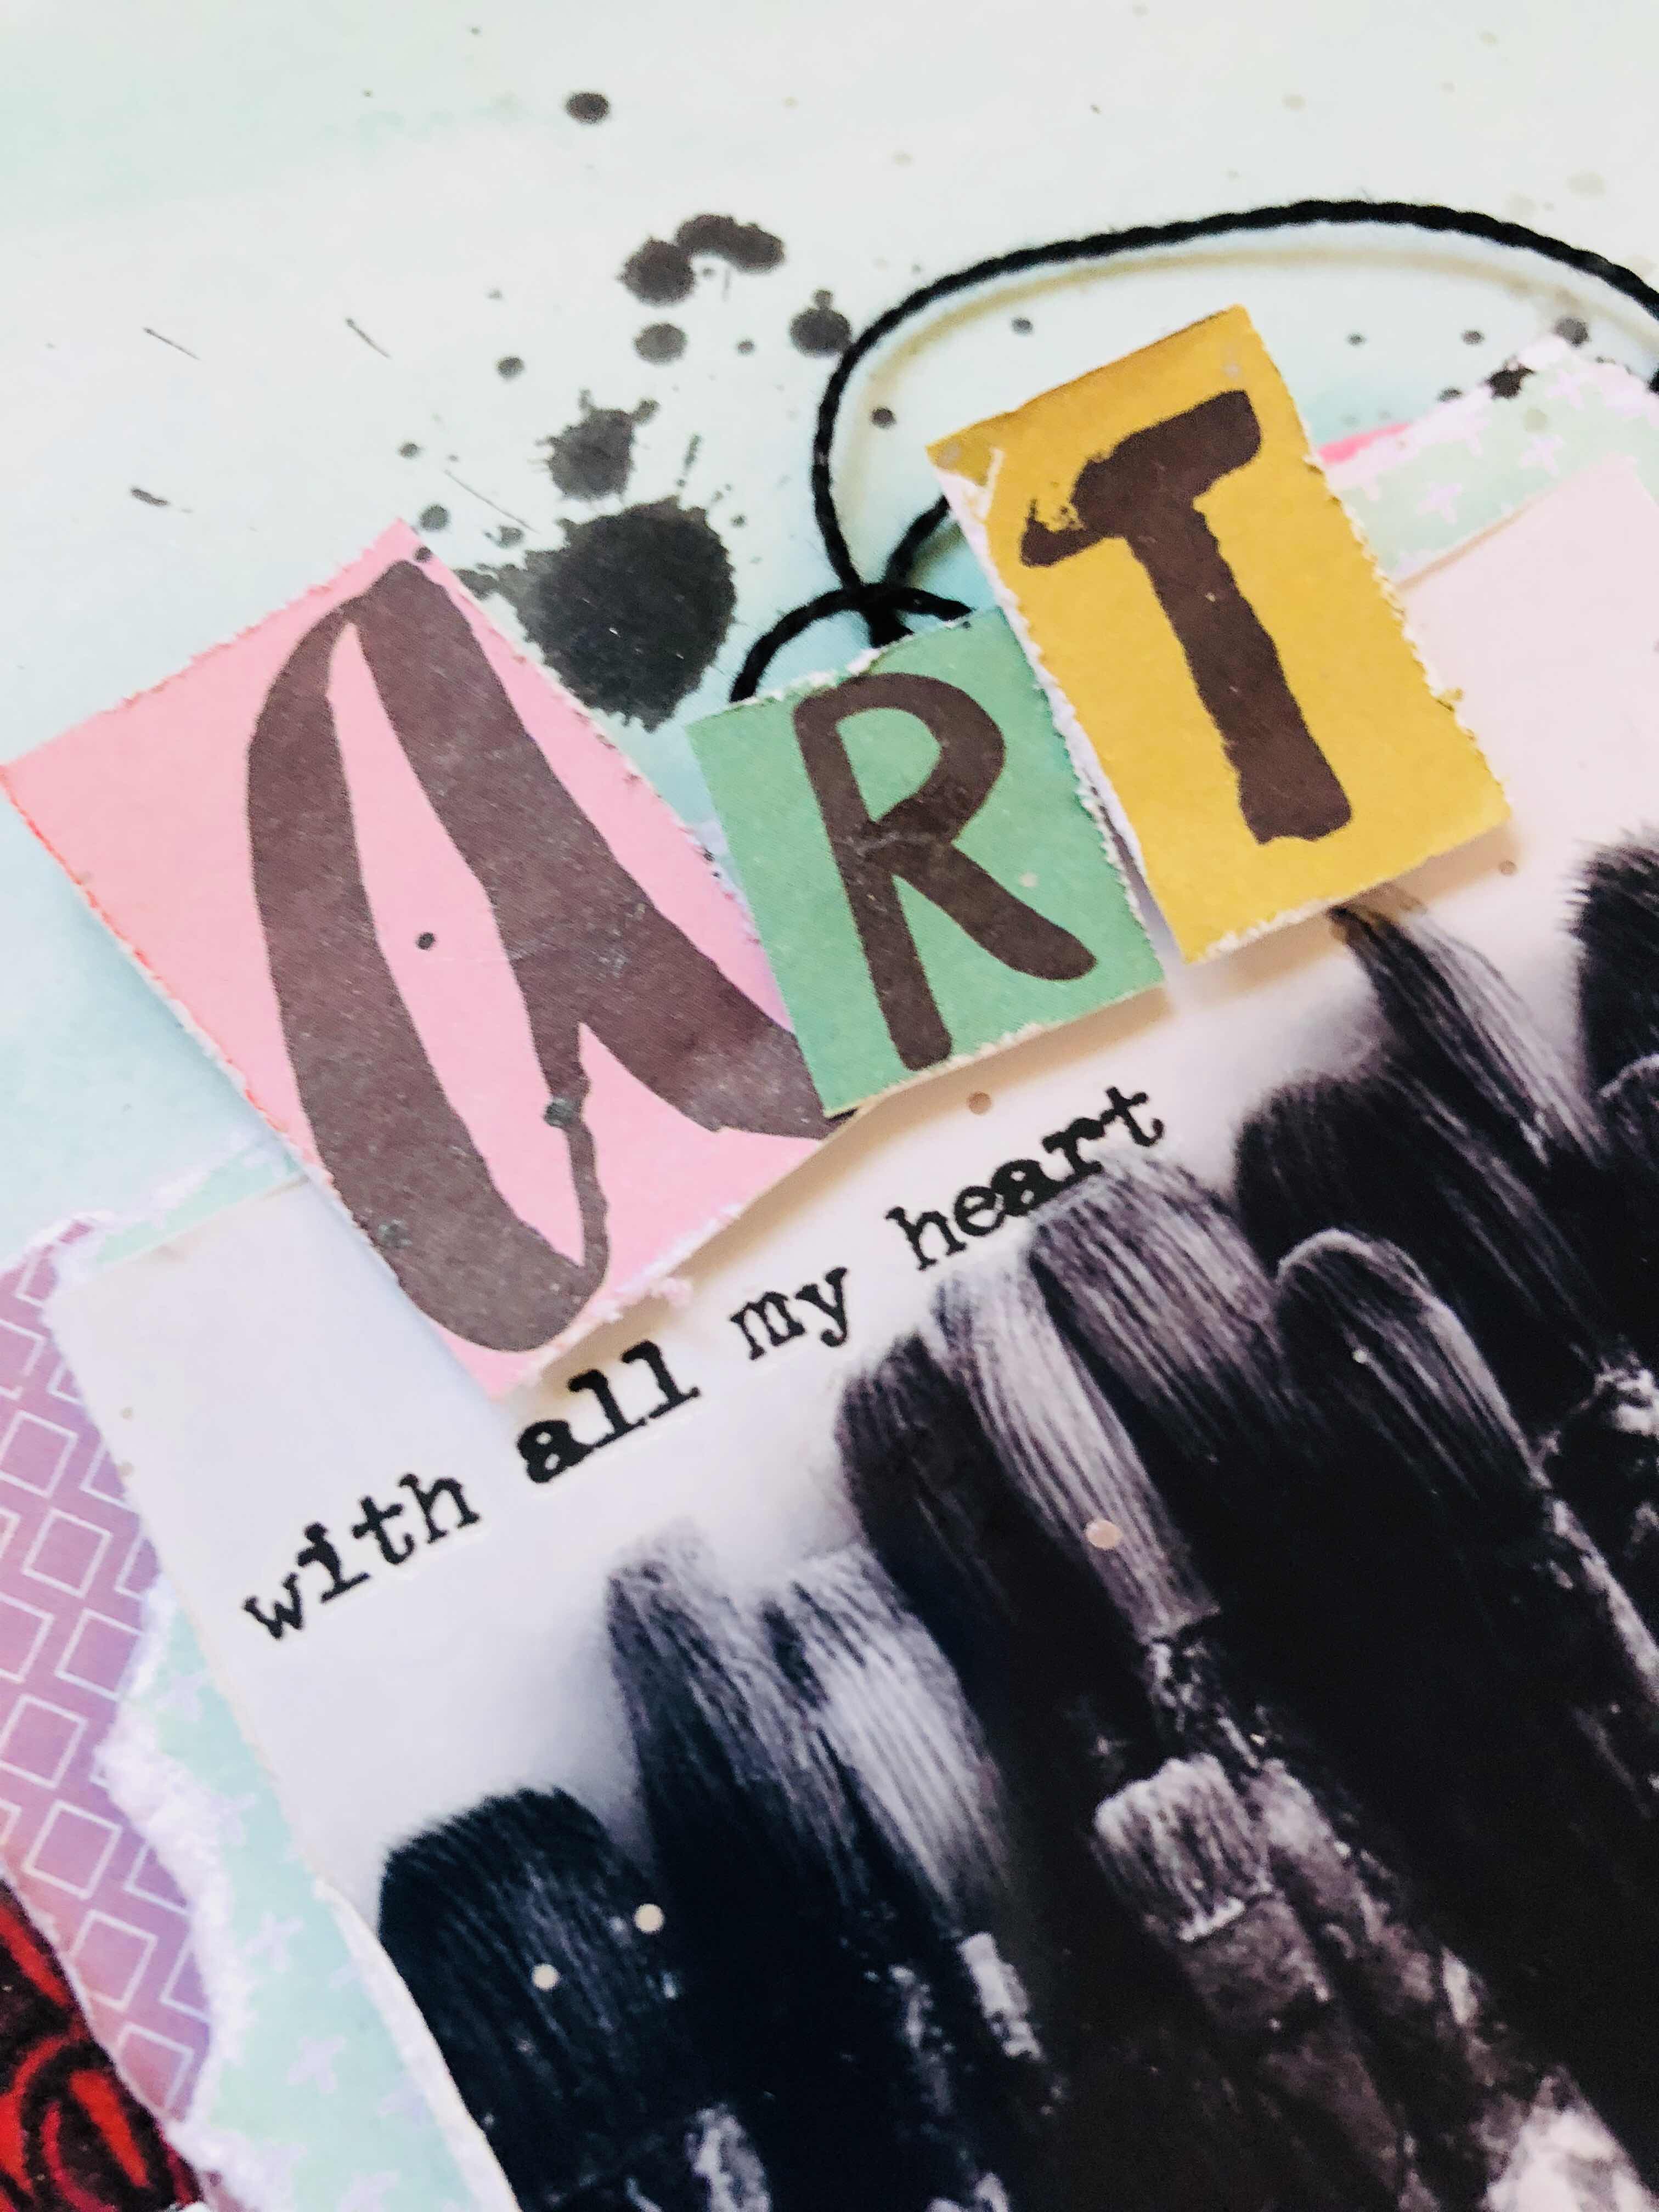
Art with all my heart - by Emma

Well hello there SC peeps, 
Emma here today to share with you a very easy, quick layout. 
It is roughly based on the colour scheme of this months moodboard. And I guess to some degree I was loosely inspired by the ‘stripes’ on the page also 😜 
I’ll show you what I mean.......


As you can see the colours are there and then the stripes are the washi tape I used. 
I started the whole thing by choosing a sheet from Heidi Swapps Pineapple Crush range in Breezy
So to get started with colour I used some Dylusions Rose quartz paint first as my base ingredient. 
Then once dry I tore strips off 3 of the tapes you can find in the Dylusions washi tape pack. These totally rock!! 


Then came a little bit of stamping around the area already created. 
This page I chose to use only a couple of ripped pieces of paper from pink paislee memorandum pad up behind my photo. 
And then to use as my ‘embellishments’ I used a sheet out of that same pack but cut out all the imaging and letters. These also became layers in my washi tape and as my title. 


I also added some random pattern by using liquid paper pen to doodle (inspired by the ever awesome Lisa Oxley)
And a few of the Tim Holtz rub ons in amongst the washi and as part of my title. 


I didn’t care if when I flicked the Distress Oxide around it went on my photo as it was to really showcase art. 
I chose to use hickory smoke for this so that it didn’t over power the image. 
And then I flicked the carbon black liquitex ink once I covered by photo. 


I’m pretty happy with the outcome. What do you think? 
It’s not perfect but hey that’s ART! 😜 
I really look forward to seeing your interpretation of this months moodboard and I’ll be back later on this month to share another layout inspired by the moodboard. 
Catch you then, Em xxx


Friday, 27 April 2018

Muse Alert : Jane Davenport

Howdy Bloggers,
Lisa here with a Friday Mixed Media update.

It's the end of my weekend and it's been an interesting few days of creativity.
It's hard when all you want to do is create,
 but your body is talking to you in aches and pains and insisting you slow down.

Thank the universe for the creative goddess that is Jane Davenport.
Jane is my Muse, my Enabler, and my Saviour.

When I am limited in different ways (time or physically)
and still have/want to create something quick,
 it seems like there is a radiant light that shines down on the few Jane products that I have.
Angels start singing, well mermaids actually, 
 and they beg me to use them.

Here is the true beauty of Jane's products,
I know that anything I create with her pieces as a focal point 
will be bold, beautiful, and utterly amazing.

Inspired 


Don't Give Up


Set Your Soul on Fire, Every Day.


The Washi Page

No video for this one unfortunately.

a little background stamping and a title stamp..

a simple page without effort.


Thanks for dropping by the Scrapping Clearly blog today,
 have a super creative weekend and get arty.
Lisa xx


Thursday, 5 April 2018

A Couple of Multi Photo Layouts by Peg

Hello Arty Peeps.

Life has been so full at my place lately that there has been precious little time or motivation for scrapping. Unfortunately, that doesn't stop the need to get stories in albums, but it does make the process so much more difficult, don't you think?

In an effort to simplify the job I decided to pull out a few things that were the last of a range. I always feel better when I can finish a paper range I have or a pack of something. The sense of completion combined with the anticipation of using something new is a heady mix.

This time it was the fabulous Teresa Collins Something Wonderful range.
I have loved this range so much for its versatility, it is so easy to use for simple pages that look more complex.


I used this paper for my base, this paper for my cards, and matching washi tape to add some energy to my page.
I also had some of the Pink Paislee Fancy Free range left over so I used this paper, added a punched border and some black cardstock, to mat my photos.
My title was done with a Pink Paislee acetate alpha, I added a few enamel shapes (hearts), and stapled things on with my Tim Holtz tiny attacher.

I also used this paper from the Pink Paislee Fancy Free range to start this page.
The other half of this paper became a strip down the middle which I edged using some Hambly transparency, stapled on with my Tim Holtz tiny attacher again.


I was at a loss with how to finish it after adding my typed and dated journal spot so, deciding that it needed more interest in the background, I reached for my Ranger Archival ink pads and some little Heidi Swapp stencils. I added some stamping too with these adorable stamps, and some wood veneer coloured black, both from Cocoa Vanilla Studios. Some star sequins and a cute paper clip finished it off.

This page started to take shape once I'd punched out the edge and mounted it with a black border. I could see exactly what was needed once it was 'framed'. Does this ever happen to you? You're stumped until it's framed?
As a side note, I always save the middle out of the black cardstock backing,
it's handy for matting photos, which I almost always do.

Thanks for coming by,
I'd love to hear your thoughts in the comments.
Til next time,
stay arty,


Thursday, 1 March 2018

In Search of Mojo - What do you do?

Hello Arty Peeps!

Welcome to March on the Scrapping Clearly blog.

Life has been a bit of a struggle lately and my creative mojo has gone walkabout.
So, inspired by my favourite creative comrade Lisa, I decided to try working with a formula.
Alas, my imagination was also lacking until I remembered these mixed media idea cards I have had for years.


I committed to a play date with my art journal yesterday.
I shuffled the deck and started at the top, no rules except I would use warm colours and whatever I had to hand. The goal was to reacquaint myself with free creative play, it didn't have to be pretty just cathartic.

Here is my first effort


Not so pretty but it got me started in a big way!
Here are the cards I turned up and what I did with them, in order.

- draw or paste a self-portrait                           I drew stick figure style face with a Posca
- add acrylic paint                                             black Ceramcoat
- journal with a permanent pen                         black Posca again
- sew something on                                            twine used to sew on mesh down left side
- draw, paint, or colour a border                        red bingo marker with correction fluid
- add texture paste through a stencil                  Prima copper crackle + TCW mini mosaic
- add fluid paint                                                 watered down orange paint
- use a sponge to dab paint in random places      Dylusions Funky Fuchsia
- include a tag, label, or envelope                      Heidi Swapp kraft tag
- use stickers                                                     Alphas, Simple Stories + CVS
- add washi/tissue tape                                     Tim Holtz music tissue tape
- add a piece of your recycled art
- add an ink wash                                             Dylusions Lemon Zest

Here's a closer look at the stitching,
I'm not too fussed on the mix of colours here but I do like the variety of textures.


While I waited for my other journal to dry I played in my smaller square one.


Here are my cards

- add a silhouette                                   DW TCW stencil + Ceramcoat black
- go wild, choose your own                      I stamped excess paint with a stencil
- rubber stamp                                        DWM faces + Archival ink
- use a colour you typically don't use       purple watercolor
- write with a paintbrush and ink             India ink
- splatter paint                                        crimson watercolor
- doodle                                                  correction fluid around writing

At this point I was quite liking what I had, so I stopped using the cards.
I added some stamping with heart bubble wrap and doodled around the hearts,
then added some yellow watercolour (ink spray) with a wet wipe.

It was a productive play date as it got me started on a mini album I have been planning for a while,
something I'm looking forward to sharing with you later this month.

So what do you do when your mojo is missing but you still have the need to create?
Does a formula work for you?
Leave me a comment and let me know.

Thanks so much for dropping by,
til next time,