Showing posts with label Prima Marketing Inc. Show all posts

Wednesday, 20 January 2021

Smile often, by Amanda Hartmann

Hello all and welcome to my Wednesday share!

Today I combined some lovely mixed media work with some of the amazing Vicki Boutin products.

Here is a list of the main products I used:

Here is my full page.


I stenciled the Prima Icing Paste through the Kaisercaft stencil. It was my first time using the icing paste and it went through the stencil smoothly and easily (nice consistency), and it dried smooth and not tacky at all. And great shine!

I layered the background on the Vicki Boutin paper. I added some Tim Holtz tissue paper, as well as some Vicki Boutin stickers/thickers.

To finish I added some Ink splatters and painting with Distress Oxide Ink - in Evergreen Bough.


Great shine in that Icing Paste! And I love this Rose Gold colour!


Thanks for looking today!
Amanda


Friday, 23 October 2020

'Brave' Art Journal by Belinda Spencer

 Hello Scrapping Clearly fans!!


It's Belinda here with you again today and I have my latest art journal spread to share with you using lots of awesome product available in the Scrapping Clearly store.


'BRAVE' Art Journal


To start with I laid down some colour in my DINA WAKLEY MEDIA 6x6 White Journal using PRIMA Art Philosophy Concentrated Watercolour in Peacock and Truth. I spritzed the pages with a LOT of  water first and then just dropped the colour on. I picked up the journal and played around with the colour letting it swish this way and that.


Next I added some salt crystals and set aside to dry completely.


The salt crystals didn't really work as well as they normally do so I ended up covering most of this up! I think they didn't like such a textured surface. Lesson learnt!!


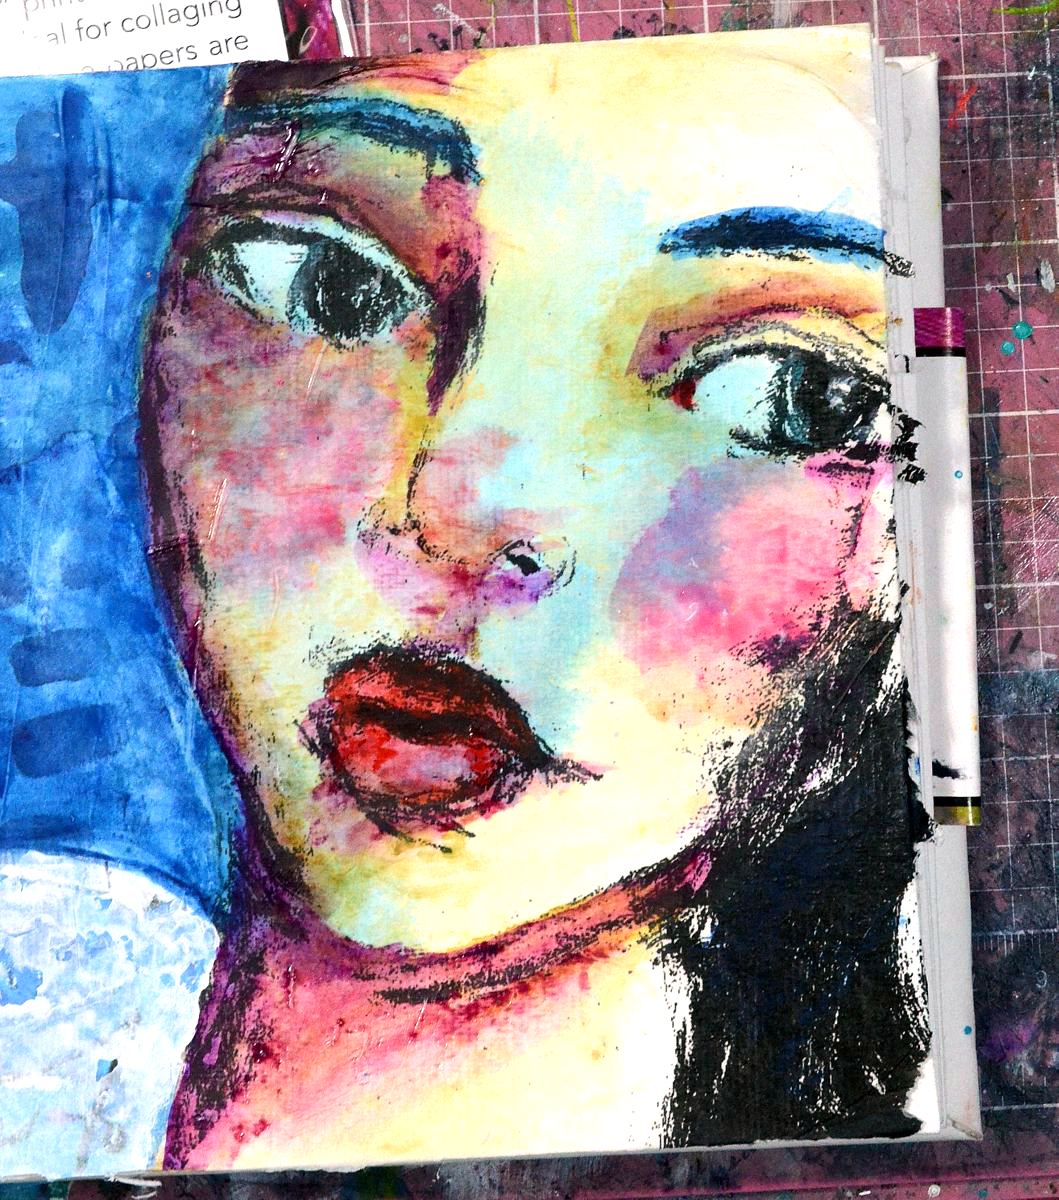
Next I tore out a face from the DWM Collage Paper Faces Pack and added to the page using a matte gel medium. I use a silicone brush to apply the gel to the surface, lay down the image and then use the silicone brush to smooth some more gel medium over the top. 


I wasn't 100% happy with the salt crystal effect so I tore up some papers from the DWM Collage Collective Book and applied to the pages using the same matte gel medium. Oh and also a strip torn from the DWM Collage Paper Backgrounds Pack. I then set it aside to dry. (To be honest I was too impatient to wait for it to dry so I sped things up with my heat gun taking care not to heat too long or too close in the one spot or the papers will bubble.)


Next I grabbed my DWM Scribble Sticks and coloured in some hair across the pages. I used a large soft wet paintbrush to activate and blend the crayons and set aside to dry. (You can see on the face that I started experimenting with the next step too)


Time to start adding colour to the face! I used the beautiful Soft Neutral PRIMA Watercolour Pencils to add some skin tones to the face just by scribbling on the colour; darker colours in the shadow areas and light where the sun hits the face.


I activated the pencil using the same paintbrush and then set aside to dry. (Or impatiently dried CAREFULLY with the heat gun again).


She needed a bit more colour so I added some more using the Scribble Sticks again and then activated and blended with the paintbrush.


Time for some detail now! My go to pens for adding final details are Posca Paint Pens and also the new Pilot Pintor Paint Pens. I used white and black Poscas as well as the Light Blue Pilot Pintor Pen for the eyes.


Next I added some stencilling using a KAISERCRAFT Mini Stencil with heavy white gesso. I added a quote torn from the DWM Collage Papers using the gel medium. I added some circles using the DWM Mini Boulders 6x6 Template and Scribble Sticks.


I finished by adding some more stencilling and doodling with the black Posca Pen. I added the title too by stamping onto plain tissue paper using the HEIDI SWAPP Old School Alphabet Clear Stamps and RANGER Archival Ink in Aquamarine and Jet Black.


Thanks so much for stopping by the blog today. I hope you are feeling inspired to have a play with your Scrapping Clearly goodies too or check out some of the awesome stuff in store now.

Cheers
Belinda


Wednesday, 14 October 2020

"Happy soul", by Amanda Hartmann

 Hi all!


Welcome to another Wednesday share from me!

I created my own background again from some white cardstock. Its kinda my favourite thing to do right now!


Here is what I used for my background:
* Gel medium
* Prima Watercolour Confection paints (used red and purple tones)
* Black spray for splatters

Here is the full page:


To create this page, I started with stamping using the Dina Wakley stamps with some black Staz on ink. I stamped some circles, as well as other textures and designs from this stamp set.

Using the Prima watercolours I painted the circles, mixing the red and purple together. 

Next I tore some strips of the Scrap FX tissue paper, to layer through the middle and also at the top and bottom of the page.

I also fussy cut flowers and leaves from the Art my Marlene tissue paper. I glued these and the tissue paper strips to the page with gel medium.

Then I used more watercolour to paint the edges and the strips, plus add splatters.

Added more splatters and doodling with black to finish.

In these close ups, you will also see I finished the page with some Vicky Boutin Storyteller stickers and thickers (coming in store soon).


Thanks for looking today!
Amanda


Friday, 12 October 2018

'Your heart is your greatest treasure' - Art Journal - by Amy


Hi all!

Thank you for popping in! I have here my first ‘Art Journal’ project to share. It was both therapeutic and a challenge, in a sense, as I was getting out of my comfort zone here.

After creating this it is fair to say that – I am hooked! 😊

So, now, every so often, I will pop in and share my Art Journal projects.


I have used a watercolour page from the Dina Wakley Media Journal in 8” x 10”. This journal is fabulous as it consists of canvas, burlap, watercolour and Kraft pages. 
 
I have primed the page with Dina Wakley Media Gesso in clear. Once dried, I masked some hand drawn circles, as I wanted keep these areas white. 

I then set to using Prima Marketing Watercolour Pencils, using ‘The Basics’ range, mixed with water. I kept working the colours until I was happy with the setting.

After the paint had dried, I darkened the circles using a Marker Uni – Posca pen in black

To add details to the page I carefully tore strips – with the help of water – to remove some images from the Jane Davenport Napkin Collage paper. I applied it using a gel medium from my stash. To protect the images, it is important to apply the gel medium over the top as well – and smooth out any air bubbles. 


I splattered Colour Blast Colour Spray in 'Roadbase' randomly around the page. To highlight some of the areas, I used Posca pens in black and white. Finally, the title was used from Tim Holtz Idealogy Collection – ‘Small Talk’.

It was a terrific learning experience, creating this journal page. I think that it is fantastic to try and experiment and learn new things – otherwise you never know what you are capable of!


Ciao, Amy 😊
 

Saturday, 31 March 2018

Wild And Free Canvas Panel by Leonie Neal-Dawson


Hello, I hope you all are relaxing and enjoying this Easter Weekend.

Our family generally goes camping this weekend but this Easter we are staying home so have no particular plans. I am thinking maybe fitting in some crafting will be an option..? What do you do over Easter Weekend?
Today I have this canvas panel to share with you. 

"She was life itself, wild and free. Wonderfully chaotic, a perfectly put together mess."
9x12" Canvas Panel 


I used this paper 'Bright and Beautiful 1' by Paper Arts. I liked the pastel tones to this paper and thought they looked a little 'Easter-ish' and that's probably where my Easter theme ends!
I cut the paper into lots of different sized squares and rectangles and collaged them onto 
a 9x12" canvas panel using Liquitex Matte Medium.


Next up I used a black Stabilo Aquarellable pencil to define each rectangle and smudged out the lines with a wet paint brush. Some stamping and splashes of watered down Gesso finished of the base of my canvas panel. 


My Chipboard title piece Wild and Free is by Memory Maze. I incorporated this into my quote
"She was life itself, wild and free. Wonderfully chaotic, a perfectly put together mess."
Can I let you know, 'Mess' is how I was feeling about my title chipboard after adding layer after layer to it
before I finally settled on something I was happy with. 
Liquitex Gesso came first but looked too plain, then it was black ink but I didn't like that either. Texture Paste and Dylusions sprays next - that blended in with the background too much! I was really beginning to think it was going to end up in the bin until I added a couple of coats of  Dylusions White Linen Spray. This last layer covered the bright dylusions pinks, purples and teal...but still left a faint tinge of them showing through, that and the earlier layer of texture paste finally made me happy. Phew, I was getting worried there for a bit. 


I accentuated my panel with these lovely Prima flowers, I like that they also had some feathers and so  tied in with the Wild and Free theme. 


That's it for me today, I hope you have a lovely Easter Holiday.

Happy Crafting and 
cheers from me. 

Leonie Neal-Dawson


SaveSaveSaveSaveSaveSave

Thursday, 8 March 2018

Bulky Blooms - Mixed Media Canvas by Leonie Neal-Dawson


Hello and welcome, Leonie here with you.

I'm sharing something a little different with you today, well different from my usual 12x12 page anyway.
My subject today is flowers, specifically, bulky ones. I used to use them often on my scrapbook pages
but for a long time now I've only been using either die-cut or very small flowers. 

 I know there are lots of people who love to use bulky blooms, and do it so well, on their scrapbook pages but for me it's about fitting more pages in my albums. Which category do you fall into?

 There are so many beautiful craft blooms available.
Hands up who has a beautiful collection of Prima Blooms in there stash?! 
But if I'm not using them on my pages much anymore the question is what to do with them?
My answer is a canvas, something I can gift to a friend or use as a piece of home decor.

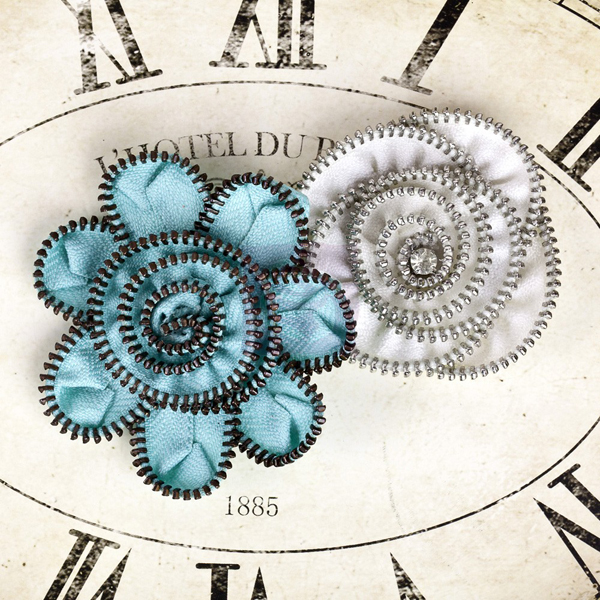
Image result for prima zipper flower

Kylie recently sent me these gorgeous Prima Marketing Zipper flowers from the Sunrise Sunset range. I knew straight away they were bound for a canvas of some sort. I have had this hessian canvas sitting unloved for a while and thought they would make a good match. So I put them together and am very happy with the result.


I applied Liquitex Super Heavy Gesso with a palette knife randomly to the hessian.  
Once Dry I added some detail to the background with the Mayan Calendar Stencil and The Crafters Workshop Light & Fluffy Modelling Paste. I seriously love using Crafters Workshop modelling
paste, it dries quickly to a nice bright white and is absolutely true to its 'light and fluffy' name. 
 I highly recommend it.


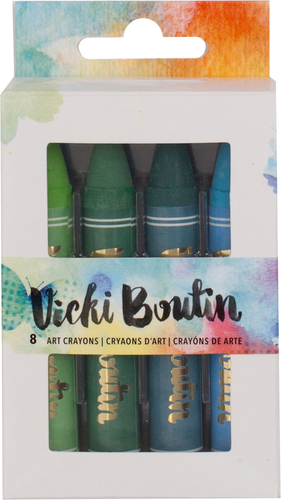
Next up I needed some colour to match that lovely turquoise bloom. I used Vicki Boutin Art Crayons.  My first time using these and they were quite easy to use - I scribbled over the dried Gesso and modelling paste and then used a wet paintbrush to blend and spread the colours around the canvas. To finish off the background I added a few small splashes of Black Ink from Liquitex.


I accompanied the Prima bloom with a set of Chipboard Wings from Dusty Attic.
The Chipboard has a light coat of Gesso applied with a sponge and then Distress Oxide inks Cracked Pistachio, Peacock Feathers and Black Soot.

I used the blending tool foam sponges from ranger to apply the inks.


I then headed to Google for a suitable quote about flying.
I used a lovely Heidi Swapp acetate word in my quote attaching it to the canvas with Glossy Accents.


So, have I convinced you to get using those bulky blooms? Or do you use them already? 
Let us know in the comments or leave a link to your 'bulky blooms' creations I'd love to see how others use them.
Cheers, thanks for stopping by today,

Leonie Neal-Dawson.


SaveSaveSaveSaveSaveSaveSaveSaveSaveSaveSaveSaveSaveSaveSaveSaveSaveSave