Showing posts with label Modelling Paste Light and Fluffy. Show all posts

Tuesday, 16 February 2021

Yes, I love you too by Tracey B

 Hi everyone and happy crafting Tuesday.

I have another layout inspired by this months moodboard.


I started with some Light and Fluffy paste through a Dusty Attic stencil.   I just love this stuff as it dries so quickly.


I then sprinkled on some Lindy's Magical shaker powder (Black Forest Black) and gave it a spritz with water.   Whilst still wet I added green Finnabair mica powder and gave it another spritz.

I die cut some paper to mimic the stencil and covered some wood veneer hearts and arrows with washi tape.


I added a Fancy Pants Golden Days cork heart and Cocoa Vanilla Awesome alphas for my title.


Have a great day,

cheers

Tracey


Wednesday, 22 April 2020

Life's too short

Hi everyone
Late with this post as finding it hard to keep track of days as they're blurring into each other.

Just a really quick share on a project that started out with the thought that it was just going to be black and white for the VCC challenge.   
What can I say, it took a turn


I started with some Light & Fluffy through a Darkroom Door stencil and added some Lindy's magical powder in Blazing Black which I spritzed with water.   A little bit of stamping and some Nuvo Glimmer paste through a stencil then other bits and pieces from my stash.  Finished off with some Snarky stickers and outlined the page with my Fude Ball pen (love the way this writes). 

As I said, super quick but satisfying and fun,

Stay safe and craft on
cheers
Trace

Tuesday, 24 December 2019

Fridge magnets

Hi everyone
With less than a month before I have to move house I've started to think about packing.   I looked in the kitchen and saw 3 of those promotional fridge magnets that you get in the mail.   I'd just been whacking them on the fridge 'cause I find them useful but certainly not attractive.   So I decided the get creative.   (Really just a way of procrastinating about the packing!)


I started by giving the magnets a couple of coats of gesso, collaging on some paper, random stamping (Jane Davenport Poppy Girl, Lavinia Stamps Dragon Pods & Seed Heads & others),  and then some Light & Fluffy through a few stencils (Colour Blast Time magic, Dina Wakley Media wheels & others) .  


I made a few embellishments using a mould and some paper clay and covered some metallic bits from my stash with gesso,


 I used alcohol inks on two of the magnets(just squinted them on in places and let them do their thing) and pounced on some acrylic paint using a dry brush for the last one.


I then used my finger to rub on some metallic wax and some gel medium to stick on some mica flakes and beads. 


Hope you all have a fabulous Christmas.
Thanks for looking
cheers
Tracey


Monday, 26 November 2018

Scrappy Inspiration from Leonie


Hello,  
November 26th and December is knocking on the door, anybody started preparing for Christmas?
I tend to be a last minute sort of person what about you?

My share today is a 12x12 scrapbook page with some fun photos of my Son with two of his cousins, for obvious reasons I've titled it Conehead.


The base cardstock has been coloured with Distress Oxide - Faded Jeans,
I then added some Crafters Workshop Light and Fluffy Modelling Paste through a Stencil Girl and 12@rts Stencil.
More texture in the form of some stitched circles and zig-zag lines across the middle of my
page.  
For a little contrast I added some Tangerine paint by Dina Wakley.


My embellishments consisted of a very old and precious Heidi Swapp Sticker from my stash.  Who remembers these round stickers they were so popular once upon a time?!  
It's a good feeling to at long last use something thats been in your stash for an age.
I also added some stickers from the more recent Heidi Swapp Hawthorne range.


Thanks for stopping by today,
Happy crafting. 
Cheers from, 
Leonie Neal-Dawson. 

Saturday, 17 November 2018

Rainbow Love by Leonie Neal-Dawson


Hello, how about some rainbow love to kick off the weekend?
Rainbows never fail to to bring a smile to my face. 
Just throw those seven colours together and bam instant happy hit right there!

I created this page last weekend at a scrapbooking retreat on the sunshine coast (thats bound to make anyone happy).
As well being a whole heap of fun Retreat scrapping is great for 
bouncing ideas off your fellow scrappers. 


I just added dobs of Dina Wakley acrylic paint across the page and used a paint brush to drag the colour down the page.  Make sure to clean the brush between each colour. 
I then added Tim Holtz rubons randomly over the page and some background stamping.
I also added some white texture paste (light and fluffy modelling paste by The Crafters Workshop is great stuff) through some stencils. I find it helps to tone down the rainbow but still let all those glorious colours shine through if you know what I mean. 


My photo is backed with gauze and a border of black stitching to help the photo pop off the page - thanks to fellow Dt member Tracey Thorne for the idea and lone of her sewing machine whilst at retreat ;) it added that finishing touch I was after. 
Tracey also gifted me that lovely cut file title from her scrappy stash - Thanks Tracey x


I added some tone on tone enamel dots over the rainbow and a quote from Dina Wakley Collage paper.


Thanks for stopping by the 
Scrapping Clearly blog. 
Happy crafting.

Tuesday, 24 April 2018

Ella & Viv Graffiti Collection with Leonie

Hello, Leonie with you today. I took this photo of my daughter in January this year and have been wanting to scrap it for a while but just needed the right paper to go with it.  Then I came across this gorgeous paper in my last DT package from ScrappingClearly. 
How perfectly does this paper match my pic?  Gorgeous grey/black brick work similar to the photo with the addition of bright pops of colour.  
It's from the Ella and Viv Graffiti collection and is called The Wall.


Here's how my page finished up, I'm really happy with it.
I took some pictures a long the way to show you how my page came together. 


I began by fussy cutting The Wall paper to matt my photo on plus a few extra bits that to surround the picture. 


I used textured white cardstock for the base and added Dylusions inksprays with a paint brush so I could control where the colour went. Next I used The Crafters Workshop Modelling Paste to add some texture through a stencil, I also used a second stencil and traced the pattern with a black Journalling pen.   I also added some stamping with Kaisercraft and Prima background stamps.


Next I adhered my cut-out patterned paper to the card stock and 
added some more stamping on top of this.


Heidi Swapp silver puffy stickers and the Heidi Swapp Acetate word were added last along with some Tim Holtz Remnant Rub-ons.  Around the border of my page I added some self affirming quotes for my daughter. 


Thanks for stopping by today, happy crafting
Leonie Neal-Dawson


SaveSaveSaveSaveSaveSave

Thursday, 8 March 2018

Bulky Blooms - Mixed Media Canvas by Leonie Neal-Dawson


Hello and welcome, Leonie here with you.

I'm sharing something a little different with you today, well different from my usual 12x12 page anyway.
My subject today is flowers, specifically, bulky ones. I used to use them often on my scrapbook pages
but for a long time now I've only been using either die-cut or very small flowers. 

 I know there are lots of people who love to use bulky blooms, and do it so well, on their scrapbook pages but for me it's about fitting more pages in my albums. Which category do you fall into?

 There are so many beautiful craft blooms available.
Hands up who has a beautiful collection of Prima Blooms in there stash?! 
But if I'm not using them on my pages much anymore the question is what to do with them?
My answer is a canvas, something I can gift to a friend or use as a piece of home decor.

Image result for prima zipper flower

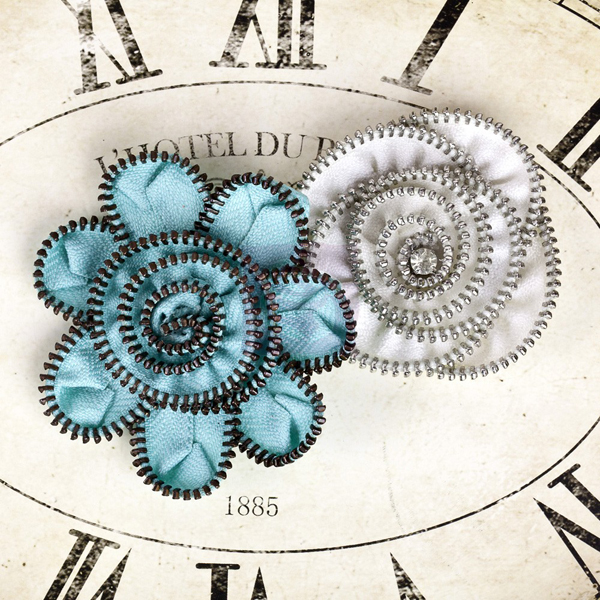
Kylie recently sent me these gorgeous Prima Marketing Zipper flowers from the Sunrise Sunset range. I knew straight away they were bound for a canvas of some sort. I have had this hessian canvas sitting unloved for a while and thought they would make a good match. So I put them together and am very happy with the result.


I applied Liquitex Super Heavy Gesso with a palette knife randomly to the hessian.  
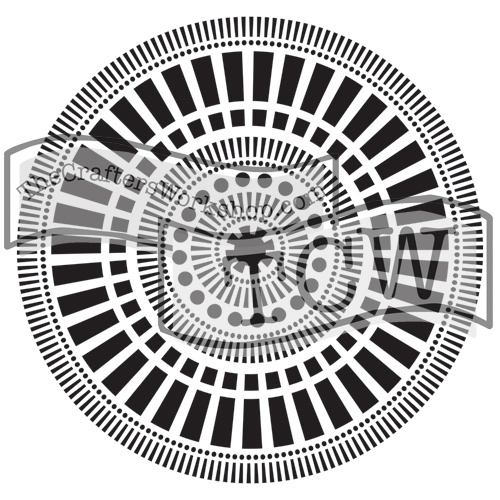
Once Dry I added some detail to the background with the Mayan Calendar Stencil and The Crafters Workshop Light & Fluffy Modelling Paste. I seriously love using Crafters Workshop modelling
paste, it dries quickly to a nice bright white and is absolutely true to its 'light and fluffy' name. 
 I highly recommend it.


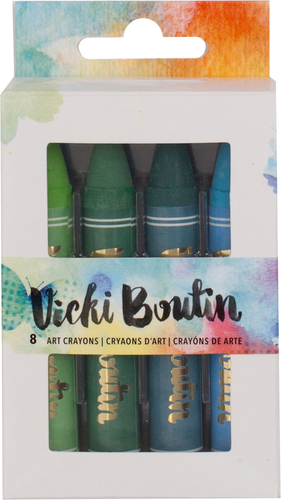
Next up I needed some colour to match that lovely turquoise bloom. I used Vicki Boutin Art Crayons.  My first time using these and they were quite easy to use - I scribbled over the dried Gesso and modelling paste and then used a wet paintbrush to blend and spread the colours around the canvas. To finish off the background I added a few small splashes of Black Ink from Liquitex.


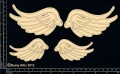
I accompanied the Prima bloom with a set of Chipboard Wings from Dusty Attic.
The Chipboard has a light coat of Gesso applied with a sponge and then Distress Oxide inks Cracked Pistachio, Peacock Feathers and Black Soot.

I used the blending tool foam sponges from ranger to apply the inks.


I then headed to Google for a suitable quote about flying.
I used a lovely Heidi Swapp acetate word in my quote attaching it to the canvas with Glossy Accents.


So, have I convinced you to get using those bulky blooms? Or do you use them already? 
Let us know in the comments or leave a link to your 'bulky blooms' creations I'd love to see how others use them.
Cheers, thanks for stopping by today,

Leonie Neal-Dawson.


SaveSaveSaveSaveSaveSaveSaveSaveSaveSaveSaveSaveSaveSaveSaveSaveSaveSave