Showing posts with label Clear stamps. Show all posts

Friday, 16 July 2021

Tab Tag Booklet with Belinda Spencer

 Hey Scrapping Clearly fans!

It's Belinda here today with a late post! I have a cute little booklet to share with you featuring the Tab Tags by Studio Light Art By Marlene Essentials and lots of other fabulous goodies from the store.


I grabbed 6 tags from the pad and proceeded to colour them using Prima Art Philosophy Concentrated Watercolours. I spritzed one tag to start with using quite a lot of water and then dropped the watercolour onto the surface. It's kind of mesmerizing watching the watercolour bloom and spread. I added three different colours to the first tag. Then, because the tag was so wet, I placed another tag on top of it to colour that one too. 


There was quite a lot of excess watercolour that squeezed out the sides so I used some book paper to swipe it up and made myself some instant collage fodder.


Next I grabbed some of the awesome Dina Wakley Stickyback Canvas Tape. I cut three lengths, removed the backing and stuck them to some plastic packaging. I spritzed them with water and added the same watercolours. I left them to dry in a sunny spot. These are what I used to bind my tag book together.


Once completely dry, I stamped and stencilled the tape. I used Ranger Jet Black Archival Ink for the stamping and a heavy weight gesso for the stencilling.


Next, I added some stencilling to the tags using the same gesso and stencils.


Here is the cover of my tag booklet. I added some collage using torn pieces of the collage fodder I created earlier and also torn pieces of Art By Marlene Collage Paper. I also collaged on a cute girl from the Art By Marlene Paper Elements Books (Mint and Lime). I used Dina Wakley Ultra Thick Gel Medium for the glue. I also added some stamping and doodling. I used a Stabilo watersoluble pencil to scribble around the girl and then activated with a wet paintbrush to emphasize her and set her apart from the background.


I used pretty much the same techniques for all of the pages using different cute die cuts from the Paper Elements books. I used Posca Pens, acrylic paint and Lyra Watercolour Crayons to add detail to the backgrounds. The quote stickers are from the Studio Light Jenine's Mindful Art Collection Time To Relax Stickers.


Products used:
STUDIO LIGHT Art By Marlene:
- Essentials Tab Tags
- Collage Paper
- Paper Elements Lime Collection
- Paper Elements Mint Collection
- Clear Stamps Mandala Tapestry
- Marlene's World Clear Stamp Sweet Birdie
STUDIO LIGHT Jenine's Mindful Art Collection Time To Relax Stickers
VICKI BOUTIN Clear Stamps Colour Study
PRIMA Art Philosophy Concentrated Watercolour:
- Blush
- Bright Pink
- Marigold
- Peacock
- Truth
RANGER Archival Ink Jet Black
gesso
DINA WAKLEY 
- Ultra Thick Gel Medium
- Stickyback Canvas Tape
UNI Posca Pens

Thanks for stopping by the blog today! I hope you are inspired to have a play over the weekend with your Scrapping Clearly goodies too.
Cheers
Belinda


Thursday, 13 December 2018

Wander often - with Emma

Welcome to Thursday SC friends.
Emma here with you today, sharing a page and a video inspired by this months moodboard.

Here is my design.....


And here is the moodboard it was inspired by.....


I created a video for this layout as well, something that I haven't  
done for a little while, and I hope you enjoy it.


This page has some awesome products on it. For my background work I started by giving my paper a coat of Clear Gesso to act as a barrier. 
I really loved the idea of playing with gold from this moodboard so I mixed some Art Alchemy in Ancient Coin with a modelling paste.


Once that was spread through a stencil I then added some colour onto the base using 2 Distress Oxides first in Antique Linen and then a darker shade over the top in Frayed Burlap.

I wanted more gold, so I then dabbed some emboss ink through a star stencil to grab that star theme from the moodboard, and applied gold emboss powder, this gave a little more sparkle.


Once this was dry I started using some very cool stamps first one from the Old town range of  the Finnabair Cling stamps, and then layered over that with a Lavinia Stamp in the Orbs, I just love this one. I also used a script stamp over them.

Once the image was layered with some tags, I chose a few pieces from one of Heidi Swapps Ephemera packs that suited my design.


The stars are quite a bold idea on the moodboard so I decided to capture this theme more by using the metal stars from Finnabair Mechanicals.

In the centre of each of the stars I added Art pebbles in vintage.


Finally I added some quotes from Tim Holtz small talk and a splash of Liquitex ink in titanium white.

The over all feel of this page is quite peaceful and I feel I captured the moodboard.

I hope you get a chance to play along with this moodboard this month, I cant wait to see what you see and how you play.

I will see you all again very soon, till then, Em xx


Tuesday, 24 April 2018

Ella & Viv Graffiti Collection with Leonie

Hello, Leonie with you today. I took this photo of my daughter in January this year and have been wanting to scrap it for a while but just needed the right paper to go with it.  Then I came across this gorgeous paper in my last DT package from ScrappingClearly. 
How perfectly does this paper match my pic?  Gorgeous grey/black brick work similar to the photo with the addition of bright pops of colour.  
It's from the Ella and Viv Graffiti collection and is called The Wall.


Here's how my page finished up, I'm really happy with it.
I took some pictures a long the way to show you how my page came together. 


I began by fussy cutting The Wall paper to matt my photo on plus a few extra bits that to surround the picture. 


I used textured white cardstock for the base and added Dylusions inksprays with a paint brush so I could control where the colour went. Next I used The Crafters Workshop Modelling Paste to add some texture through a stencil, I also used a second stencil and traced the pattern with a black Journalling pen.   I also added some stamping with Kaisercraft and Prima background stamps.


Next I adhered my cut-out patterned paper to the card stock and 
added some more stamping on top of this.


Heidi Swapp silver puffy stickers and the Heidi Swapp Acetate word were added last along with some Tim Holtz Remnant Rub-ons.  Around the border of my page I added some self affirming quotes for my daughter. 


Thanks for stopping by today, happy crafting
Leonie Neal-Dawson


SaveSaveSaveSaveSaveSave

Tuesday, 20 March 2018

Stunning 'Paper Arts' Papers with Leonie


Hello and welcome to the Scrapping Clearly blog,
Leonie here with you.
My scrapbook page today is inspired by our March sketch/moodboard combo.  
With a $30 shop voucher up for grabs you can join in with us and link your entry in our Facebook Inspiration Group HERE.
No automatic alt text available.

The Scrapping Clearly Store has a beautiful range of 'Paper Arts' papers in stock. These are fabulously textured and printed papers perfect to use for scrapbook background pages.
Take a look at just a few of the designs below, they are so gorgeous just by themselves.


Adventure 
by Leonie Neal-Dawson


I wanted to add some of my own texture and mixed media elements to these lovely papers so I started out with The Crafters Workshop Light & Fluffy Modeling Paste through a brick stencil inspired by the brick pattern in the sketch.  I then used a second piece of Paper Arts Bubbles 3 paper and adhered torn pieces with Gel Medium
Next, I added some colour with Dylusions Spray in Vibrant Turquoise and London Blue.


More layers were added to my page with some stamping using Kaisercraft clear stamps, watered down gesso splats, more of the ripped Paper Arts Bubbles paper and some gauze.
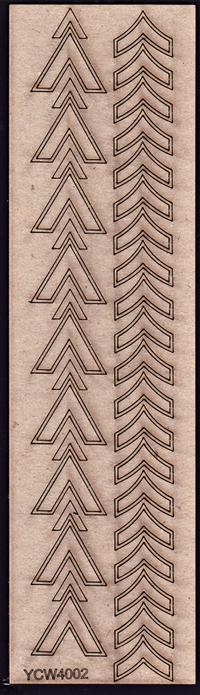
I liked the chevrons on the sketch so I used some chipboard from Your Creative Wings to add some chevrons to my page. 


Cracked Pistachio and Walnut Stain Distress Oxide Inks were used to colour my title Wood Veneer by Heidi Swapp.


These gorgeous gold geotags are by Studio Calico.


Thanks for stopping by today,
I hope you've been inspired to get crafty and join in with our March challenge.

Cheers,
Leonie Neal-Dawson