Showing posts with label Heidi Swapp Color Shine. Show all posts

Thursday, 21 January 2021

Enjoy - With Karyn Schultz!

  Hi Scrapping Clearly Lovelies!

It's Karyn here and today I have a scrapbook page that I created using lots of fun products available at Scrapping Clearly
 
  
  In my latest DT kit I received this Heidi Swapp Stationary pack. It contains lots of fun tags, stickers, alphas etc. I used this pack, and its colour scheme, as inspiration for my page.
 
  
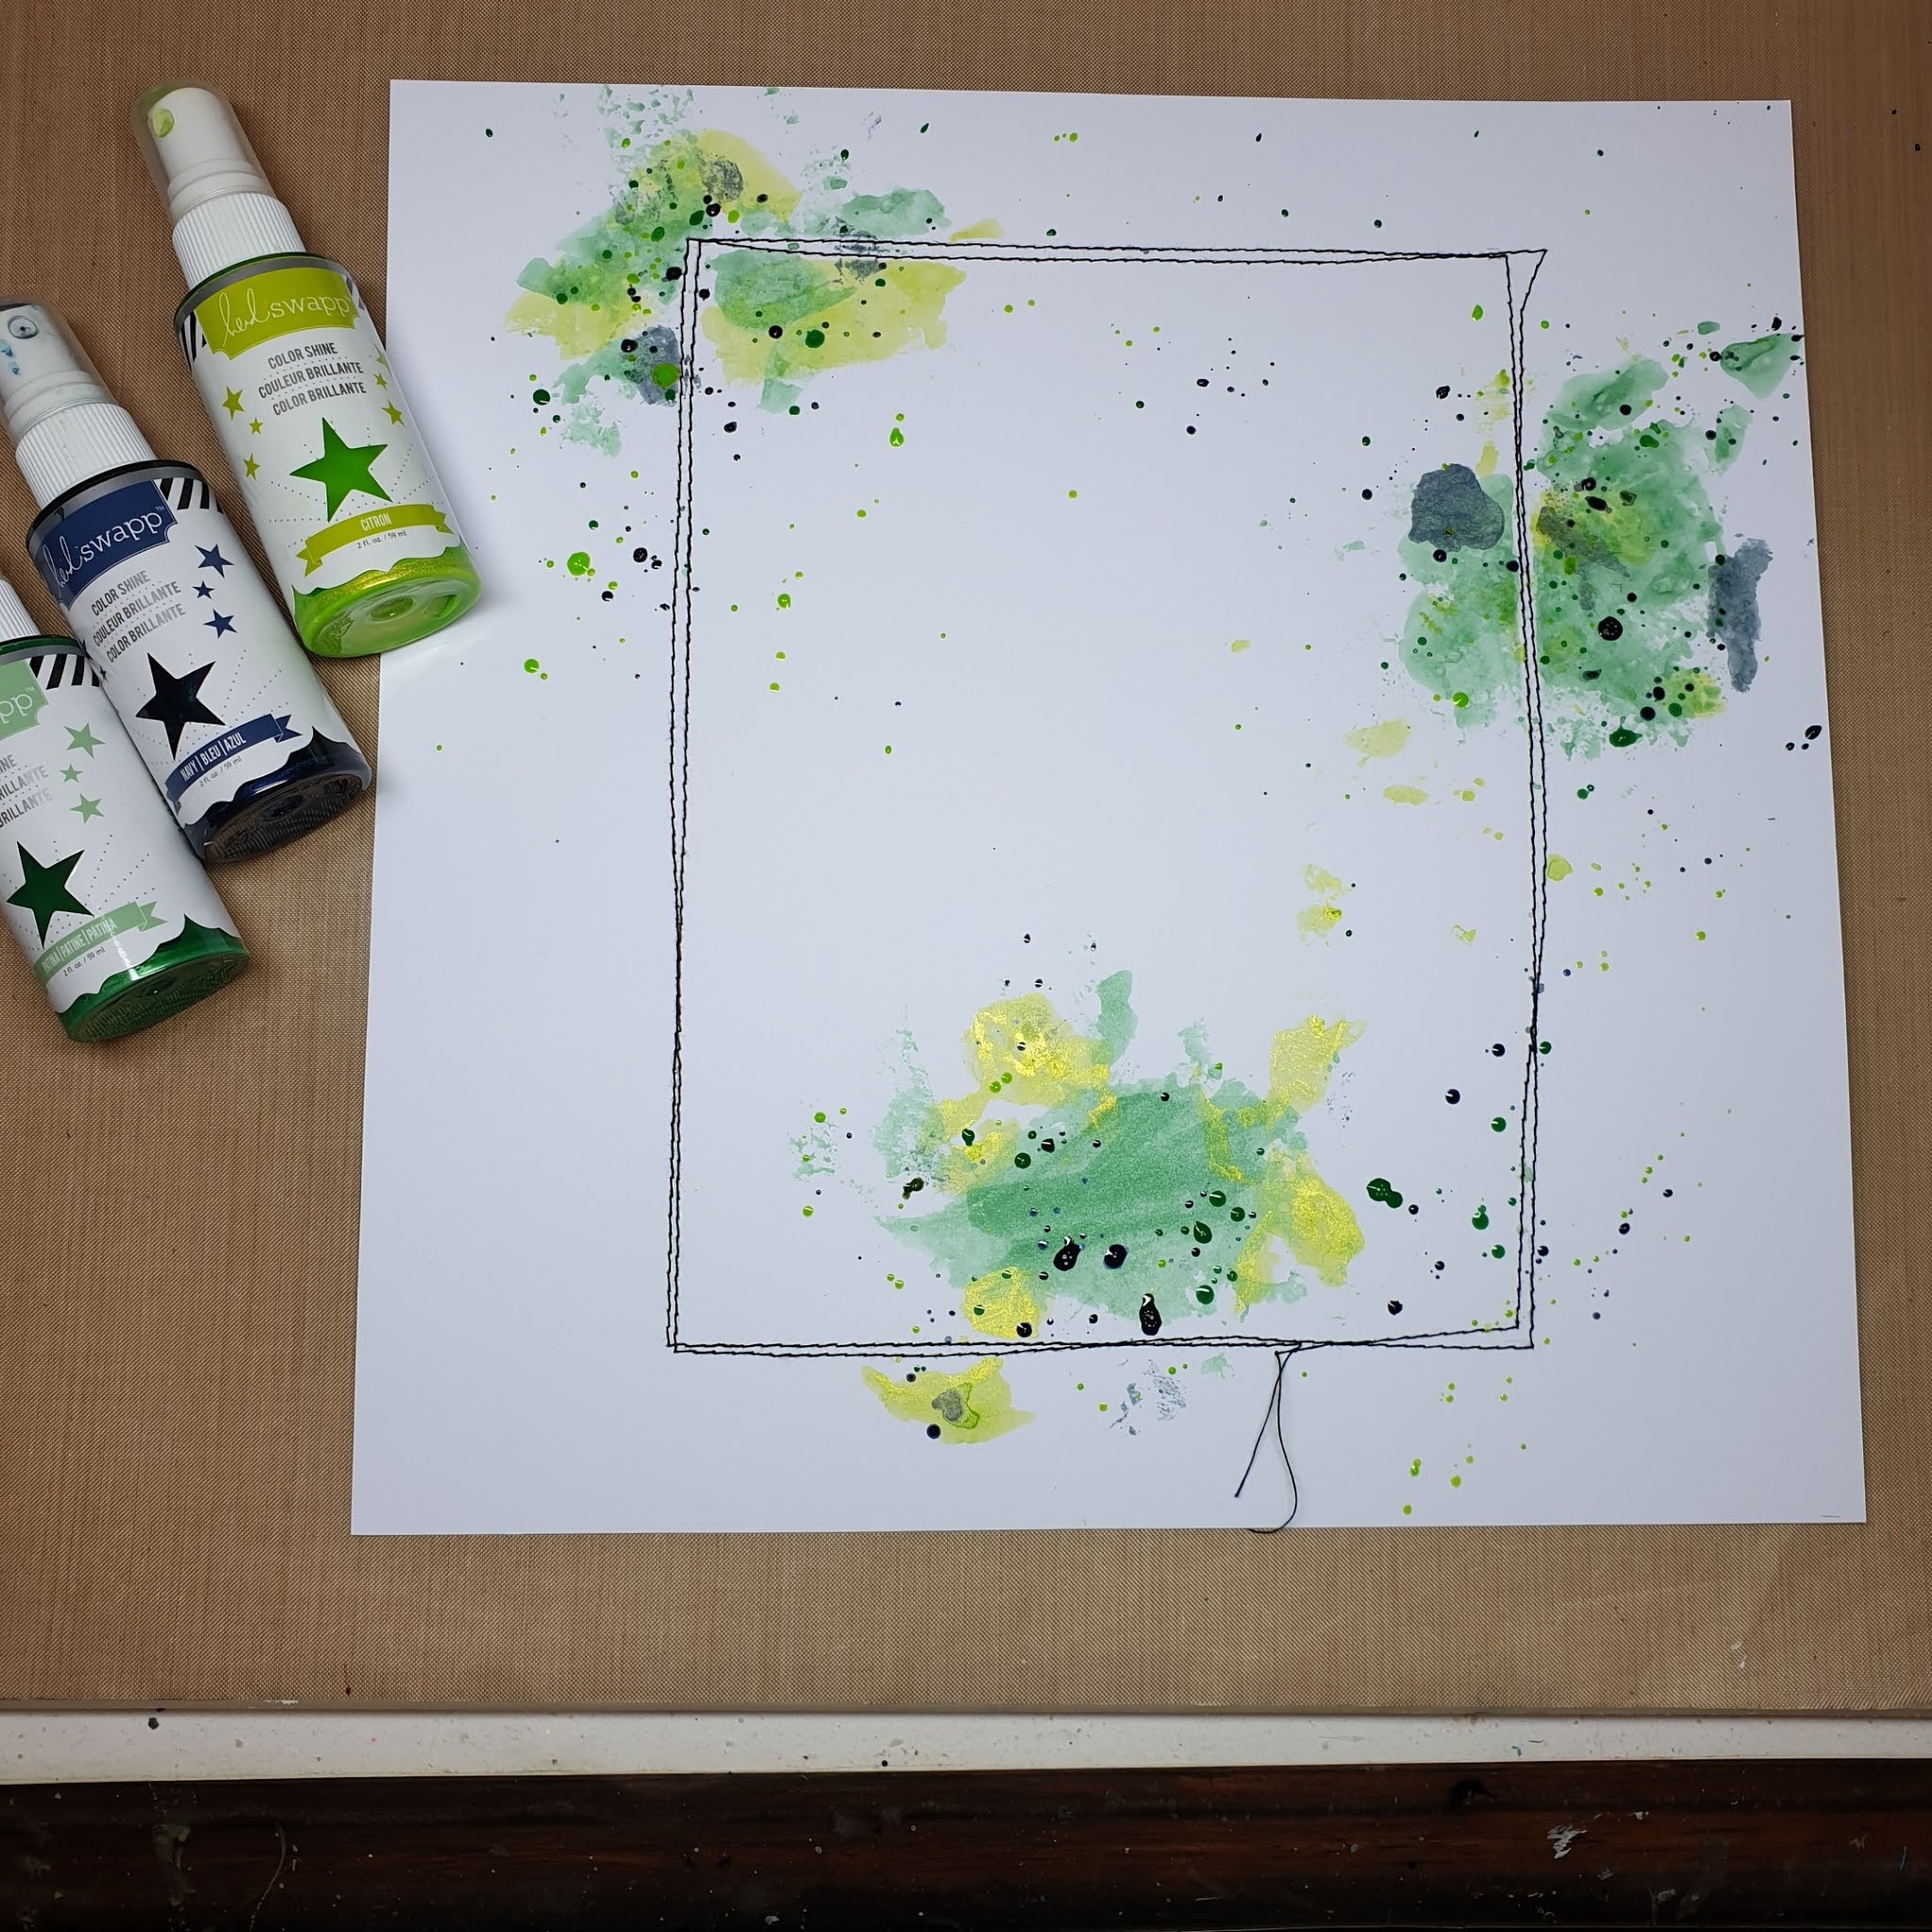
I started by sewing a rectangle on heavy weight white cardstock that I had cut down do 11" x 11". I later attach this cardstock to a sheet of Vicki Boutin Storyteller Narrative paper
 
 
 I gathered my other supplies to use on the page, this included Heidi Swapp Color Shine and Scrap FX cardstock embellishments.  
 
 
 On the white cardstock I used the Heidi Swapp Color Shine (navy, patina and citron) to create a background (painting with plastic and splatters).
 

 Here is my final assembled page.
 
 
Underneath my photo I layered tags from the Heidi Swapp Stationary pack and fussy cut embellishments from "Bold Blooms"  and "Flowery Bits" from Scrap FX

 
 The glitter alphas are from the Heidi Swapp Stationary pack.
 
 
 The enamel arrows and stars are from the Heidi Swapp Stationary pack.  The title is from Heidi Swapp chipboard word stickers


 Thanks so much for stopping by!
 
Crafty Hugs xx


Thursday, 7 February 2019

Birthday Cards - With Karyn Schultz!

Hi Scrapping Clearly Lovelies,

It's Karyn here, and today I have a set of 4 cards to share with you made using lots of goodies from the Heidi Swapp Emerson Lane collection and Art Anthology paints - all available from the Scrapping Clearly Store.


I've used white cardstock bases for all of the cards as well as backgrounds to add paint. 

For 2 of the cards I've used a palatte knife to swipe over some Art Anthology paint in Sorbet - Cameo, Gemstones - Blue Topaz and Sorbet - Vegas Gold. Then I added some splatters of Heidi Swapp Colorshine in navy, blush and gold.


I matted these painted backbrounds on papers from the Emerson Lane collection then added Ephemera, a photo corner, a birthday diecut, paper doilie and paper flowers. 
  

For the next card I matted various papers from the Emerson Lane collection then added a photo corner, a birthday diecut, and some flowers from my stash.   
  

For the last card I matted various papers from the Emerson Lane collection then added added Ephemera, a photo corner, HS lace ribbon, a birthday diecut,  and paper flowers .    
 

Thanks so much for stopping by 
Crafty Hugs xx


Saturday, 4 August 2018

That's My Boy - Lisa J

Hi Scrapping Clearly friends,

Lisa J here today to share a scrapbook layout using Cocoa Vanilla Studios You Rock collection.


I am still loving the look of colourful layers on white cardstock with a gorgeous patterned paper border. So if it makes you happy do it I say.

The You Rock Stripped paper was perfect for creating strips of colourful pattern on my page without having to chop into too many brand spanking new sheets of 12 x 12 (the first cut is always the hardest).

There are so many fantastic co-ordinating embellishments in the collection it made the finishing touches super simple.

I have used the Chipboard, Wood Veneer, Sticker Accessory Sheet and Die Cut Ephemera on this layout.


I added sprinkles of colour with Heidi Swapp Color Shine.


Happy Scrapping


Tuesday, 19 June 2018

Fun Page with DT Katie Howard

Good Morning! Welcome to another Scrapping Clearly blog post. Today I thought I would share with you just how versatile the Fancy Pants Take Note collection really is, especially since it is a school themed collection!

I decided that I wanted to try and create a more feminine page using this collection, and guess what?! It was really easy to do, especially as there was some pink tones and even a floral in the collection. Here is the page that I created:


The corkboard paper is so perfect for the background, so that is where I started. You get two of each paper in the collection kit, plus some die-cuts and cards so you have lots to use with one kit! I created some paper layers behind my photos after first backing them using some of the pretty gold tissue paper that my Scrapping Clearly order comes wrapped in! Don't forget to keep that in your stash and use it, what a bonus!

I decided I needed some soft detail on the background so I decided to grab my distress oxide ink in Faded Jeans because it worked with the darker blue in the paper. I started with a stencil and added some background detail, I used the Dyan Reaveley alphabet border stencil. After I added to the background I decided I wanted a border as well, so I masked off the alphabet part of the stencil and used the dashed lines with my ink to create a border all the way around my page, I just love how it looks!

One thing that I love to do with my paper scraps is create tags, they are so easy to make and are perfect for tucking into layers, you can then add buttons or enamel dots or ribbons or bows to them as well.


I created a little cluster with some of the tags using some die-cuts from the kit and also some chipboard from the Maggie Holmes Gather thicker set. Some of the colours in here are a perfect match! And it is nice to mix and match collections and manufacturers too.


I decided to print my journaling and stick it on, but used a sweet heart from the Gather thicker set and also one of the flowers from the Heidi Swapp Vintage Chic trimmings pack. These flowers are just made to crinkle and distress. I cut mine in half and layered slightly offset before tucking under my journal block. I also tucked one under the tags at the top. These were just the right shade of pink, and added a girly touch too.

I used the word "Today" from the Gather thicker set for my title, as this was an every day moment and nothing in particular, and it is an easy way to add a title, and let's face it, I am all about easy!

Last of all I added some splatters using some Heidi Swapp color shine, there are so many pretty colours to choose from, I used navy and gold.

Thanks for stopping by, see you next time!

Katie x


Tuesday, 5 June 2018

Your the One - layout by Emma.


Happy Tuesday everyone. 
It’s my share with you all on the SC blog today. 
We have such a great challenge this month. 
Here is my take.....


I started my layout with a sheet of Paper Arts - Black & White 1
It’s such an awesome sheet of paper as most of the ‘background’ work is done for you. 
Then I wanted to create colour drips and sprays in behind my layers so I did this with a variety of products, such as Heidi Swapp colour shine, Kaisercraft mist in red and yellow, distress oxide in broken china
You can see how I did this in my video link at the end of the blog. 


I also flicked a few of these colours over and around to really bring colour to the center of the page. To create a bolder colour I used a couple of Dina Wakley acrylics in ruby and Tangerine to add body to the flicks. 
I then use a couple of stamps that look like splats over the ink colours and build with these. 


Under the photo I proceeded to layer twine and a few Carpe Diem frames I had. 
Staggering these under my photo which is another awesome one I found on Pinterest. 
I used a couple of Heidi Swapp Marquee rhinestones and Tim Holtz embellishments as the embellies as well as some 2crafty chippy. 


And once all glued down I flicked and splattered Liquitex Carbon black ink to tie it all together. 
Layout complete!! 
I hope this inspires you to have a go of this months challenge, I’d love to see how you interpret it. 

And you can see my process video here....


Thanks again for your company and I’ll catch you all very soon. 
Em xx


Monday, 28 May 2018

Starstruck - a layout by Lisa J

Hiya Scrapping Clearly friends,

I have a layout to share today using all things Heidi Swapp.

I had a photo of my littlest guy with musician 8 Ball Aitken at the Tamworth Country Music Festival that I had been wanting to scrap so the idea of using lots of stars to create a "starstruck" layout was born.


I started by lightly tracing a circle on some white cardstock. I used Color Shine in Navy and Citron to sprinkle around the circle and then placed my acrylic stars down with a spot of glue. I stitched (very roughly) over these with black thread.


I created some layers around my photo with the 6x6 paper pad.


Now I have used a whole lotta cool Heidi Swapp stuff on this page. Here are the links for the store:

Hello Today Acrylic stars
Sequin Shapes Disco Stars
Navy Glitter Alphabet Stickers
September Skies 6x6 paper pad
Colorshine in Navy and Citron
September Skies Color Magic Diecuts


A quick reminder too that there are only a few days left to enter this month's combined Mood Board and Sketch Challenge. See the challenge here.

Happy scrapping

Lisa J


Monday, 19 February 2018

Rock It - With Karyn Schultz!

Hi Scrapping Clearly Lovelies! 

It's Karyn here,
and today I have a scrapbook page to share with you made with lots of papers and embellishments from the Pink Fresh Studio "Escape the Ordinary" collection - all available in the Scrapping Clearly Store. This is the 6th page I've made using this collection - and I've still got enough for 1 or 2 more :)


I started with a sheet of white cardstock and added strips of the Transform paper along the top and bottom edges as shown. Next I matted my photo over a white paper doily and more offcuts from the papers in the collection. Then I used gold wood veneers to create titles in the top left and bottom right corners.


Next I added a variety of the chipboard stickers across my page - I love the watercolour look of these flowers.


Lastly I added some splatters of black and gold Heidi Swapp Color Shine across my page, a stamped date and hand written journalling.


A pretty quick and easy page, perfect for when you don't have much time to create.
Another story told.

Thanks so much for stopping by 

Crafty Hugs xx


Tuesday, 30 January 2018

Hello Cute - A Scrapbook layout with Lisa J

Hello all, 

My turn today to share my last project for January with the Cocoa Vanilla You Rock Collection. I have loved working with this collection and I hope you have enjoyed the projects I have shared.


For my last January layout I started with the B-side of the Experimental paper. The gorgeous watercolour style blue ombre just had to be a background.


I added some strips of patterned paper down the left hand side as a base for my photo and embellishments and then just started adding bits and pieces.


There are so many embellishments in the Cocoa Vanilla You Rock collection and they just work together so well.


I finished off with some sprinkles of Heidi Swapp ColorShine in Navy and some enamel dots. My title uses Wood Veneer from the You Rock collection and Teal Puffy Thickers from American Crafts.

If you haven't already, make sure you enter this months challenges on the Scrapping Clearly page.  Entries need to be in tomorrow.
You could win a $30 shop voucher!

Happy creating


Saturday, 13 January 2018

Golden Days of January by Leonie Neal-Dawson

Hello and welcome to my first post for the year.
I hope your New year is off to a cracking start.

I've just returned from 12 days camping on the NSW side of the Murray river
so I'm still very much in holiday mode and feeling quite relaxed.
The weather for our holiday was perfect, we spent our days swimming by the 'beach' as we call it and floating down the river. I even managed to squeeze in some scrapbooking time, along with a Champagne or two. 

They truly were Golden Days which is the collection I will be using to hopefully inspire you throughout the month. Here are some of my holiday snaps, hopefully soon to be scrapped! 


One of the pages I scrapped while away was my take on the Scrapping Clearly January Sketch. 

You can load your entry and see all the details HERE in our Facebook group.


As mentioned I used the Fancy Pants Golden Days Collection to create my page.
Some photo's of my daughter before her Grade 6 End of Year/Primary School Celebrations.
The Navy Blue and Peach colours in this collection suited these pictures beautifully.


To add some direction to my page I added these arrows from the Golden Days Puffy Stickers pack.


I love this little cluster. A tag with gold foil from the Golden Days Gift Tags and Labels pack, layered with elements from the Golden Days Ephemera pack.


I added some White Linen Dylusions Ink Spray and Heidi Swapp Color Shine splats to that lovely Wood Grain base paper.

And of course my page wasn't complete until I added some journalling about the photo's. I did this on another of the Tags from the Tags and Labels Pack and slid it behind one of my photo's.


Thanks for stopping by today, happy crafting.

Leonie Neal-Dawson