Showing posts with label boy page. Show all posts

Wednesday, 9 October 2019

For the Boys - Traveler's Notebook Spreads | Sue Plumb


Hi everyone! It's Sue Plumb here with my latest guest designer project to share with you. You might recall that last week I shared a pretty floral 12x12" layout (you can see it HERE); so for this week I decided to go in an entirely different direction with some boy themed traveler's notebook (TN) spreads.

My love for TNs has really grown over the past 12 months, as I approach this format quite differently to the "traditional" layouts I do. These little books are less about the process, and more about getting the memories down so I include a lot more journalling. For today's post I was working in one of my sons books and getting a couple of stories recorded for him.


I started this spread with a piece of leftover patterned paper from another project, so I thought I would take the opportunity to use it up on this. (This is a great way to use up scraps.) The paper I used was the I Love You paper from the Simple Stories 'Heart' collection, and I placed a piece on either side of my spread as my base.


The next step was to arrange my photos and my printed journalling. (I pre-print my journalling so I know exactly how much space it will need on the page.) Just like a larger layout, once I have those things in place, it's simply a case of filling in space with embellishments. For this spread I was working with the Ephemera Pack from the Pinkfresh Studio 'Boys Fort' collection


All the embellishments you can see on this spread are from the same Ephemera Pack; and I simply shuffled through the pack and found ones that work work to fill the spaces on my page. The final step to finish off my spread was to add some spots to the white space using a very fine grey felt pen.

For my second spread, I again began with my background. This time I used a scrap of the Treasured Memories paper (also from the Simple Stories 'Heart' collection); along with a scrap of the Happy Go Lucky paper from the Cocoa Vanilla Studio 'Boys Rule' collection


This time I also matted my main photo with the same Cocoa Vanilla Studio patterned paper to help it stand out more on the page. Again, I placed my photos and journalling before turning my attention to the embellishments.


I used the same Pinkfresh Studio 'Boys Fort' Ephemera Pack to embellish this page as I did for the previous spread. This time however, I needed an extra pop of blue so I fussy cut some blue stars from the Starshine paper from the Cocoa Vanilla Studio 'You Rock' collection (using my awesome limited edition gold Fiskars scissors).


I finished off my spread by stamping some little banners using StazOn black ink and a roller stamp from my stash; and with some doodling using fine tip felt pens.

I hope I have inspired you with some ideas for the next time you get creative - maybe try the traveler's notebook format if you haven't already, or even just create something masculine?
Thanks so much for stopping by, I will be back again next week with another project to share.


Wednesday, 2 May 2018

🖤You

Well hello everyone, and welcome to May!! 
Today I’m sharing a 12x12 with you that is very colourful and a little grungy. 
I started with a Paper Arts for my base sheet, this one is Psycadelic 2


I really wanted the paper elements and embellishments to stand out so I swiped some Jo Sonja black texture paste on the base. 
Then proceeded to add colours that were already in the base sheet but would ‘pop’ more. 
So I chose Dina Wakley acrylic paints in turquoise and sky


Then I created tags out of a few sheets from the Heidi Swapp 8x6 pad, And a resist tag to create my layers under my photo. I used a handful of the Tim Holtz rub ons along with some stamps prior to adding the tags. 


Under my photo I tucked a frame that I had, added a couple of the rub ons onto, and then came the embellishments. 
Firstly the Heidi Swapp arrows and the complimentary flairs
These arrows are so easy to work with and add a nice quick easy way to embellish. Then I added a few enemel stars from Heidi Swapp. 


Finally I flicked liquitex titanium white ink around and outlined my tags with liquid paper. 
This page was complete. 
Quick and simple. 
I hope you can play along this month and I look forward to seeing you all very soon. 
Until then, Em xx


Thursday, 12 April 2018

Boy Page using Maggie Holmes Collections with Katie

Good Morning to you all!

Who has been enjoying the Commonwealth Games over the past week?
I have to admit to a few too many hours in front of the TV cheering on the cyclists and swimmers, and although they are being held "just down the road" from me we decided to support from the comfort of our own home. Although we did watch the baton relay run through our neighbourhood, so that was special.

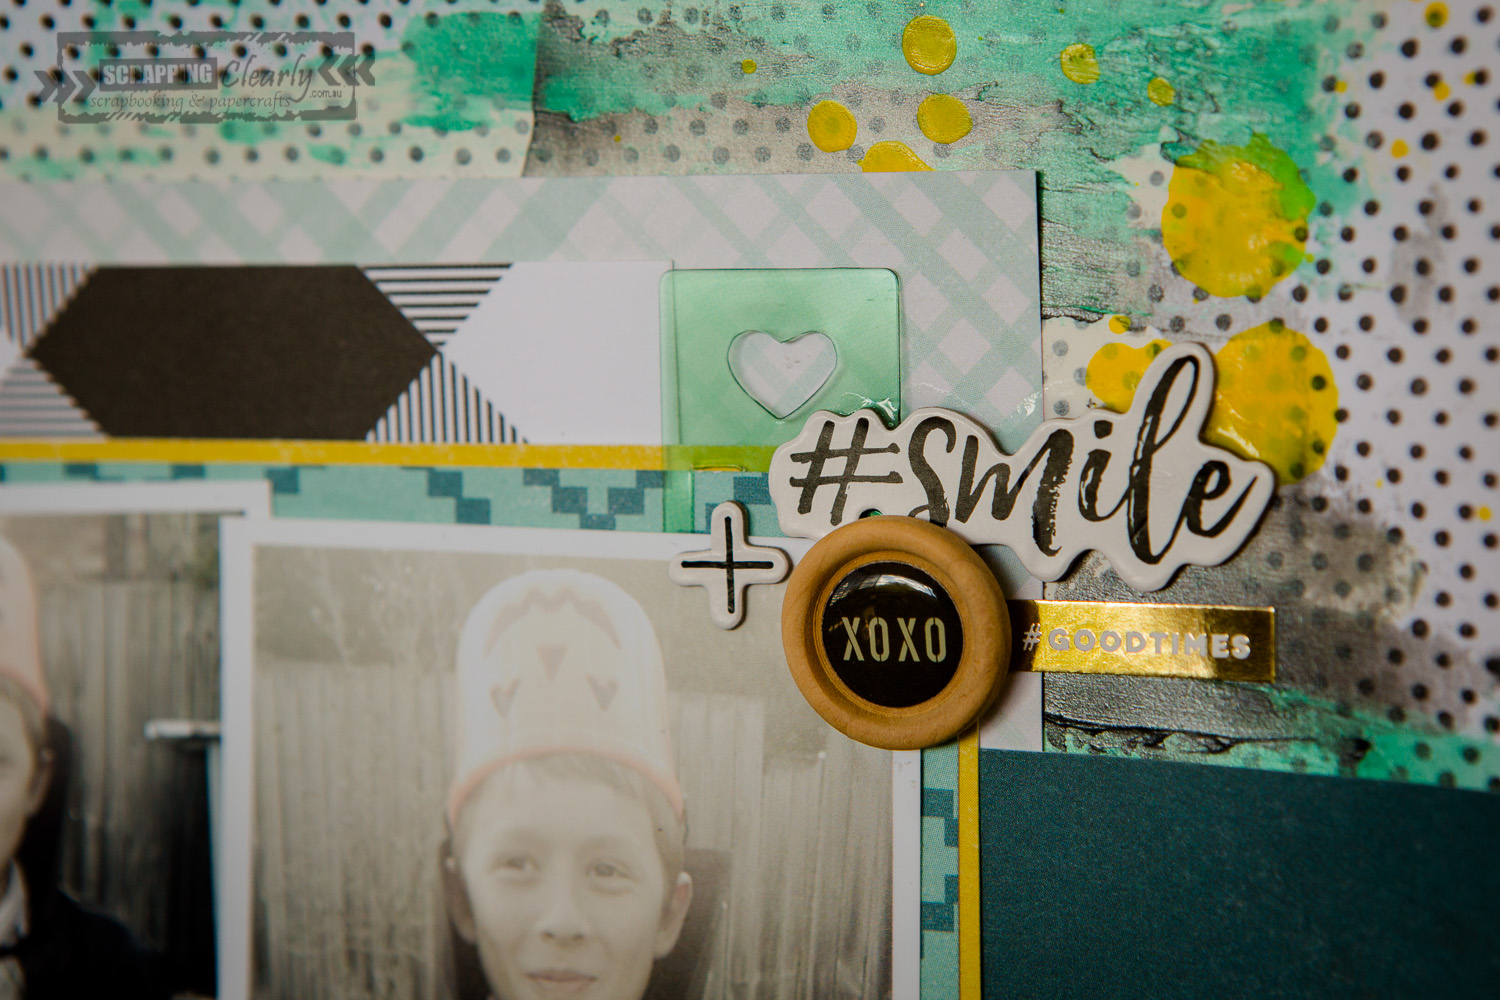
So, back to crafting... my last shares have been showcasing how versatile the Crate Paper Maggie Holmes collections are and I thought I would continue that theme, this time showing you how you can create a very masculine page with supplies that are mostly of a feminine feel. My page has been made using mostly the Gather collection, with some other bits and pieces thrown in for good measure.


 The first thing I did was go through all the papers looking for the colours that had a more masculine feel, like the black and white prints, greens, blues, yellows, wood grains and that kind of thing. I was amazed at just how many papers I had that I could use. Given my photos were of neutral tones I decided to go with a green, yellow, and black & white colour scheme. I followed the same process with the chipboard, Thickers and other embellishments that I had. The papers that I decided to use were: Jane, Magical, Melody, Favorite, Beautiful and Kate. I used Jane for my background as it was a good small black and white print, so not distracting. A great way to get your hands on all the papers is with the 12x12 paper pad, then you have plenty of options with your papers.

To grunge up the background a little I put down some gesso roughly in the area where I was going to add other mixed media and eventually my photos. Once my gesso was dry I used a spatula to spread out some Colour Blast Colour Pastes, you can spread these out like paints to give a thicker more textured result. I used Envy and Stormy Weather as they worked well with the papers. I finished the background off with splashes of yellow using Liquitex Ink in Cadmium Yellow. These inks are great for adding splatters because of the dropper that they come with, and are one of my favourites to use for splatters.

Next, I went about layering the patterned papers behind my photos and then started embellishing.


 The wood enamel button came from the Gather Embellishments pack, lots of great bits included in this set. Also from the ephemera pack, sticker sheet and Gather Thicker set. I used these pieces to create a small cluster.


 In a similar way, I added another small cluster also including a button from the Chasing Dreams collection.


From the Gather chipboard sticker sheet I decided to use the frame as a place for my journalling, it was the right colour and cut down made a great additional cluster. I also added another button from the Chasing Dreams set, the tag from the embellishment set and some word stickers. The title was a combination of numbers from the thicker set and puffy alphas from the Chasing Dreams collection.

Well, that is all from me. I hope this inspires you to look at your collections differently and see if you can use more feminine collections for masculine pages.

Until next time, thanks for stopping by,

Katie x


Saturday, 10 March 2018

Grade 6 - A Back to School Layout by Katie Howard

Good Morning and firstly let me say, oh my goodness it is March already!

Crazy how quickly each month seems to roll around,
it feels like New Year was only last week
and here we are almost at Easter!
Crazy!

Now the question is, am I too late for sharing back to school layouts?! 

Well, in all honesty, this page is already about two years out of date as it is about my son's last first day of primary school (grade 6 here in Queensland) and he started grade 8 earlier this year!
Oh well, I have never professed to being a "chronological scrapper".
Are you?
Do you find you need to scrap in order or are you like me and enjoy scrapping whichever photo takes your fancy?

I am using Fancy Pants Designs Take Note collection, which is, in fact, a school inspired collection, but this collection is so much more than that! It definitely has some school geared papers and embellishments,
but it could easily be used for other themes like travel.


I used the Take Note collection kit, which comes with papers and a 12x12 die-cut sheet
and some 4x4 brag cards which make it easy to put together a page without needing much else.
My page took on a central design, layering papers behind my photos, I also utilised my border punch to create the torn notebook look along the middle section, and the corkboard paper was perfect for a background.


One of my favourite "older tools" is a tab punch, they are great for adding layering details without adding bulk,
and it helps to get more out of your patterned papers too.
Layered with the tabs are a die-cut from the Take Note collection kit ephemera and some chipboard stickers from the Heidi Swapp Enjoy Vintage Chic Collection. This sticker collection has some great neutral shapes to add to just about any page. I finished off with a date stamp on the die-cut.


More layering in this little cluster, again using die-cuts from the Take Note collection and the Heidi Swapp chipboard stickers. This time I also used one of the 4x4 cards, but not as intended, I simply cut it down to form a layering piece with the phrase as I didn't need the whole card.


For my title I used the number six from the Take Note die-cuts and combined it with a stamped label using some stamps in my stash. The perfect matching ink for this was Distress Oxide in Peeled Paint. I love love love these inks, they are so very versatile and stamp beautifully as you can see! Also added was the chipboard camera, again from the Heidi Swapp sticker set, see what I mean about versatile shapes!


This final small detail was created using another one of the 4x4 brag cards from the Take Note collection kit, again I cut it down to be useful for me. I cut it into strips so it looks a little like journaling and, to help to stand out on the busy patterned paper background, I inked the edges using Black Soot Distress Oxide ink.
To finish off, another chipboard shape from the Hedi Swapp set. The final piece was a few black splatters which I added using Liquitex Ink in carbon black. I love using the dropper in these inks for splatters as you get nice round, big drops and splats. One tip - when used on patterned paper the ink is more likely to seep through,
so make sure you protect your work area!

Well, that is it from me today, I am hoping that this inspires you to go and scrap a page of an older memory, get those photos scrapped!
Until next time, thanks for stopping by.

Katie x

Wednesday, 7 March 2018

Mixing it Up with Pocket pages and 12 x 12 with Melinda

Howdy and happy Hump Day!

Hope your week has been kind to you so far, I know the beginnings of my weeks are always super busy.
However, here in WA we had a public holiday and I spent the day at Adventure World with my family, so today only feels like Tuesday!

I have a bit of a different share for you today but first, here are the photos of my 2 pages
that I created using the adorable PhotoPlay Boys Rule collection pack.


Yep, that is a 12x12 page and a pocket style page. Here is a little of the back story!

I like to have something in the boys' albums for each month to sum up what life was like for them that month.
I've found the best way for me to achieve that is to include a few small stories in a pocket page that make up their every day (like in this spread of Hunter setting the dinner table).

Then I do 12x12 pages with the bigger kind of stories (like this month his first day at 3-year-old Kindy). Depending on the month I have 1 or 12 lol

I'm not a huge "this is a really cute photo, I've gotta scrap it" kind of person,
I'm more of a "this is a great story and I have this awesome photo that goes with it" kind of scrapper
which works really well for me.
How do you like to get your stories in your albums?
Are you more of a "this is just an adorable photo" kind of scrapper?
I love learning what inspires others!!

So, I made a process video for this which you can see here.

My very first step was choosing which 12x12 paper I wanted to use for my background
and making sure that I included that as the title card for the pocket page spread.
I tossed up between the "Seeing Stars" and the "Mr Mischief" papers from the collection pack
and ultimately decided the photos popped more on the "Mr Mischief".
I now had a starting point!


I started on my pocket page and picked patterned papers that I thought would work really well then cut them to size (using some of the cut-aparts but also just chopping down some of the 12x12 papers).

I love the continuity over the pocket page and the 12x12 page.


I've used the Heidi Swapp Black Glitter Chipboard Letter Stickers for my title on both pages.


I've used quite a few of the stickers from the Boys Rule collection pack sticker sheet on both pages as well, I love all those little stars that I could sprinkle across both pages!


I worked on 3 areas of embellishment on my 12x12 page layering, a few bits of papers and quite a few stickers. I've also popped up a couple of the stickers to give more dimension and interest to the page.


My very final steps were adding a few stickers from Heidi Swapp's Puffy Stickers sheet,
my journalling in 2 places, and some Bling splatters using my Colour Shimmer Pot by Colour Blast!


I'm super happy with how this spread came together, and even happier that I now have these photos
out of the photo storage box and into Hunter's album!

Thank you, as always, for stopping by,
until next time, happy scrapping!!

Melinda

Saturday, 17 February 2018

Dude - A Scrapbook Layout with Lisa J

Hi scrappy friends,
Hope you are enjoying the weekend.

Today I am sharing a layout featuring some gorgeous Heidi Swapp products: Color Magic alphabets and embellishments, acrylic stars and the September Skies 6x6 paper pad.

My background started with some Colour Blast Paste in Steel through a Heidi Swapp stencil on Bazzill Marshmallow cardstock. Being heavyweight, this cardstock is perfect for taking mixed media without warping.
I added some colour with Tim Holtz Distress Oxide inks in Faded Jeans and Spiced Marmalade and some Colour Blast Colour Spray in Sunset. I also splattered some Heidi Swapp Color Shine in Navy.


I love how the Heidi Swapp Color Magic products can be customised to suit your project. I have used Tim Holtz Distress Ink in Cracked Pistachio.


I have added some stamping in jet black Archival Ink with a Darkroom Door Arty circles and a splatter stamp. I have also added some extra stamping with a Kaisercraft mesh stamp.


I layered some September Skies papers under my photos, trimmed down my white cardstock, and mounted it onto a piece of Pink Fresh Studios Escape the Ordinary "Dare" paper (I cut out the inside first of course). I cut my chevrons from the mint side of this paper and also layered some of the navy underneath all my other paper layers.

I attached the acrylic stars with my Tim Holtz tiny attacher - love this tool for adding acetate and vellum elements.

Thanks for dropping by,
Happy creating,

Lisa J


Tuesday, 30 January 2018

Hello Cute - A Scrapbook layout with Lisa J

Hello all, 

My turn today to share my last project for January with the Cocoa Vanilla You Rock Collection. I have loved working with this collection and I hope you have enjoyed the projects I have shared.


For my last January layout I started with the B-side of the Experimental paper. The gorgeous watercolour style blue ombre just had to be a background.


I added some strips of patterned paper down the left hand side as a base for my photo and embellishments and then just started adding bits and pieces.


There are so many embellishments in the Cocoa Vanilla You Rock collection and they just work together so well.


I finished off with some sprinkles of Heidi Swapp ColorShine in Navy and some enamel dots. My title uses Wood Veneer from the You Rock collection and Teal Puffy Thickers from American Crafts.

If you haven't already, make sure you enter this months challenges on the Scrapping Clearly page.  Entries need to be in tomorrow.
You could win a $30 shop voucher!

Happy creating


Monday, 22 January 2018

Oh Hello Sugar Rush, Scrapbook Layout with Lisa J

Hello there,

It's the beginning of another week already. Only one more week of School Holidays for my boys. Even though the boys are home, I seem to have so much more creative time in the holidays. I will be sad to see them go back to School.

The first weekend of the School holidays, my youngest son Sam and I took a trip to Pokolbin to visit family. We  discovered the Sabor Dessert Bar. Oh it was heaven (so much so that we may have visited twice in two days). If you are ever in the Hunter Valley region I would highly recommend it. But enough of food and back to today's layout.

I started the layout off with white cardstock and a large triangle of one of my absolute favourite papers from the Cocoa Vanilla You Rock Collection "Starshine". I added machine stitching and roughed up the edges with my fingernails but a distress tool would be better for your manicure.


I made a tag from the gorgeous wood veneer pattern B side of the Plus One paper to tuck amongst my layers of patterned paper and die cuts. Some fussy cut stars were sprinkled about for added embellishments.


I added some red tile alphabet stickers from my stash to complete my title. You can find alternative alphabet stickers in the Scrapping Clearly store.


I finished off with a few staples with my tiny attacher and the layout was done. Quick and easy. I love it when the papers do the work for you.

And yes, Sam really was on a sugar rush after devouring three macaroons washed down with a lemonade (luckily for me, he drove home with my sister).

Enjoy your week and happy creating