Showing posts with label Stabilo Aquarelle. Show all posts

Friday, 17 September 2021

Current Mood with Belinda Spencer

 Hello Scrapping Clearly fans!


It's Belinda here with you today to share my latest art journal spread inspired by the September Mood Board. I love working in black and white so I couldn't resist making a second project!


'Current Mood' Art Journal Pages


I started by adding this fabulous Scrap FX Rice Paper using Ranger Multi Medium Matte. I scraped a little heavy white gesso over parts of it using a palette knife once it was dry.


I swiped some black and white gesso over the surface again using the palette knife. Once that was dry I added another layer of collage. I was lucky enough to grab myself the stunning Botanical Collage Paper by Tim Holtz when it was in stock and I am using it very sparingly because I love it so much. These pages just needed some of it though. I tore some pieces of it and added with the same Multi Medium Matte. 


Next I went crazy with stencilling, stamping and a bit of doodling with a white Posca Pen.


I stamped my fairy using the Aall & Create Take Flight Clear Stamp Set. I stamped the girl on smooth white cardstock and the wings on tracing paper/vellum. I used the Vicki Boutin Colour Study Stamp Set to add 'tattoos' to my girl and doodled around them with a black journalling pen. I drew some antennae, fussy cut everything and stuck all the pieces together.


I cut some of the quotes from a sheet of patterned paper from the Heidi Swapp Art Walk 12 x 12 Paper Pad and also used a sticker from the Jenine's Mindful Art Collection Sticker Book.


ART BY MARLENE Stencils
RANGER Multi Medium Matte
COLOUR BLAST Black Heavy Gesso
COLOUR BLAST White Heavy Gesso
UNI Posca Pen White

Thanks for stopping by the blog today. I hope you will play along with the mood board this month too.

Cheers
Belinda


Tuesday, 20 August 2019

BRRR

Hi everyone
I've just spent the weekend at a retreat and although things didn't go entirely to plan
 (ie fell down a step and broke a bone in my foot)
I had a wonderful crafty time.   
This is one of the LOs I created.   Simple but effective I think.

I started by using my brayer and rolling on a couple of different coloured Dina Wakley acrylic paints in Turquoise with a bit of Elephant mixed in.   I then used the edge of my palette knife to add some lines with my left over paint and sponged some black paint through an old stencil.   I think this was a TCW one but this Kinder Kreations Skelton Tree stencil would be perfect as well.  
I added some stitching (machine and hand), some wood veneer snowflakes from my stash and some punched ones , then my title with some American Crafts foam thickers.    
As a finishing touch I added some more colour using a Stabilo pencil which I activated using my water brush pen.

Hope you've been inspired.
'Til next time
cheers
Tracey 

Wednesday, 24 July 2019

Image transfer

Hi everyone

I decided to try something new (for me) with this and did an image transfer.


I started by printing out my photo using a laser printer.  
 (I originally tried a black and white photo but that didn't work.   Not sure why, maybe user error!)   

I then coated both my cardstock and the front of my photo with matte medium using a silicon brush and placed the printout face down on my card stock.   I used an old credit card to squeeze out all the wrinkles trying not to get any medium on the top.   

When dry (well, almost) I spritzed the back of my printout with water and gently tried to rub off the paper.   All I can say is that I should not have been so impatient and waited until it was well & truly dry.   I lost a fair portion of my imagine as it wasn't completely dry.   Lesson learned.


I then dry brushed on some gesso and added some background stencilling.   I used a Donna Downey stencil but any would do.   I then glued down some chipboard pieces I had in my stash.


I added colour with an assortment of Dina Wakley paints and some Distress sprays.   I mixed a little Lime paint with some Faber Castle whipped spackle for dimension an scrapped that roughly through a stencil.
I added some words and highlighted them using a Stabilo aquarellable pencil.

I then finished of with some Viva Décor Inka Gold in platinum and copper which I watered down a little and painted on with  brush.

I'll definitely be trying this technique again.   Why not give it a go too?


Tuesday, 25 June 2019

Tiny Dancer

Hi everyone,

Back again with another LO inspired by this month's mood board


I started with some old pink patterned paper.   I knew I was going to cover most of it up but I just wanted a subtle colour for the background.   I coated it with some Liquitex gesso  and when dry, mixed some modelling paste with some Dina Wakley paint in Elephant and used that through a flower stencil in my background.   I dry brushed on a bit more paint and rubbed it back with a babywipe, repeating the process until I was happy.   I added some Tattered Angels Glimmer Mist in granite and a little Prima Water colour pencils along with a Stabilo pencil adding water to move them around. 


I used some Cocoa Vanilla Life is Beautiful Alphabet Stickers for my title, some Enamel Accents and Liquid Pearls to form little dots and a scattering of Finnabair Art Ingredients Mica Flakes stuck on with gel medium.


I finished by matting my photo base using some old pattered paper and some embellishments from my stash.


Thanks for stopping by.   Hope you've been inspired.


Tuesday, 23 October 2018

All Time Fav by Leonie


Hello, have you entered our October moodboard challenge yet?
See our Facebook Inspiration group to upload your entry.


Leonie here and I have a page today to share that was based on a moodboard over at Scrap The Girls but I never got around to uploading.  But I was so happy with how it turned out that I decided to share it with all our Scrapping Clearly family instead.


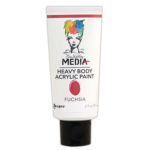
The background was quite easily put together.  I used Dina Wakley Heavy Body Acrylics in Ruby, Fuchsia and Blushing to create random squares and rectangles on heavy weight Marshmallow cardstock.  
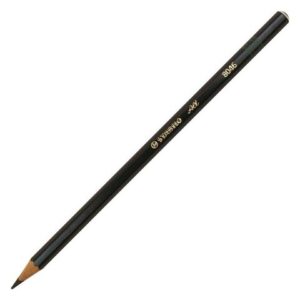
I then used a stabilo pencil to draw a border around each of the rectangles and used a wet paintbrush to smudge out the black line.
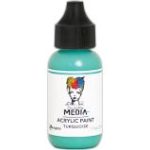
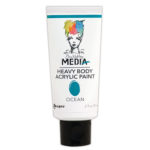
Once it was dry I painted the circular shapes in Turquoise and Ocean. Adding some highlights with White Acrylic and repeated the stabilo pencil outline.


Three strips of the gorgeous Dina Wakley Washi Tape down the length of the page added a border and feed into the white space I created on the Left of the page.
I embellished my page with a Heidi Swapp Glitter title.


I also added some Tim Holtz Ideology rubons to the background just to break up the bright reds slightly.
Some gauze to ground my photo, a small cluster of flowers and Tim Holtz Small Talk Stickers 
and my page was complete.


Thanks for stopping by today, don't forget our gorgeous green toned moodboard for October.
Happy Crafting,
 cheers from Leonie Neal-Dawson.