Wednesday, 24 October 2018

Using up your stash & grabbing a few extras


Woohoooo we are getting closer to the end of the month and I am getting super excited to check out all the new entries for the October moodboard. My latest layout has stayed with the awesome moodboard tones of green but also added blue and a touch of black. I like to scrap general everyday moments like my sewing adventures. This photo is of my Friday night sewing whilst watching the footy.

I love using white cardstock and layering with inks and then adding layer upon layer to get my desired effect. With this layout I added few squirts of color… Dylusions – Cut Grass… and a lovely blue that I seriously cannot for the life of me find in the box of love that has become my ink sprays (apologies now… this will be a MIA search to retrieve the name by the next post) … seriously squirt that stuff on your page a couple of times then unscrew the lid and add a few drips… I kind of like to add it central to my page and drag it up to the top and bottom so it will protrude past what extras I am about to add.


I next  dug out my Kinder Kreations  Eye of Fatima large stencil – gosh I love this stencil … it is so versatile… I have added it in three places …. and I am a lover of just using Modelling paste as is out of the jar… no colour … white is amazing so that the color underneath leaches through. My go to modelling paste of choice is Liquitex… I am a huge fan of Liquitex. Did I say I love Liquitex.... lol.


So how many of you love Project Life – my hand is up – although I have not started one album yet but I have purchased so many of the amazing card kits …..I have some amazing friends who have created the best albums that I am in awe of so I could not just sit by and not buy some of those cards… they screamed YOU NEED THOSE and because there are so many cards that come in the kits with extras of the same I have utilised them on my layout…. so here I have picked a few that suit my layout and added them as background papers/accents, honestly these cards are so versatile.

I have finished the layout off with a few extra wood embellishments & flair that I had hiding in my stash. I have used some black dottie washi behind the photo and a cool blue/teal washi at the top and bottom of the page to border the page, it truly helps tie the page together with that amazing blue ink (which i have no idea of its name right now)


I hope you can grab a little inspo from this … top picks & purchases from this layout for me would have to be my Kinder Kreations stencil, Liquitex modelling paste and dylusions inks….

Happy scrapping .... till next time ... be good but be messy!

Tracey


Tuesday, 23 October 2018

All Time Fav by Leonie


Hello, have you entered our October moodboard challenge yet?
See our Facebook Inspiration group to upload your entry.


Leonie here and I have a page today to share that was based on a moodboard over at Scrap The Girls but I never got around to uploading.  But I was so happy with how it turned out that I decided to share it with all our Scrapping Clearly family instead.


The background was quite easily put together.  I used Dina Wakley Heavy Body Acrylics in Ruby, Fuchsia and Blushing to create random squares and rectangles on heavy weight Marshmallow cardstock.  
I then used a stabilo pencil to draw a border around each of the rectangles and used a wet paintbrush to smudge out the black line.
Once it was dry I painted the circular shapes in Turquoise and Ocean. Adding some highlights with White Acrylic and repeated the stabilo pencil outline.


Three strips of the gorgeous Dina Wakley Washi Tape down the length of the page added a border and feed into the white space I created on the Left of the page.
I embellished my page with a Heidi Swapp Glitter title.


I also added some Tim Holtz Ideology rubons to the background just to break up the bright reds slightly.
Some gauze to ground my photo, a small cluster of flowers and Tim Holtz Small Talk Stickers 
and my page was complete.


Thanks for stopping by today, don't forget our gorgeous green toned moodboard for October.
Happy Crafting,
 cheers from Leonie Neal-Dawson.

Monday, 22 October 2018

Inspired by the Mood Board Part 3 - with DT Katie Howard

Hello and welcome back for the third and final "Inspired by the Mood Board" post! I hope you have been enjoying seeing the many different ways that I take inspiration from a mood board and I also hope that it inspires you to look at them more closely and see all the varied possibilities that they can result in.
Today's post shows yet another different take on the board and a very different result from the previous two creations. First let's look at the mood board again to remind ourselves (in case you have forgotten!):

No automatic alt text available.

This time I took inspiration from the left and centre bottom images, in particular the foliage and flowers in the the forest picture and the frames on the wall in the centre picture. I also decided to go with the light and bright feel of the centre image, and this is the page that I created:


On my page you can see my frame in brown, drawing on the wood in the bedroom and the trees and path in the forest path picture, and then leaves, foliage and flowers from the forest in shades of green and a touch of deep purple/blue.


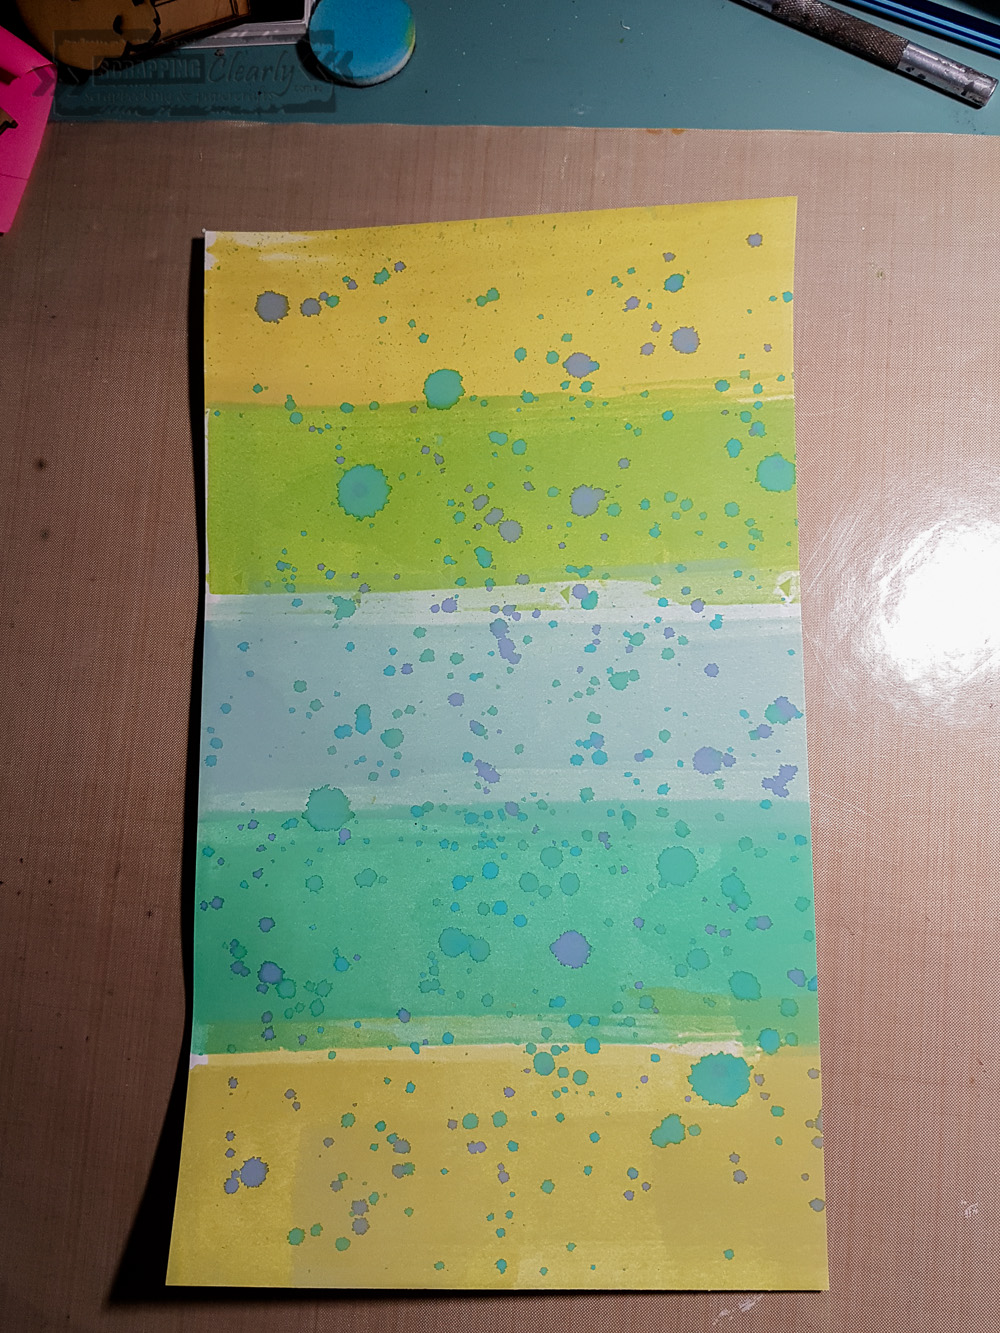
I created my own striped pattern paper using distress oxide inks and a brayer. I added some ink to my craft mat and spritzed some water to create a water colour that I then used the brayer to add to the cardstock. After I made the stripes I added some splatters using some blues and blue green inks to contrast with the shades of green already on the background. The colours that I used were: Evergreen Bough, Peeled Paint, Lucky Clover, Crushed Olive, Mowed Lawn and Peacock Feathers and Faded Jeans for the splatters. To make great splatters grab a largish round brush and pick up some of the water colour ink from your mat and simply splatter!


I decided to add some texture to my background using the Distressed Lace stencil and some white texture paste. The white on white is great for adding texture without adding distraction. To emphasize some of the detail in the pattern I grabbed some gelatos (you could use any water soluble crayon) in pale mint green and a purple and added them directly to parts of my background then used a water brush to move the colour around.

While my background was drying I cut some leaves, foliage, flowers and the frame using my electronic cutting machine and a free cut file from Scrapbook & Cards Today. There are many great free cut files around if you have a look! I used the striped background paper to cut the leaves and foliage from and love how they turned out!

Then it was just a matter of assembling the die-cuts and photos on my page. I used some of the left over striped background to finish my page.


I layered under and over the frame and the photos and didn't stick them completely down so they had more dimension where they curled up.


I finished off with a title from the Crate Paper Maggie Holmes collection Gather, using the word "loved" from the thicker set.

So, there you have it, one mood board and three different interpretations! You still have time to get in an entry for this mood board, check it out on the Facebook Group here, we would love to see your interpretation!

Until next time, thanks for stopping by,
Katie x


Saturday, 20 October 2018

Layers of mixed media


Hi Everyone,

This layout is made up of layers of different mediums.

The first layer was gold gesso onto a garbage bag, lay your cardstock over it and use a brayer.

I then took a template and used clear embossing ink through it, then sprinkled on thick white embossing powder and heat set.

I took my chipboard and heat embossed that also.

I added some glass beads to the background using glossy accents to attach them.

The frame was white so I coloured it with acrylic paints and more glass beads.


Thanks for looking


Friday, 19 October 2018

'These little moments I love...' by Amy

Hi All! 

I have here a simple page using goodies from the gorgeous Pink Fresh Studio 'Escape the Ordinary' range. 

This range is perfect to compliment my photo of young Samuel up in Victoria's High Country.


Here is a list of the items used from the store in this layout: 


Finally, using the Pink Fresh Studio - Escape the Ordinary, I have die-cut some shapes to embellish this simple page.

Here are some close-ups!


Thank you for stopping by; and have a great weekend!

Ciao, Amy

Wednesday, 17 October 2018

Daffodils - With Karyn Schultz!

Hi Scrapping Clearly Lovelies,

It's Karyn here,

Today I have a scrapbook page to share with you made using lots of goodies from the Heidi Swapp Pineapple Crush collection available in the Scrapping Clearly Store.
I'm also playing along with the October Moodboard Challenge. We would love for you to join the challenge and be in the running to win a Scrapping Clearly voucher - you have until October 31 and you enter by uploading your photo to the album in the facebook group here.
I've started with a sheet of paper from the collection and added a piece of white cardstock sized 27cm x 21cm. Next I've stamped the "see" hexagon stamp from the HS Pineapple Crush stamp set across the white cardstock underneath where the photo and embellishment cluster will go - using Twisted Citron Distress Oxide ink pad
Next I've matted my photo on other papers from the HS Pineapple Crush 12x12 paper pad then added a paper clip and glitter alphas (also from the same collection).
I've added more paper strips from the HS Pineapple Crush 12x12 paper pad and ephemera in the top-left corner as well as a puffy sticker.  
I used Ranger enamel accents (Electric Lime) to add some "enamel dots" across my page.  
Lastly I added a flair, punch cuts and handwritten journalling to my page.  
Thanks so much for stopping by 
Crafty Hugs xx


Tuesday, 16 October 2018

Hi everyone, this is my first post on the blog for Scrapping Clearly and I am a little chuffed to be here  & sharing what I hope is a little fun, laughter and inspiration to get you slapping some paint and products onto a scrappy layout and create your own little masterpiece of love.

As you would have read from my bio, I love a good challenge & another thing is that I leave everything to the last minute as I like to think I create better under pressure. This months moodboard is the perfect challenge to get my mojo going and I am loving the zesty green. 


I have thrown a few awesome products into a box whilst running through the craft room on the weekend. I am going to call this my 'whats in the box ' post. It's the fly by the seat of my pants and grab what I can to create a little awesomeness... 


I bet you are wondering 'What's  in the box ', lets take a look.... 

Vicki Boutin Watermelon Burst  – it’s a lush green paint… I love its thickness & coverage 
woven hat mesh in a neutral shade
plus a cute pic of my son.... 

So here goes the process for my layout Wild @ Heart


Lately I have been creating my own backgrounds. This one was created using white cardstock some Vicki Boutin paint in the fabulous shade of Watermelon burst.  I have brayered on the paint and then plonked on a stencil and rubbed off paint with a damp cloth. Ooooh la la one background ready to go!


Next was to ink up the stars on the texture plate and place them on the page. I stamped them in three places in the zone of the photo. The next stamp was also added in three places and working on the outer edges of where the photo will be placed. 


Time to choose the ephemera. I had some woven mesh that I used to back the photo…I have also chosen a frame & various ephemera from the Cocoa Vanilla Endless Summer pack.  Now it is time to put it all together. 


The frame was stapled to my photo and I have glued down the photo corners. I have also added foam tape to two of the corners of my photo and double side taped to the remainder. Time for a quick fiddle around with the embellishments and title before setting everything in place with glue. I love leaving the timber embellishments natural as they tie in well with the skin tones in this photo, they were chosen from the Wild at heart wood veneer pack. A sticker quote was chosen from the Made of Awesome stickers and a few enamel dots later and the layout is all done.

 Wild @ Heart 

Don't forget we are only half way through the month so you have plenty of time to get your entry uploaded to the October Moodboard Album & I cannot wait to be inspired by your creation.

have fun creating 
Tracey