Showing posts with label art philosophy. Show all posts

Thursday, 2 June 2022

Travelers Notebook - 'Believe in Yourself' with Emma Zappone

 Happy Thursday SC fam!
Today I share another TN with you.
This weeks prompt is 'toothbrush paint flick' or I guess just paint flicking.......
I love this prompt, it's fun. Check out the video for my pages here to see how I got my finish.


I kept it pretty simple, using 49&Market products mostly. I added a little strip of Tim Holtz Rice paper I have had in my stash for years. Then I lightly added a dry brush of white Gesso to soften the paper and background. 


I also added a Rubon from the Spectrum Sherbet 49&Market collection on the left side of the pages to use as colour palette for this page. Before I added the embellishments, I added colour with Art Philosophy watercolour inks. This was added in 2 ways, First with a toothbrush (the prompt) which gave a small fine mist of colour over the pages and then with my trusted flicking paintbrush which gave the larger colour splats.


The leaves and butterflies are from the 49&Market Spectrum Sherbet Acetate leaves pack. And my slightly dodgy title is a rubon from the same pack as earlier mentioned. Finally I finished the pages off with some black ink flicked over. I think the pages are relatively simple yet effective. 

Join me over on YouTube to see it all come together.


Catch you again soon.
Em xx


Thursday, 24 February 2022

Stay Wild - TN Thursday with Emma.

Happy Thursday everyone.
Today I share a quick TN with you all. This weeks theme is Flowers.


Who said art had to take a long time? This page only took me 20mins. It probably would have been shorter if I hadn't had to dry everything...😜😜😜


The background pages were primed with white Gesso and then I smooshed Art Philosophy watercolour concentrates over the pages to add that wild bold colour. 


Once these were dried I then embossed inked and an Aall & Create stamp from the Lotus clusters set and using white emboss powder set it on top of the colour. This added a little drama and softness over all that colour. For my focal point I chose some cool images out of an Art by Marlene elements pad. Along with some flowers that complimented this weeks theme.


The quote is from Art by Marlene sticky quotes and then this page was finished with a good splashing of white acrylic paint.

Check out how it all came together here in my video.


Happy creating everyone.
See you again soon.
Stay happy, stay crafty, Em xx


Friday, 5 February 2021

My Here + Now by Belinda Spencer

 Hello Scrapping Clearly fans!!


It's Belinda here today to share one of the layouts I created for the Australia Day Cyber Crop. I created this one for Challenge Four; My Backyard and used some fabulous products from the Scrapping Clearly store.


'My Here + Now'


I used a photo of my backyard which is actually the front yard of our home. We use the back door as our front door though so our house is kind of back to front. That is what you get with a quirky old farmhouse built in the 1800's. We even have an outdoor dunny that you can see in the photo. It gets so cold in the hills in winter so I would not have wanted to go out at night to use that dunny especially with the amount of redback and white tail spiders as well as brown snakes and red belly black snakes we get! Thank goodness for indoor toilets!!

I started my layout by cropping a sheet of the Paper Arts Bubbles 3 patterned paper. I love this paper. It really doesn't need too much mixed media on it as it is quite lovely just as it is. But of course I did add some! I had some Prima Finnabair Art Extravagance Icing Paste in Vintage Gold to play with for the first time. I have to say how impressed I am with this product!! I used it with a Vicki Boutin stencil and applied with a palette knife. It gave a really crisp edge and was quite quick to dry. I am going to be using this a lot and think I will have to invest in other colours.


Next I spritzed the page with some water and dropped in some Prima Art Philosophy Concentrated Watercolour in Marigold. I used a paintbrush (and my finger!) to push the watercolour around a little. Aqua and yellow are such a beautiful combination and the yellow co-ordinated so well with the yellow leaves in my photo.


I added some Peacock Concentrated Watercolour too for a more intense aqua/teal colour.


And because I LOVE stamping I added some stamped leaves to the background for added interest. I am totally in love with the little Inkadinkadoo Cling Stamps. This one is called Branches and has the sweetest little stamps. I used Jet Black Archival Ink which is my weapon of choice when it comes to stamping. It is waterproof and gives a lovely crisp image.


Next, I added some layered patterned papers and my photo.


I stamped some flowers and leaves onto book paper using stamps by Vicki Boutin and the Jet Black ink. I coloured the flowers with the same watercolours as used on the background and left to dry. I added double sided tape to the back of the book paper before fussy cutting each piece. This essentially creates a sticker and reinforces the paper to make it easier to fussy cut. Then all you have to do is peel off the backing and stick the fussy cut piece onto your layout.


Finally, I added some embellishments sprinkled over the page and my title.


Products used:
VICKI BOUTIN Stamp and Die Set
- Right Here
DUSTY ATTIC Chipboard Flies

Thanks for stopping by the blog today. I hope you are feeling inspired to have a play with your Scrapping Clearly goodies too!

Cheers
Belinda


Thursday, 4 February 2021

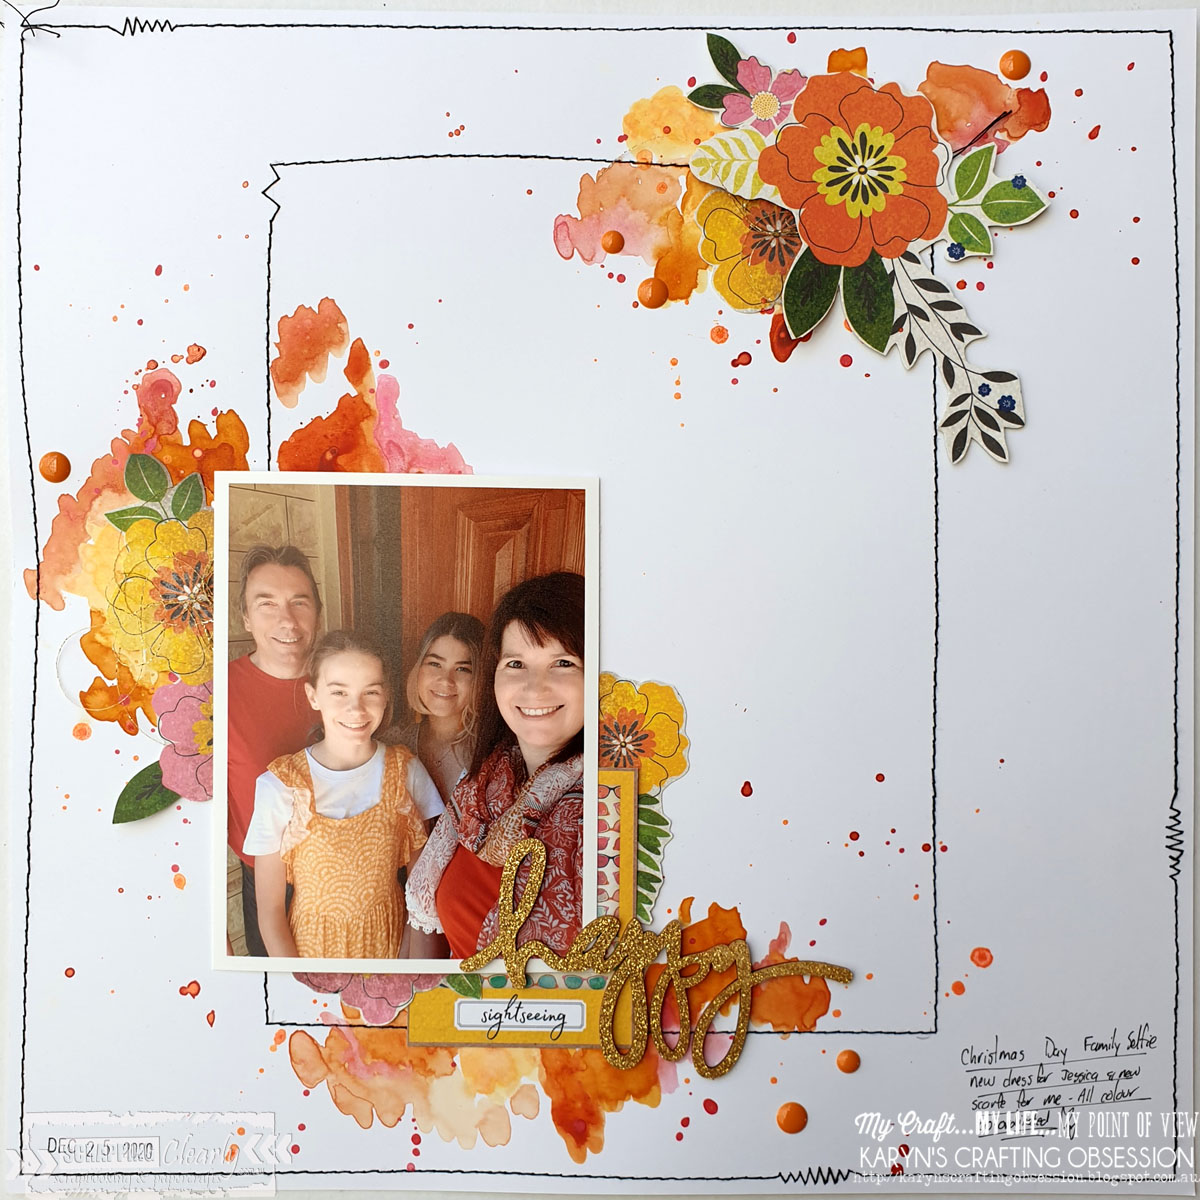
Happy - With Karyn Schultz!

  Hi Scrapping Clearly Lovelies!

It's Karyn here and today I have a scrapbook page that I created using lots of fun products available at Scrapping Clearly
 
 
 I started by sewing a rectangle and border on heavy weight white cardstock . I added zig-zag and straight stitch for interest.
 
  
 To create the background I use Heidi Swapp Color Shine (mustard and rose) and Prima Art Philosophy Ginger watercolour concentrate. I painted it on in places then added splatters.


 Here is my final assembled page.
 
 
I embellished the page using the Vicki Boutin Lets Wander Collection . I used a polariod cut from the "Picture Perfect" paper and fussy cut flowers from the "Sunshine and smiles" paper.


I used a title from the Heidi Swapp wood veeer word pack and enamel dots from my stash.


 Thanks so much for stopping by!
 
Crafty Hugs xx


Tuesday, 15 December 2020

Sir Theo

 Hi everyone and happy crafting Tuesday (that's a thing right?!)

You know when you start with only a vague idea where you're going?

Well, this is what happens.   

I got lost in the weeds but eventually made it out the other side!

I started with my go-to white card stock and added some Art Philosophy water color and some Lindy's powders.


I then ripped up some Prima tissue paper and stuck it down with gel medium.


I then added some paint using a brayer but finished up with way too much green


so wiped some off with a baby wipe through a stencil.   I still wasn't happy so I went over entire page with gesso.   In the weeds, right?


While the gesso was drying I went back in with a baby wipe and took off some of the gesso being careful not to take too much or I'd be back where I started.


I then added some more Lindy's powders and some distress inks.   I gave my chippies a light coat of gesso and then sponged on some Distress Ink to the edges and added a little glitter with a glitter Posca pen. 


I had everything stuck down then decided my background needed something else so I carefully pulled everything up and added some stamping.


 And this is what I finished up with


Products I have used include

Lindy's Stamp Gang Magical Shakers (California Poppy Gold & Cowabunger Copper)
Dina Wakley paint (Lemon, Buff, Evergreen, Ancient)
Vicki Boutin Stencil
Distress Ink (Rusty Hinge & Bundles Sage)
Carabelle Studio stamp scribbled leaves
Fancy Pants Golden Days Cork shapes
Washi tape
 
TFL
cheers
Trace