Showing posts with label Your Creative Wings. Show all posts

Tuesday, 20 March 2018

Stunning 'Paper Arts' Papers with Leonie


Hello and welcome to the Scrapping Clearly blog,
Leonie here with you.
My scrapbook page today is inspired by our March sketch/moodboard combo.  
With a $30 shop voucher up for grabs you can join in with us and link your entry in our Facebook Inspiration Group HERE.
No automatic alt text available.

The Scrapping Clearly Store has a beautiful range of 'Paper Arts' papers in stock. These are fabulously textured and printed papers perfect to use for scrapbook background pages.
Take a look at just a few of the designs below, they are so gorgeous just by themselves.


Adventure 
by Leonie Neal-Dawson


I wanted to add some of my own texture and mixed media elements to these lovely papers so I started out with The Crafters Workshop Light & Fluffy Modeling Paste through a brick stencil inspired by the brick pattern in the sketch.  I then used a second piece of Paper Arts Bubbles 3 paper and adhered torn pieces with Gel Medium
Next, I added some colour with Dylusions Spray in Vibrant Turquoise and London Blue.


More layers were added to my page with some stamping using Kaisercraft clear stamps, watered down gesso splats, more of the ripped Paper Arts Bubbles paper and some gauze.
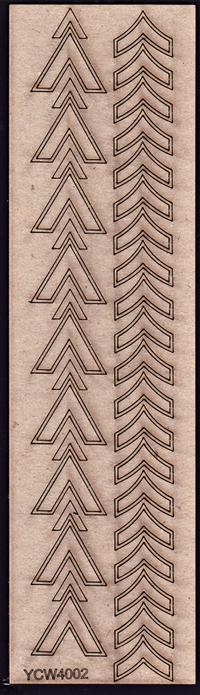
I liked the chevrons on the sketch so I used some chipboard from Your Creative Wings to add some chevrons to my page. 


Cracked Pistachio and Walnut Stain Distress Oxide Inks were used to colour my title Wood Veneer by Heidi Swapp.


These gorgeous gold geotags are by Studio Calico.


Thanks for stopping by today,
I hope you've been inspired to get crafty and join in with our March challenge.

Cheers,
Leonie Neal-Dawson

Saturday, 8 April 2017

April Sketch - Every DREAM begins with a DREAMER

Happy Weekend Scrappy Arty's peeps... 

I love sketches! 

They are the perfect foundation when your brain is stuck and you need some inspiration to hit you. I've used this months sketch, with some of the awesome goodies I received this month from the SHOP to create this moody layout featuring my kidlets... 


I'm a bit of a sustainability nut, and I'm always looking for out of the box ideas to add to my layouts... I literally used the box this month! 
I've used the lid of the black pizza box that my DT goodies came in as my base, and I've stuck down then stitched the 'Hubble' patterned paper from the Shimelle - Star Shine collection.

Then with some Marble Black Dylusions spray, I've misted the paper in random bursts. 


Next I have cut out bits from the Astro patterned paper, sewed around the edges and layered it up with Xpress It Double Sided Foam Tape.

Add to that some of the Your Creative Wings Chipboard – Chevron Strip raw, and some of the amazing Vicki Boutin chunky gold glitter with some Glossy Accents and you have one awesome layout. 


Don't forget to upload your sketch challenge layouts to the Facebook page HERE... 


Tuesday, 22 December 2015

My Daily December


Hello everyone and Merry Christmas!! 
With just 3 days to go, here are some more of my December daily pages. I will warn you there are a lot of photos!!
 This would have to be my favourite Christmas project I have worked on and I look forward to doing one next year. However it will be more formal and more organised to make it easier to complete.
There isn't any journaling shown for privacy purposes but there are plenty of hidden tags, envelopes and project life cards to write on later.

Please feel free to comment below and ask questions on any of these pages as I will be happy to chat about my experience or any of the products.

 The white bow was hand stitched using the Amy Tangerine stitching kit.

 I added the program from our pageant with a custom sized plastic sleeve using the fuse tool.

 I liked using all different size photos for variety and the large full page one has a big impact.

 Here is a small fold out for photos using Washi tape to join the project life size cards together.

Showing a close up of the Washi tape joining the fold out cards.

 The hidden tag behind the photo has a handmade tassel attached.

  Burlap tag for added texture.

 Close up of the acetate page with the beautiful chipboard heart from Your Creative Wings. I attached it with Jac paper and covered the centre with fine white glitter. Looks super cute and I am so happy with the result.

A great way to add photos is to create a collage. I used Pic Monkey and it was so easy. 

 Another custom made sleeve using the Fuse tool, one side with a diecut and shaker pocket. The other side a photo.

 Project life cards backed together are a great quick insert and good for journaling on.

 Heidi Swapp Lovely word die cuts easily through thin cork.

Several different white and gold Washi tapes were used throughout. 
I love this Christmas snowflake die I borrowed from a friend using the gold glitter paper. 
I used the Candy Cane Lane range by Teresa Collins and her Studio Gold project life cards.
Thank you so much for taking the time to look and get to the bottom of my post today. That was very photo heavy! 
We would love to hear how your December daily album is going. 
Till next week,stay safe and enjoy your Christmas holidays with family and friends. 
 Michelle xx


Tuesday, 8 December 2015

Christmas Mini Album


 Hi everyone, how is your December so far?

 It can certainly get very busy and somewhat hectic at times.
 I know it is for me and sometimes I miss the small moments, so for that reason I have felt impressed to capture my December in this mini wooden album from Heidi Swapp. 

This is the first time I have compiled something like this so I decided to use what I have in my home. I will be creating with the Candy Cane Lane range by Teresa Collins found here in the Scrapping Clearly shop.

The beautiful chipboard on this vellum cover page is from Your Creative Wings and I have a few more pieces that I will be using thoughout my album.


This page was created by sewing pockets using an A4 binder sleeve so that my photo a day would slide in and fit perfectly.


Here is the back of that custom made sleeve and I printed on a sheet of vellum my reason for creating this album. The Candy Cane Land sticker sheet and chipboard used to embellish. That glitter epoxy round is made using one of the stickers.


A bowl full of tiny words I created for my December Album. I love how they are custom made just for me and can be added where needed. Just using some double sided tape to the backs.


 Some of the die cuts with enamel dots.


Recipe on the left with a card that can slide in and out of a PL waterfall sleeve that I attached to the page with double sided tape. 

More cooking ideas inside that vellum envelope made to size using the We R Memory keepers punch board found in the Scrapping Clearly store. I will be making more using this punch board as it's easy to use and so versatile. So very helpful for customising your projects.
 A photo collage page with many more pages to come that I will continue to add to this coming week.
 We love hearing about your plans to create this month. Please comment below if you have a question or just want to share your project with us.
Thank you for stopping by and have a lovely day xx


Monday, 30 November 2015

December Daily


Good morning, I have the perfect opportunity here today to share my plans for December! Yes it's that time of year!! What do you love about Christmas?
 Since I have heard of the idea of December daily that was created by Ali Edwards, I have wanted to create an album too but never have so this is the year. I am excited to document my family traditions, to add our stories and photos. 
I am using the Heidi Swapp wooden album and the Candy Cane Lane collection by Teresa Collins for the papers and embellishments. 
All the chipboard are from Your Creative Wings and I just love the elegant detailed pieces here. So pretty and versatile.


I have everything ready to start and this is my cover and first front page. You may remember I shared this cover before a while ago so it makes it super easy for me to begin to fill it now.


  Candy cane lane ephemera and sequins.

 Close up of the first title page.


The second half of my prep for December is this Heidi Swapp Countdown to Christmas Calendar, which will include a photo a day I will share on instagram.

I really want to use what I have already to complete these projects, so the frame for this is an Ikea photo frame I painted gold.


For this I will be using the Believe Collection by Heidi Swapp.

Do you plan on doing Christmas projects this year? Please share what you will be working on and if you are doing December daily I would love to hear from you.
Thank you for stopping by and enjoy your day.
Michelle xx 

Friday, 6 November 2015

Project MY LIFE

Hey there,

Hope you are having a great week! I have been flat out with study and parenting and all that fun stuff, but I managed to sneak in a little tiny bit of scrapping. I completed a cover page of sorts for my personal album and using some of the gorgeous chipboard available now at Scrapping Clearly. http://www.scrappingclearly.com.au/shop/group/your-creative-wings-chipboard-feathers-on-a-stick-sml/ I love chipboard! I am not a big fan of any crazy bulk in my pocket spreads so chipboards works beautifully.
 

I added some colour with Dylusions sprays, some watercolour and a gold sharpie and that  pocket card was ready to go! The centre card has been left empty purposely, so that I can write a dedication of sorts to myself... or maybe a disclaimer in case anyone else reads it! I love the Dylusions, they are so easy to use and the colours are fantastic! I used Vibrant Turquoise and Crushed Grape http://www.scrappingclearly.com.au/shop/brand-ranger/dylusions-spray-vibrant-turquoise/


The layout came together and I love the way the chipboard embellishment turned out, not to mention I really enjoyed getting inky! Awesome Thickers add a little touch of bling too!

Would love to hear your feedback! What are you working on?