Showing posts with label shimmer dust. Show all posts

Wednesday, 20 December 2017

December Daily 2016 - Catch Up with Melinda

Hello there ScrappingClearly fans!!
Melinda here with you today sharing some more of our 2016 December Daily album. 

As I have been working on this years album I have pulled out all of my Christmas supplies
including the gorgeous Pink Fresh Oh Joy Collection that I received last year from Kylie!!
Follow the link and you can find all of the bits still available!

I have 5 pages to share with you today, all of which are pretty simple but, all tell a December story.
I am loving how this album is coming together so far!

First up, I'll share the pages exactly as they sit in my album,
then I'll give you a close look at each page with a bit of "this is what I did/used" with each!
I hope you enjoy!


Up first was our day 16, on the left, and day 17 on the right.
I do still need to finish off the back of day 17, but it has a friend's child
and I didn't want to share without permission. 


The next pages I have to show you are for day 19.
Yep, you did read correctly, I jumped from 17 to 19.
All good however, I know where I have gaps but, I have all my photo's printed
so it's easy for me to go back and complete!!
If you are struggling with your own DD (current or past!) this year,
I have found having the photos at least printed and in pockets helps immensely!


And the last page I have to share is the back of our day 19 - Santa photos.

So, here are the close ups and some more info!


Day 16
First day of our school holidays last year and Pixie our Scout Elf decided it was a good idea to have a movie day!
I'm not loving how that photo ended up getting cut where it did but it's in the album
and I can always re-crop and change it out if it bothers me that much!

For this page I have used some of the gold foiled phrase stickers, some of the Oh Joy Puffy Stickers a 3x4 card I cut from the 6x6 Paper Pad and also a 3x4 card cut from the B side of the Oh Joy 12x12 Winter Wonderland Paper.

I wanted that house with the 16 to pop a little so I grabbed a small white doily and my Bling Colour Shimmer Pot and painted away. With the leftover paint I added splatters on the grey card and also on the 6x8 facing page.


Day 17
This one started with a piece cut from the Oh Joy 12x12 Winter Wonderland Paper cut to about 5 3/4" x 7 3/4" and mounted on white cardstock. I've used 2 of the Oh Joy Acetate Die Cuts and for my number have used some red alphas from my stash.


Day 19 (page 1)
I simply printed my 2 photos at 3x4 and slipped them straight into the pocket. The bottom 6x4 card was cut from a sheet in the Oh Joy 6x6 Paper Pad.
 I've used some number stamps and a punch from my stash on one of my offcuts from the paper pad to stamp out the day and used a pop dot to adhere on the O in season. Journalling, a phrase sticker and a stamp with gold ink and done!


Day 19 (page 2) 
I always like to include individual photos of my boys with Santa as well as one of the 3 of them.
This is one of my most fave traditions and I've loved seeing the way they react to Santa and how their belief changes and grows each year! This was pretty simple as well - I printed this at 5x7, grabbed a page protector, used some washi and re-punched some holes. A couple of really quick embellishments including another of those punched stars.


And last but not least, me and Santa! I do at some point include a photo of me with Santa.
I love the magic and wonder that go hand in hand with believing and how that believing turns into magic for others. Again, a couple of super quick embellishments including an Oh Joy Puffy Sticker, and calling it done!

I am loving how this album is coming together and can't wait to get a "proper" start on this year's albums as well. Like I said, I've printed my photos up to Thursday and know what stories I will be telling. I will stumble a little when I get to Saturday, I had my Aunty's wedding which was great but also my niece babysat my boys and I got a few great photos from her!! Decisions, decisions!! Haha!

I hope you are having a fabulous December regardless of whether you document each day or just your faves. Remember to pop over to the store, you can do a really quick search for "Christmas" and all the Christmas goodies will pop up! In fact, I've already done it for you, just click on the "Christmas" above and it will take you straight to the search results!!

I will be back again on Boxing Day so have a fabulous Christmas, enjoy your day however you may spend it and stay scrappy!!


Melinda

Wednesday, 22 March 2017

You are my happy - Mood Board Inspiration with Amy Prior

Hi everyone! Amy Prior back with you all again today, this time sharing my take on the current Mood Board challenge which has been designed by the amazing Peg Hewitt! Here is the mood board and you can check out the challenge details by clicking here. 


Here is my take on the challenge for this month:


To create this layout, I have started off with a piece of  American Crafts 12x12 Double Thick white cardstock which I have sprinkled some some amounts randomly of Colour Blast - Shimmer Dust - Peacock, Colour Blast - Shimmer Dust - Lush, and Colour Blast - Shimmer Dust - Navy onto.


I have then sprayed some water over the top of the dry powder to activate the coloured pigment and shimmer. Avoid spraying too much water as you don't want the colours to mix too much with each other. 


If the colour is not intense enough, simply sprinkle some more of the Shimmer Dusts over the top until you get the desired effect. You may need to add more water if there is not enough to activate the additional powder.


If there are chunky areas of powder, simply spray more water on those areas to disperse. When the background is completely dry, spray some more water over the top to get this cool bleached effect. The result is a super fun mottled watercolour background!


I have finished off this layout with various Dear Lizzy - Happy Place - Patterned Papers layered, Dear Lizzy - Happy Place - Die-cut Phrases, alongside some die cuts and flowers from my personal stash.

The complete product list for this layout includes...

Thanks so much for stopping by, and until next time, happy scrapping!

Amy Prior xx

Tuesday, 21 March 2017

Mermaid Hair - March Mood Board


Morning Scrapping Clearly Peeps...

Have you had a chance to check out our Mood board this month? As soon as I saw it, I knew this was the photo I was going to scrap. My daughter attend a private school where weird and wackey hair colours are a huge No-No... So for the summer holidays we dyed her maid pastel blue and she declared it 'mermaid hair'. 


I started my base off with a piece of black cardstock from my stash. It was a piece of Core'dinations that had a blue base, so when I have sanded the edges, the blue came through. 

Next grab some Marshmallow Heavy weight cardstock and some Colour Blast shimmer powder in Lush, Navy Sunshine and Peacock and get messy and play!! 

I usually sprinkle a little bit onto the cardstock them apply random spritz of water and let them meld and mix. The effects are stunning and the applications are endless. 


Ive used pieces of patterned cardstock from the
 Crate Paper - Cute Girl range to matt my photo, and the super cute mermaid cut out from the chipboard stickers with glitter accents.


To finish it off, ive added some splatters of acrylic paint in London Blue and Calypso Teal from Dylusions. 


Dont forget to upload your mood board entries to the Face book page HERE to be in the running for some amazing prizes.

Happy Scrapping...

xoxox

Skai


Sunday, 19 March 2017

Beautiful Sketch Challenge sample by Amy Prior

Hi there Scrapping Clearly fans! Amy Prior back again with you today, this time sharing my take on the Sketch Challenge for March 2017 which was created by the fabulous Peg Hewitt! Here is the sketch and you can checkout the challenge details here.


Here is my layout example for this sketch...


I have a full step-by-step tutorial for you on how I created this layout...


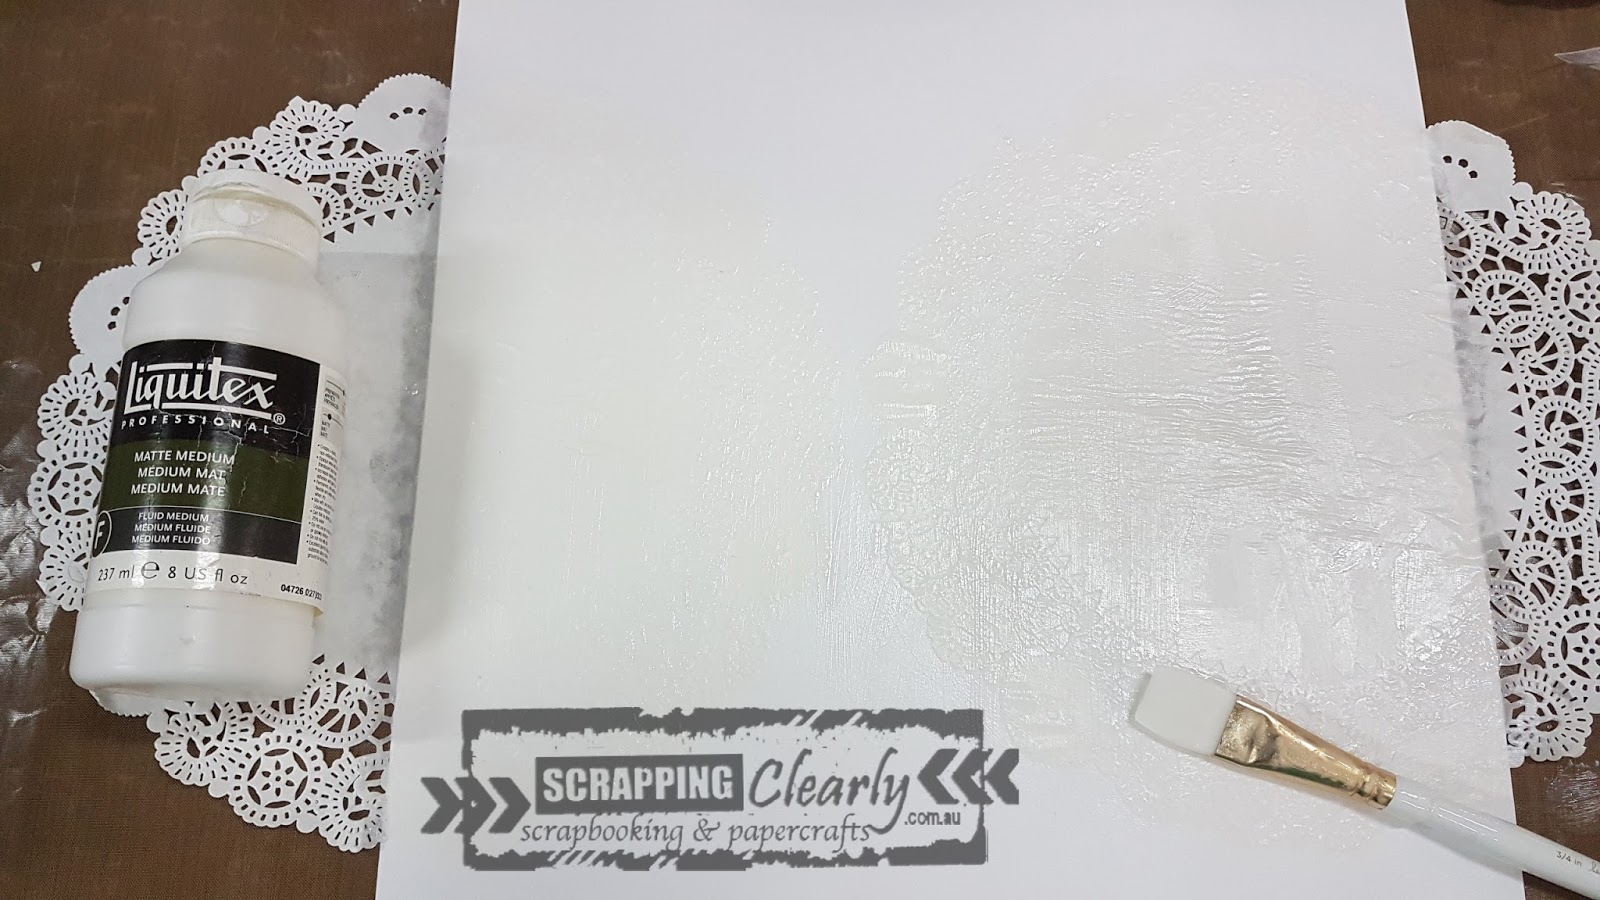
Step 1: Using a Heidi Swapp - Minc Collection - Brushes, adhere some paper doilies onto a piece of American Crafts 12x12 Double Thick White Cardstock with Liquitex - Matte Medium. Paint the matte medium over the top also to seal the paper doily.


Step 2: When the Liquitex - Matte Medium is completely dry, sprinkle some Colour Blast - Colour Shimmer Dust - Navy over the background in the shape that you want to see the colour.


Step 3: Spray some water over the top of the Colour Blast - Colour Shimmer Dust - Navy until you get the desired effect of colour. You can sprinkle more Shimmer Dust if the intensity of colour is not enough or you can dab some excess colour with paper towel etc. if the colour it too much.


Step 5: Sprinkle some Colour Blast - Colour Shimmer Dust - Lollipop over the top of the gessoed wood veneer title.


Step 6: Spray a little bit of water over the top of of the Colour Blast - Colour Shimmer Dust - Lollipop to activate but not too much so you get this fun mottled effect.


Step 7: When the Colour Blast - Colour Shimmer Dust - Lollipop is dry, cover with Ranger Inkssentials - Glossy Accents and allow to dry.


Step 8: Using a Uni Posca PC - 3M Poster Marker doodle around the edges of the wood veneer title to help it pop off the page then set it aside to dry.


Step 9: Cut various pieces of Cocoa Vanilla Studio - Wild at Heart - Patterned Papers and then ink the edges using a Ranger - Mini Ink Blending Tool and some Ranger Black Archival Ink Pad.


Step 10: Using a Prima - Finnabair - Art Basics - 2 inch Mixed Media Silicone Brush, scrape some Colour Blast - Colour Paste - Lipstick through The Crafter's Workshop - 12x12 template - Cherry Blossoms. To get the effect i have here, use different parts of the stencil on either side rather than using the stencil as normal straight in the middle of the page. This gives the effect that the cherry blossom branches are coming in from the edges of the page rather than just sitting in the centre.


Step 11: When the Colour Paste is dry completely, doodle around the edges of the flowers with a Fude Ball Pen 1.5 Black and then put some Simple Stories - Life in Color Collection - Enamel Dots in the centres. I have also added some My Minds Eye - On Trend 2 Collection - Enamel Shapes around the background randomly which I also doodled around with a Fude Ball Pen 1.5 Black.


Step 12: Layer the pieces of  Cocoa Vanilla Studio - Wild at Heart - Patterned Papers underneath your photographs then adhere to the background paper using a good quality adhesive. Double-sided tape does not adhere very well to the Colour Blast pastes when dry.


Here is the total product list for this project:
Well that's it from me today, thanks so much for stopping by and until next time, happy scrapping!

Amy Prior xx

Saturday, 11 March 2017

She's my Perfect 10 - Skai Mitchell

Evening Scrappy Peeps..


Just popping in for a quick share tonight, using this months sketch challenge as my inspiration for this layout. 
I am totally in love with this range of papers by Teresa Collins Designs called Something Wonderful, and I've used the blue and grey tones to create this piece. 


Ive used some Colour Blast Shimmer Dust in Midnight for my base layer, and used the B-side of the Alpha Pattern Paper for my circle. For some reason, I love all the B-sides of this collection, which seem to be the blues and greys. 

Ive used random sheets from the Something Wonderful Paper Pack to matt my photo, and a card from the Something Wonderful Ephemera Tags for my sentiment. 

Add to that some bits from the Decorative Brads, Chipboard Elements, Enamel Dots and Word Stickers and you have one perfectly co-ordinated page


Dont forget to add your sketch entry into our Facebook album to be in the draw for some awesome prizes


Thursday, 19 January 2017

Best time together with Amy Prior

Hi there Scrapping Clearly fans! Amy Prior back with you all again today, this time sharing my take on the fantastic Mood Board challenge we have over on the Scrapping Clearly Community Facebook page. Here is the mood board...


...and here is the layout that I have created using this mood board as inspiration. I have a quick step-by-step tutorial showing how I created the background for this layout below.


Step 1: Scrape some Liquitex - Glass beads effects medium through a stencil using a palette knife over the top of some American Crafts 12x12 Double Thick White Cardstock and dry completely either naturally or using a heat tool.


Step 2: Mix some Colour Blast - Shimmer Dust - Duke & Candy with water and use it to paint some Heidi Swapp - September Skies - Color Magic - Die cuts words.


Step 3: When the Liquitex - Glass beads effects medium has completely dried, spray a deep puddle of water over the areas where you would like there to be colour on your background. 


Step 4: Using the tip of a long thin palette knife, sprinkle tiny amounts of Colour Blast - Shimmer Dust - Duke all over the puddle of water that you have created on the background.


Step 5: If the powder is not dispersing enough, spray a little bit more water just over the top of dry areas. Let it dry completely either naturally or by using a heat tool but try to avoid moving the water around with the heat tool as you want the colours to be blotchy looking for a multi tone effect. 


Step 6: When the Colour Blast - Shimmer Dust - Duke is completely dry, use your finger and gently rub some Viva Decor - Inka Gold - Silver over the texture on the background. 


Step 7: Cut various rectangles and squares out of American Crafts - Shimelle - Starshine patterned papers - various  to layer underneath the photograph. 


Step 8: Finish off the layout with various items from American Crafts - Shimmelle Starshine - stickers, the painted Heidi Swapp - September Skies - Color Magic - Die cuts, and My Mind's Eye - On Trend 2 - Acrylic words. Adhere the clear stickers to white cardstock then fussy cut if you would like them to stand out better like I have here with the hot air balloon.


Products used for this project include:


Well that is all from me today, thanks so much for stopping by and until next time, happy scrapping!

Amy Prior xx