Showing posts with label Kaiser Craft Stencils. Show all posts

Wednesday, 22 May 2019

Handmade cards - using stencil and inks.

Hi everyone! My share today is some handmade cards using a Kaisercraft stencil and distress inks from the store.

I have made these cards with a cool but simple technique, inspired by the scrapping guru Mr Tim Holtz. This technique was introduced a few years ago but I only recently discovered it: it's so simple but effective and fun to do.


To begin, I trimmed down some Kraft and white cardstock to the size of my choice. I then primed the white cardstock with gesso - as was going to work with wet mediums.


A very useful tip here - because the stencil was to be flipped over (and you want to ensure the correct side for printing your images) then lightly mist over the coloured area -


- then flip the stencil over gently and place over the cardstock - and press down the ink with a paper towel, to ensure the paper absorbs the ink. Next, lift the stencil and heat dry the print - how cool it this!


To make the flowers, first, over a craft mat, I stamped various distress inks, as pictured, then lightly sprayed with water and placed a sheet of primed cardstock (or use watercolour paper, if you have some) over it - pressed down - and removed - voilĂ !


Next I heat-dried the coloured cardstock. I love how the colours blend together with the water.


With the Stazon Ink (in Jet Black) I stamped the coloured cardstock with the gorgeous Jane Davenport 'Poppy Girl' stamp

I then fussy-cut the flowers out. I inked the edges of the flowers and the printed the cardstock with both Distress Ink in Vintage Photo and Antique Linen.

To allow the flowers and pop out, I placed them over prepped medical gauze - I had inked the medical gauze with Dylusions Spray in 'Fresh Lime' and 'Pure Sunshine'.

I gently splattered both cards with ColourBlast 'Roadbase' Colour Spray

After both cards were adhered, I selected some quotes from Dina Wakley Media Collage Paper Backgrounds and added some sequins from my stash for some bling... here are some more close ups...


I am happy with how these gorgeous cards turned out. 


Thanks for stopping by!

Ciao for now, Amy


Saturday, 8 December 2018

December Moodboard Inspiration by Leonie

The festive season is upon us and that means a gorgeous December moodboard to create with, 
this one is filled with neutral earthy tones and textures, plus some luscious gold stars.
I hope you can find some time in this busy season to join us. 
Post your creations in the appropriate album in our Facebook group

#Lovethislife
I've stuck with a clean and simple design for my take on this moodboard.
Using papers from Cocoa Vanilla Studios newest collection Midnight.
I chose a woodgrain patterned paper to replicate the woodgrain in the centre image.


Of course I had to add some gold stars like the moodboard.  
I used the Kaisercraft 12x12 Stars Stencil. My favourite star stencil for its different size stars plus some solid and some outline stars.
I first stencils some stars with Dina Wakley Gilt Acrylic Paint.  This is a really nice gold colour paint. The colour of gold paint can vary so much but Gilt by Dina Waklley Media is a nice pale gold colour.
I then stencilled the stars a second time with Bo Bunny gold Glitter Paste. 


Thanks for stopping by the Scrapping Clearly blog,
I hope you get a chance to join in our challenge this month.
Cheers from 
Leonie Neal-Dawson.


Wednesday, 15 November 2017

White on White layout with Karyn Schultz

Hi Scrapping Clearly Lovelies!!! 

It's Karyn here and today I have a scrapbook page to share with you made using lots of fun products available in the  Scrapping Clearly Store.

For this project I've kept with a white-on-white theme. I just love these types of pages -
but they are a bit hard to photograph. 


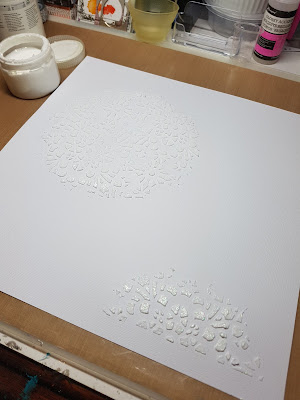
I started my background by applying Faber Castell glass beads glitter gel through a stencil (KaiserCraft Floral Lace stencil) onto white cardstock (under the photo and in the bottom right corner). 


Once this was dry I added a number of layers of white cardstock under my photo (torn edge, straight edge, punched edge) as well as a Teresa Collins Something Wonderful photo overlay.


I then added lots of the Heidi Swapp Color Magic Paper Goods ephemera as embellishments. Usually, you would colour these with sprays but I left them all white.

I used some of the Heidi Swapp ghost alphabet (acetate) for my title and attached using a Tim Holtz tiny attacher

Do you ever do all white layouts?
If not, why don't you challenge yourself this month.
Share your projects with us in our Facebook group, we love seeing your stuff!
Thanks so much for stopping by
Crafty Hugs xx


Wednesday, 4 October 2017

Adventure - With Karyn Schultz!

Hi Scrapping Clearly Lovelies!!! 

It's Karyn here and today I have a scrapbook page to share with you made using the Cocoa Vanilla Studio "You Rock" collection and Colour Blast pastes and shimmer sprays available in the  Scrapping Clearly Store.

I had so much fun creating this page! I havent had much time for crafting lately and had lots of DT commitments to catch up on. So I limited myself to the CVS You Rock collection and a selection of Colour Blast products and went from there. In the end I pumped out 6 projects in 24 hours - BOOM!! If you are ever in a creative rut then my first suggestion is to limit your supplies so you are not overwhelmed with choice :) 

I started my background by spraying and splattering Deep Water and Sunshine shimmer sprays and a red mist across white cardstock - concentrating it under my photo placement and in the bottom right corner. I then added stencilling (KaiserCraft mini stencils) with Deep water, sunshine and dusty charcoal Colour Pastes. 
Next I layered a heap of the awesome You Rock papers under my photo - the colours and patterns in this collection are so cool - perfect for girly layouts too! 
I added a few of the fun wood veneer and rubber embellishments across my page. 
Finally I added some flair and stickers from the sticker sheet - word sticker are my favourite embellishment at the moment!
Although the Scrapping Clearly store is temporarily closed Scrapping Clearly products I've used include 

Cardstock 
Cocoa Vanilla Studio "You Rock" collection (12x12 papers, washi strips, flair, wood veneer, sticker sheet, enamel shapes, rubber charms)
Colour Blast colour paste (Deep water, sunshine, dusty charcoal) 
Colour Blast shimmer sprays (Deep water, sunshine)  
Tim Holtz Tiny attacher
Heidi Swapp roller date stamp
KaiserCraft mini designer templates (dots and dashes, bubbly)
Fude Ball pen  
Ranger Archival ink pad, black

Thanks so much for stopping by
Crafty Hugs xx

Karyn

Saturday, 23 September 2017

Art Anthology Art Journalling - With Karyn Schultz!

Hi Scrapping Clearly Lovelies!!! 

It's Karyn here and today I have an Art Journal page to share with you made using lots of awesome  Art Anthology products available in the  Scrapping Clearly Store.
Art Anthology products were new to me and I was so excited to receive a selection of their products in my latest DT kit from Scrapping Clearly. Whenever I try a new product I start by using it on an art journal page. I rarely have a plan, I just go with the flow and let the paints guide me.

Lately I've been doing my art journalling on loose cardstock with the aim to bind them together with my Zutter bind-it-all. Although I love art journals I find them to be very big and bulky in my small workspace and also I often accidentally spill paints on other pages - which is annoying. So I made this page on a piece of 6" x 6" marshmallow cardstock. 
Firstly I painted blue and purple Art Anthology velvet dimensional medium across my page using a silicone brush (these brushes are so good to use and easy to clean between colours!). These paints are somewhat transparent - sort of like a tinted gel medium. Then I added some stencils - firstly a bubble stencil with brown Art Anthology sorbet dimensional medium (this is also transparent and has loads of shimmer).  
Next I added a dots and dashes stencil with orange Art Anthology sorbet dimensional medium. Then I added some of the red Art Anthology stone effects in places. Next I added some spritzes of yellow, pink and teal Art Anthology Colorations color spray.
After drying this off properly I added a Cherry blossom stencil with yellow Art Anthology sorbet dimensional medium - see the wonderful shimmer!! As I was creating I added any paint leftovers to a scrap piece of cardstock - this is always useful for cutting, stamping and adding to your page, and you dont waste any paint!! I also added some stamping using some fun Dina Wakley circle patterns stamps.
I used my Fude ball pen to draw a boarder around the page. I cut up the scrap page and added it to my page too.
Here are some close-ups of my page - I love how it turned out!!


Scrapping Clearly products I've used include 

Prima Finnabair art basics mixed media silicone brush 1 inch
Art Anthology Colorations color spray (patience, timeless, peacock feathers)   
Art Anthology Sorbet (poppy, chocolate, sunshine) 
Art Anthology velvet dimensional medium (reef, mardi gras)
Art Anthology stone effects (brick)
Ranger Archival ink pad, black
Cardstock  
Dina Wakley stamps - circle patterns (circle collage, etiquette anion)
Fude Ball pen  
Stabile aquarellable black pencil  
Tim Holtz Idea Ology Small Talk Sticker Book  
KaiserCraft mini designer templates - cherry blossom, dots and dashes, and bubbly

Thanks so much for stopping by
Crafty Hugs xx
Karyn