Friday, 23 March 2018

Then and Now - My Evolution as an Art Journalist.

Howdy Bloggers,
Lisa here with a Friday Mixed Media Update.

Extra work days for me don't really allow for much creative time and although I did fit in
a couple of journal spreads, I didn't really photograph anything along the way.
But today I'm sharing with you a blast from the past.
While searching for something to blog about, I was scrolling through FB, and
in one of the groups I'm a member of was a post about sharing your first ever journal page and your latest.


I then looked at my first pages and thought about my progression and journey through Art Journalling.
 So today I'm sharing just that. My 1st ever journal pages, completed in 2011.


I sort of put away my art journals and they didn't really resurface them for a few years 
and then in 2014 I took a few classes and my passion was tweaked again.
With my ever growing art supplies from my scrap stash wanting to be played with more and more,
I had the tools, but found myself a little stuck for ideas and flow.

I would like to credit a few influential people who assisted and inspired my creative journey.
Paula MacMillian Perich for sharing her techniques.
Jane Davenport for providing cool classes.
Louise Nelson for serious inspiration and for being a unique artistic talent.
Dina Wakley for her free flowing relaxed arty pieces.
and to Kim Price, who gifted me an online LifeBook class that helped me lift and grow creatively.
 Of course Youtube is a ripe source of inspiration.
Here a few people who inspire me creatively with their updates
Taking in these inspirational videos feeds my creative soul, as does Instagram
(but that's another post).

So from the evolution of my first pages, 
I now feel much more confident to create art journal pages without stress and with flow. 
Here are some of my latest pages.


For this page I have used a mix of Golden and DWM paints,


Thanks for dropping by the Scrapping Clearly blog today,
I'll be back next week with a new Friday Mixed Media Update .

Lisa xxx


Thursday, 22 March 2018

Together - Lisa J Made a Girly Page!

Hi all,

As a mum to four boys you can probably guess it is pretty rare for me to make a girly page. At a scrap retreat last weekend I decided to challenge myself and I embraced my girly side to scrap a photo of my sister and niece. 

I fussy cut a tonne of flowers from this stunning floral paper from the Heidi Swapp September Skies 6x6 paper pad.

I stencilled my white cardstock background with modelling paste using a floral stencil.

I used some Color Shine in Georgia Peach and brushed on some gorgeous shimmery colour. 

Next step was to add some layers around my photo using co-ordinating papers from September Skies and some tissue paper. A similar tissue paper can be found here.


I added some colour to the Heidi Swapp Color Magic die-cuts using Distress Oxides in Cracked Pistachio and Faded Jeans. I swiped the inks on to my messy mat added a spritz of water then used my blending tool to combine the inks to create the perfect shade and add colour to my chosen pieces. These are so fun to play with and so easy to alter to suit any project.


This was a fun layout to create and it is always good to try something out of your usual style.
What have you challenged yourself with lately?

Happy scrapping,

Lisa J

Wednesday, 21 March 2018

Here and Now Layout - With Karyn Schultz!

Hi Scrapping Clearly Lovelies!

It's Karyn here, 
and today I have a scrapbook page to share with you made with papers from the Bella Bllvd Illustrated Faith Bright and Brave collection and Heidi Swapp Embellishments - all available in the Scrapping Clearly Store.


I started with a sheet of white cardstock and added strips of Geared up for Jesus (teal) and
Borders paper (black geometric) on to each side.
Then I used a stencil (KaiserCraft bubbly mini template) and Faber Castell glass bead glitter gel
in a few spots across my page. 


Once this had thoroughly dried I matted my photo on many layers of paper from the Illustrated Faith Bold and Bright collection kit. I then selected a heap of flower shapes and a title from the Heidi Swapp September skies color magic die cut pkt and painted them a teal colour using my watercolour pan paints

On the right side of the page I added more papers from the kit and fussy cut 2 of the cassette tape shapes. I then added a title and other elements from the Pink Paislee Fancy Free collection foam glitter thickers


I attached the Color Magic flowers while they were still damp - I love how they have curled as they dried and given a 3D effect. finally I added some splatters of Heidi Swapp Teal Color Shine across the page.


Thanks so much for stopping by 

Crafty Hugs xx


Tuesday, 20 March 2018

Stunning 'Paper Arts' Papers with Leonie


Hello and welcome to the Scrapping Clearly blog,
Leonie here with you.
My scrapbook page today is inspired by our March sketch/moodboard combo.  
With a $30 shop voucher up for grabs you can join in with us and link your entry in our Facebook Inspiration Group HERE.
No automatic alt text available.

The Scrapping Clearly Store has a beautiful range of 'Paper Arts' papers in stock. These are fabulously textured and printed papers perfect to use for scrapbook background pages.
Take a look at just a few of the designs below, they are so gorgeous just by themselves.


Adventure 
by Leonie Neal-Dawson


I wanted to add some of my own texture and mixed media elements to these lovely papers so I started out with The Crafters Workshop Light & Fluffy Modeling Paste through a brick stencil inspired by the brick pattern in the sketch.  I then used a second piece of Paper Arts Bubbles 3 paper and adhered torn pieces with Gel Medium
Next, I added some colour with Dylusions Spray in Vibrant Turquoise and London Blue.


More layers were added to my page with some stamping using Kaisercraft clear stamps, watered down gesso splats, more of the ripped Paper Arts Bubbles paper and some gauze.
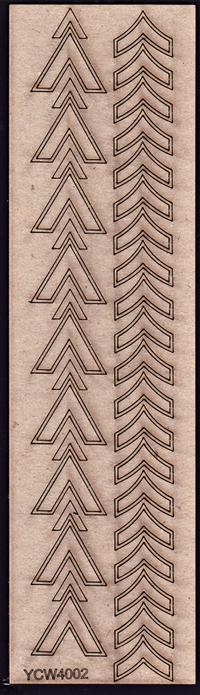
I liked the chevrons on the sketch so I used some chipboard from Your Creative Wings to add some chevrons to my page. 


Cracked Pistachio and Walnut Stain Distress Oxide Inks were used to colour my title Wood Veneer by Heidi Swapp.


These gorgeous gold geotags are by Studio Calico.


Thanks for stopping by today,
I hope you've been inspired to get crafty and join in with our March challenge.

Cheers,
Leonie Neal-Dawson

Monday, 19 March 2018

Mixing Collections - a scrapbook page with Katie

Good Morning!
How are we all traveling?
Personally, I am finding myself pretty busy doing all sorts of catch up things around the house, cleaning out, rearranging that kind of thing. We ordered ourselves a new lounge in January and we are looking forward to a fresh new look in our room when it finally gets here, but it also means some other "sprucing" up, new rug, move the furniture that kind of thing. Do you get the "need to change things" bug too? It hits me every now and then and my hubby knows it is best to nod, say yes dear and stand back!

Now to scrapping, today I am sharing a page that I created combining bits and pieces from two different Maggie Holmes collections. The great thing about her collections is that they do have some common threads through them making them very easy to mix and match to create a page or several pages! I was also inspired by the current mood board when creating this page. 

 No automatic alt text available.

It was primarily the colours and the flowers that inspired me, because they match Maggie Holmes collections very well, and she loves flowers too, a match made in heaven. This month you can combine the sketch and the mood board into one page, check it out here.


I mostly used the Crate Paper Bloom and Chasing Dreams collections to create this page, but there are many Maggie Holmes collections and you will find that they all work pretty well together!
I used a patterned paper from Chasing Dreams called Moment for my background as it was the perfect colour but also had a distressed look to givesome interest.
Most of my other papers were from the Bloom 6x6 paper pad, yes even the big strips behind the photos! Tucked in behind the photos you would never know they came from a 6x6 paper pad! The glitter piece is from Chasing Dreams and I love how it adds a little bit of gold sparkle without taking away from anything else!


My title word "Love" came from the Heidi Swapp Vintage Chic chipboard stickers and it was the perfect pink to match in with the other colours. The title was layered on other chipboard stickers that came from the Bloom collection, while the black phrase sticker is from Tim Holtz's Idea-Ology range of small talk stickers. These are some of my favourite to use, so easy to add in and a great way to add pops of black too. Don't be afraid to layer your chipboard pieces too, it is the perfect way to add that depth without too much bulk.


I am loving these vintage buttons from the Chasing Dreams range, there are four different colour and styles of buttons and they are great to add to tags and include in embellishment clusters. The rubber charms in the Bloom range are also fun to use and are a great way to add some unique texture too.


Thanks for stopping by,
I hope this inspires you to have a go at
mixing your collections.

Katie x


Sunday, 18 March 2018

{unloading in a art journal}

Morning to all our Sunday readers,
I hope you're all having a happy Sunday, it's quite warm and windy here and our internet is on the fritz, thank goodness for mobile phone hot spotting......
Great day though for spending time creating and getting painting!

Today I am sharing some pages in my Dina Wakley Journal, I love this journal so much and I have just started creating in Dina's new larger version. I can't wait to share it with you all. I have so many pages that I never seem to share so today, instead of just one, I am sharing a few in the hope these may inspire you, and get your creative juices flowing to start creating in your own journal.

I once read that art journalling really doesn't have to be expensive or complicated. It's one of the most forgiving ways to make art because, in an art journal, everything you make is safely contained within your own personal book. You may choose never to share any of your pages with anyone (or everyone!) so it's a space where ... you can let loose and explore with colours, shapes, lines, and your words all at once. 

You may choose to leave your journals more free-form and expressive, or you may want to have more of a “finished” art product on each page. I think that art journalling is a great way to paint what you're feeling, your own visual diary, and a great way to test out new products and ideas.

I would love to see you all share an Art Journal Page of your own over on the SC Facebook community page where we can all inspire each other........


I hope you have enjoyed my share of some of my arty pages and I hope they inspire you to also get your art journal out and have a play.......

Enjoy the rest of your day.