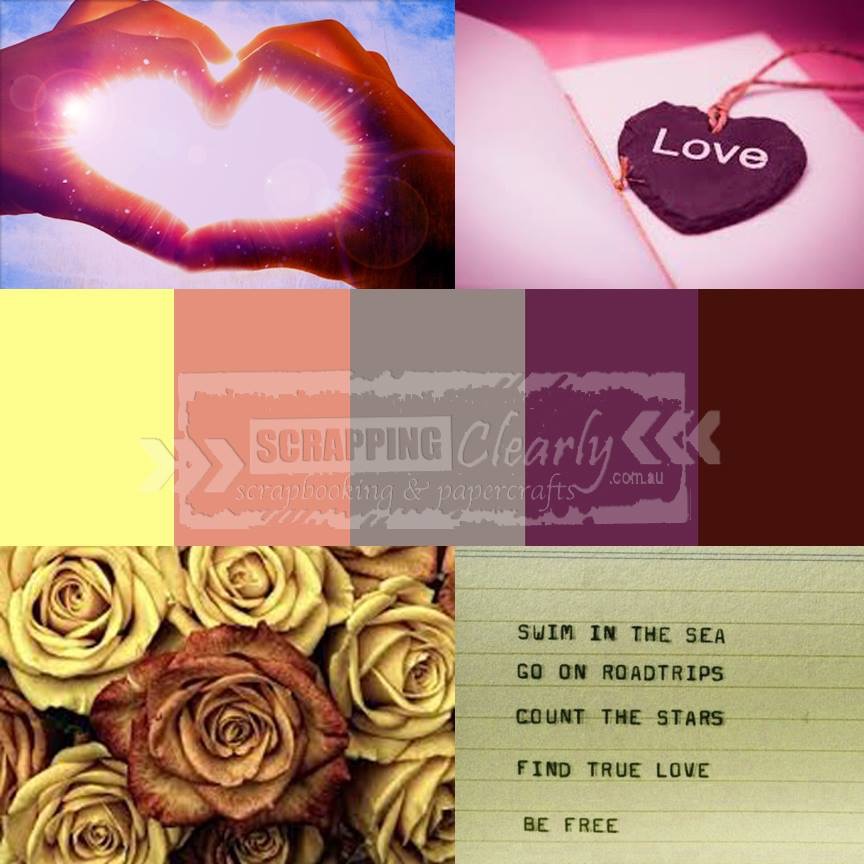
Have you seen our beautiful Feb mood board yet? I hope this inspires you and you will create a project - there are fabulous prizes up for grabs! It's a bit love themed, being February ...
I focused on the greys and purples, the flowers and hearts :)
I dug into my Scrappingclearly stash and used a mix of products for this page ....... some Cocoa Vanilla Studios along with some Dear Lizzy ...
Products used:
Dear Lizzy – Happy Place 12 x 12 Pattern Paper Lemon Berry
Prima – Royal Menagerie Collection – Flower Embellishments – Maud
Dear Lizzy – Happy Place Glitter Stickers
Cocoa Vanilla Hello Lovely -Sequins
Sunday, 12 February 2017
Thursday, 9 February 2017
Week One 2017 - Feb Mood Board Inspiration with Melinda
Hi, hi ScrappingClearly fans, Melinda here with you today sharing my take on the gorgeous February 2017 mood board, once again designed by the very talented DT member Peg Hewitt!
Here is the board again if you have not seen it!
All about the lovey stuff, awwww! I did avoid the purple - no surprises there but I loved the softness of the pink and the yellow. The picture in the top left reminded me of Summer and I just love that beautiful burst of sunlight in the heart!
I was sent the gorgeous Cocoa Vanilla Studios range called Free Spirit and I immediately thought it was a great match! I got to cutting up the papers and putting our first week of 2017 together for our Project Life album!
Here is the completed double page spread
Sorry about the glare, it is a bit tricky for me to photograph both sides together. But here they are separately
Left side
Right side
And here is my process in video form if you would like to watch!
I decided to use the WRMK pink embroidery floss also included in my kit to create some extra interest on 3 of the cards
This is our title card for the week
I loved how the word Summer looked in the font I chose to embroider with
And this photo is an absolute fave of mine! Love this memory - seeing the sheer joy and pleasure on my boy's face just made my day! Oh, and in case it needs clarifying, Mia is the horses name ;)
Also, on those 3 cards I brought in a little extra something using some Studio Calico gold sequins and some Ranger Flamingo Liquid Pearls (which I had never used before!) in a little cluster.
I have used my WRMK typewriter for all of the journalling and learnt that when using it, 1 layer of cardstock is just enough. If you put through 2 layers, it's a little trickier ;)
Thanks so much for stopping by today and make sure you get your take in for the gorgeous mood board challenge for this month over here in the FB group!
Happy scrapping!
Melinda
Products used:
Cocoa Vanilla Studios - Free Spirit - 12x12 paper Wallflower
Cocoa Vanilla Studios - Free Spirit - 12x12 paper Word Jumble (both sides)
Cocoa Vanilla Studios - Free Spirit - 12x12 paper Dreamy
Cocoa Vanilla Studios - Free Spirit - 12x12 paper My Way
Cocoa Vanilla Studios - Free Spirit - Sticker Sheet
Heidi Swapp Pink Glitter Alphas
Ranger - Liquid Pearls - Flamingo
WRMK - Pink Floss
WRMK - White Typecast Typewriter
Studio Calico - Gold Sequins
Wednesday, 8 February 2017
Pure Love - Sketch Challenge
Evening Arty peeps... popping in today for a double share of inspiration!
I was reading on a group page recently what gets every one creating when they are lacking inspiration, and the main response given was sketch challenges.
Sketches are a great 'base' to any layout and can be the springboard to creating beautiful layouts. There are no hard and fast rules, so you can interpret any way your mind see's it. This month I've used our sketch challenge top creating this gorgeous layout featuring my friends newborn bubby and these amazing pictures from their newborn shoot.
I began with a sheet of white Marshmallow cardstock and painted the edges with Ceramcoat Acrylic paint in Pink quartz
Next I've layered up a hand cut heart from Cocoa Vanilla Studios 'Dreamy' that I have inked the edges of with Distress Ink in Picket Fence and machine stitched onto my background.
Layer up your photos with Foam Mounting tape and begin to stick your embellishments down with Glossy Accents. Ive used some random embellishments left over in my stash, as well as Cocoa Vanilla 'Free Spirit' flare. Add some Thickers for your title and you have one finished layout.
Dont forget that Scrapping Clearly has an awesome prize pack to be given away each month. All you need to do is create a sketch based on our example and upload it the challenge folder on Facebook HERE
I cant wait to see what you create...
Gallery Wall Arrow by Lauren Hender
Welcome back to the Scrapping Clearly blog.
Today I have a fabulous beyond the page project to share with you.
I had a great time putting it all together and although it looks a bit tricky each step is actually simple to do.
Heidi Swapp is the feature product designer of this project.
See below are some the main products I used to create this project.
How stunning is the screen stencil!
Step 1 is to paint your arrow with a base colour. The paints that I have chosen to use are the Annie Sloan chalk paint. Any acrylic paint will do provided it does not have a high gloss finish.
If you are in the US Heidi herself promotes a company that produces chalk paint, so stop by her Instagram account and see if you can track them down.
Step 2 is to dry off using a heat gun. You will want your project to be really dry before applying the next coat.
Surprise surprise, step 3 is to apply the top coat.
Next step (4) is to sand off the edges to let some of the base coat through. This gives a nice rustic feel. The sandpaper I use is quite fine. I find it works best and takes off just the right amount of top coat.
Now the fun begins.. Step 5! Using the screen ink stencil and some Heidi Swapp screen ink paint. Apply the paint. To do this I did the top of the arrow and the bottom of the arrow, left it to dry before doing the centre. This meant that I was smudging the wet ink in that I had already completed. I used the minc screen ink as that is all I have but I know that there are a range of colours available to choose from.
Step 6: Once the ink is dry sand of the edges again, dust off with a cloth and apply a top coat. I have used some wax featured below but a sealer of some type will do the trick. Remember to give it a buff to achieve a nice professional finish.
Step 7: Using the HS clips and chains set I measured out along the arrow where I wanted to set my hooks. I then cut the chain to my desired length.
Step 8: I thought I would have been strong enough to screw in by hand the hooks but I should have known the HS timber is top quality and hard, so therefore I had to call the hubby to help create the holes for the hooks.
Step 9: I then fired up the minc and foiled the centre piece for the project. This is one of the HS Minc products available to purchase. It comes in a set with others and I assure you, you will love them all.
Step 10: Sit back, peal off the foil, do a happy dance because it's just like magic and soo pretty!
Step 11: Using some sheer white ribbon a made two holes in either side of page and poked the ends of the ribbon through. I tied a knot to secure it and tied the two other ends of the ribbon into a bow which will sit over the centre hook.
Step 12: Aww so pretty lol
Step 13: I then clipped my two photos on and put the chains on the hooks.
I was so pleased how it turned out.
So lets go shopping for all you need..
Hope my beyond the page project has inspired you to get a little messy.
Lauren xo
Tuesday, 7 February 2017
Adorable together February sketch challenge example with Amy Prior
Hi there Scrapping Clearly fans! Amy Prior back with you all again today, this time sharing my take on the gorgeous February sketch challenge which has been designed by the amazing Peg Hewitt!
Here is the sketch for this month and you can checkout our current challenges by clicking here.
Here is my take on the this sketch challenge using a photo of my gorgeous daughters with their friend Tayla taken at the Road to Bethlehem in December 2016...
I just love this gorgeous colour of Colour Paste. It is transparent and ever so glittery which makes my heart so happy but this makes it very hard to photograph as you can see sorry. When the Colour Paste was dry, I have sprinkled some Colour Blast - Shimmer Spray - Bling randomly around the background using the lid of the spray bottle.
To create the background for this layout I have simply scraped some Colour Blast - Colour Paste - Snow White through this gorgeous love heart stencil over a piece of American Crafts 12x12 Double Thick White cardstock.
There are so many layers of gorgeous Crate Paper - Cute Girl Collection - 6x6 paper pad underneath my photograph including some strips that I have fringed and layered above a strip of American Crafters 12x12 Gold glitter cardstock. If you don't have fringe scissors or a We R Memory Keepers - Party Collection - Fringe and score board, you can just cut the fringing using a normal pair of scissors.
The final touches of this layout included embellishing with items from Crate Paper - Cute Girl Collection - Paper tassels, Crate Paper - Cute Girl Collection - Thickers, Crate Paper - Cute Girl Collection - Ephemera, and Maggie Holmes - Bloom Collection - Rubber Shapes packets. I have also doodled around the edges of the title sticker with a white pen so that it stands out better.
The complete product list for this layout includes...
American Crafts 12x12 Double Thick White cardstock
Crate Paper - Cute Girl Collection - 6x6 paper pad
Crate Paper - Cute Girl Collection - Paper tassels
Crate Paper - Cute Girl Collection - Thickers
Crate Paper - Cute Girl Collection - Ephemera
Colour Blast - Colour Paste - Snow White
Colour Blast - Shimmer Spray - Bling
Maggie Holmes - Bloom Collection - Rubber Shapes
American Crafters 12x12 Gold glitter cardstock
American Crafts 12x12 Double Thick White cardstock
Crate Paper - Cute Girl Collection - 6x6 paper pad
Crate Paper - Cute Girl Collection - Paper tassels
Crate Paper - Cute Girl Collection - Thickers
Crate Paper - Cute Girl Collection - Ephemera
Colour Blast - Colour Paste - Snow White
Colour Blast - Shimmer Spray - Bling
Maggie Holmes - Bloom Collection - Rubber Shapes
American Crafters 12x12 Gold glitter cardstock
Well that is it from me today, thanks so much for stopping by and don't forget to head on over to the Scrapping Clearly store to purchase all these products and more by clicking here. Until next time, happy scrapping!
Amy Prior xx
Amy Prior xx
Monday, 6 February 2017
January winners!
Congratulations to our January winners!!
Please message Kylie for your code to spend your $30 voucher in our amazing shop
What Happens At Retreat....
G'Day Arty Peeps!
Welcome to the blog.
Today I have my February Sketch page to share with you. I created my own background using a Crafter's Workshop stencil, a handcut heart mask, and some teal and mustard Heidi Shine mists, and orange Dylusions, on a piece of heavy weight cardstock. I used a broad black marker to outline my heart.
Here's a close up of some of my background, love that mustard mist!
And my new favourite toy, The WeRMK Typecast typewriter, was used to journal directly on my page before I stuck everything down. My lines are not quite perfect because the extra thick cardstock struggles to roll effectively in the typewriter, doesn't bother me at all though.
Here is the finished page.
My title, phrase, and border under the pics are from this sticker sheet. The foam hearts are from here, The flowers are Cocoa Vanilla and the enamel shapes are My Mind's Eye.
Here's the sketch, I hope you come and play along, upload your creation here.
Thanks for coming by.
Labels:
AC Thickers,
BoHo Dreams,
Cocoa Vanilla,
Design Team,
Dylusions,
Heidi Swapp colorshine,
marshmallow,
Peg Hewitt,
Scrappingclearly,
sketch challenge,
TCW,
Typecast,
WeRMK
Subscribe to:
Posts (Atom)