Hello hello
I here to share a Village of Reverie with you all.
The inspiration for this village is from the March mood board and the Lucky Findings Foundation Pack - Reverie.
Now my Village is pretty tiny, and it all started with these tiny chipboard houses that I have been hanging onto for years that Jo Kinder created for me. Yep, my houses thing has been happening for a little while now.
and they turned into this.....
view from the back.
so let me give you a quick rundown (quick because I forgot to take photo along the way). I started with the house on the left and then repeated the process along the way.
The base background was the Reverie Marks Rice Paper. I then filed all the edges to rough them up a bit and added some swipes of Ranger Tim Holtz Distress Oxide - Salvaged Patina (a little spritz of water) and dried all the pieces. I did do a bit of a whoopsie (photo below) and rubbed a little too hard before things were dried. Yep, I am an impatient creator, even with a heat gun.
For all the roofs, I used the same technique. Painted the bases, covered it with Matte Medium and Lindy's Embossing Powders (each one a different powder) - Groovy Granite, Carefree Verdigris, and Don't Scream Aquamarine.
For the embellishments I used pieces from 2 different resin packs - Cogs and Wings and Nocturnal Insects . I covered the individual pieces 2 layers of paint - Pthalo Green and then black.
For the screws I then rubbed the paint back a little to expose the resin in parts and then added some of the Art Alchemy waxes. The insects, wings, and cog pieces, I did the same base layers but then mixed up the waxes on top so that every house had a slightly different highlight. The waxes I used throughout the pieces are: Art Alchemy Metallique - Aged Brass, Old Silver and then Art Alchemy Opal Magic - Blue Velvet, and Art Alchemy Antique Brilliance - Lucky Emerald. **Note to self - get more of these colours!!!.
I then assembled all of the pieces together and added some Lucky Foundations Design Reinforcements from the Reverie collection and finished with some saying from the Tim Holtz Ideaology Small Talk set.
So, I think that is enough chatter from me. So now I'll let you sit back and enjoy.
oh and I should add - this little guy stands 9cm tall, is 4 cm across the front, and 2.5cm wide.
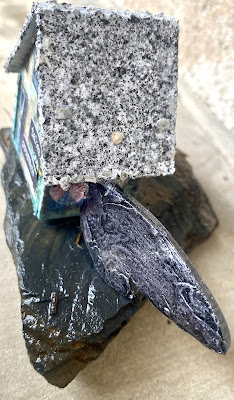
The next little one I wanted a little different. So, this time, I used the Stamp Collection Rice as the background and added the resin Wings coming out the side.
oh and because you can see the back of the wings, I roughly added some texture paste prior to colouring them to give it some added funness (yes, that is a word).
the dimensions of this litttle guy is - 5.5 cm tall, 3.5 cm across the front (plus wings), and 3cm wide.
for the last of the series, I used Design Paper/Rice as the base and featured the insect from the paper on the back of the house to help tie the whole series together.
back, I love how vibrant the insect became.
The demensions of this last guy are: 6.5cm high, 5cm across the front side, and 3cm wide.
Please let me know what you think about this little Village.
oh and also - How do you use your Stamp Collection Rice page out of any of the Lucky Findings Art Foundation Kits.?
Live with Respect
Leanne xo


No comments:
Post a Comment