
Hi there Scrapping Clearly fans! Amy Prior back again with you today, this time sharing my take on the Sketch Challenge for March 2017 which was created by the fabulous Peg Hewitt! Here is the sketch and you can checkout the challenge details here.

Here is my layout example for this sketch...

I have a full step-by-step tutorial for you on how I created this layout...
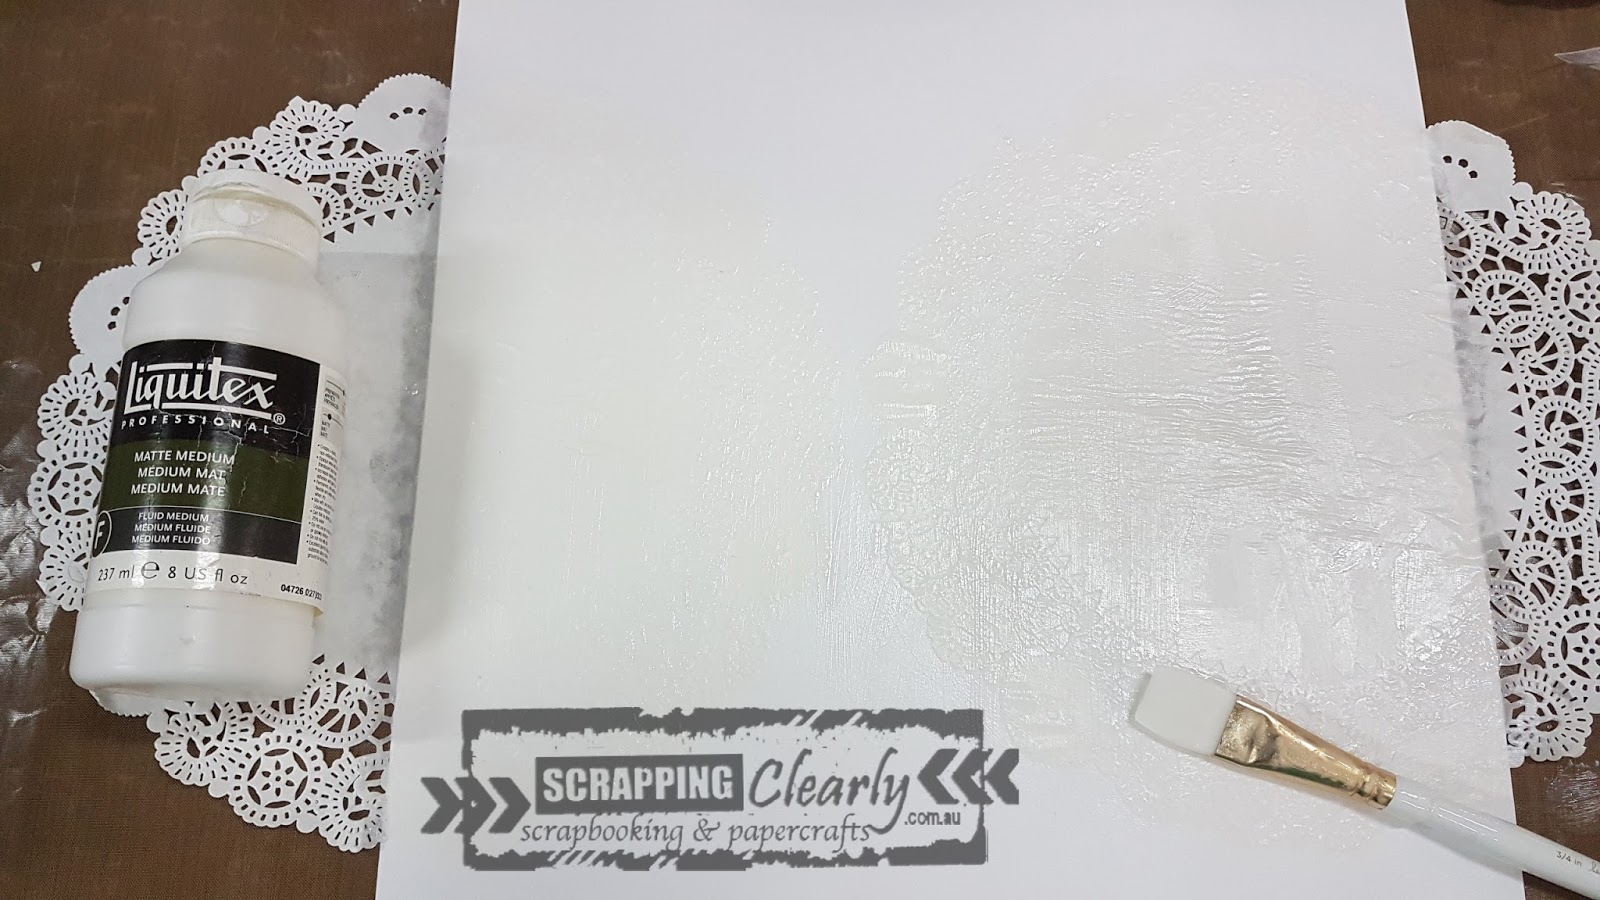
Step 1: Using a Heidi Swapp - Minc Collection - Brushes, adhere some paper doilies onto a piece of American Crafts 12x12 Double Thick White Cardstock with Liquitex - Matte Medium. Paint the matte medium over the top also to seal the paper doily.

Step 2: When the Liquitex - Matte Medium is completely dry, sprinkle some Colour Blast - Colour Shimmer Dust - Navy over the background in the shape that you want to see the colour.

Step 3: Spray some water over the top of the Colour Blast - Colour Shimmer Dust - Navy until you get the desired effect of colour. You can sprinkle more Shimmer Dust if the intensity of colour is not enough or you can dab some excess colour with paper towel etc. if the colour it too much.

Step 4: Paint a Cocoa Vanilla Studio - Wild at Heart - Wood Veneer Words with Liquitex - Gesso using a Heidi Swapp - Minc Collection - Brushes.

Step 5: Sprinkle some Colour Blast - Colour Shimmer Dust - Lollipop over the top of the gessoed wood veneer title.

Step 6: Spray a little bit of water over the top of of the Colour Blast - Colour Shimmer Dust - Lollipop to activate but not too much so you get this fun mottled effect.

Step 7: When the Colour Blast - Colour Shimmer Dust - Lollipop is dry, cover with Ranger Inkssentials - Glossy Accents and allow to dry.

Step 8: Using a Uni Posca PC - 3M Poster Marker doodle around the edges of the wood veneer title to help it pop off the page then set it aside to dry.

Step 9: Cut various pieces of Cocoa Vanilla Studio - Wild at Heart - Patterned Papers and then ink the edges using a Ranger - Mini Ink Blending Tool and some Ranger Black Archival Ink Pad.

Step 10: Using a Prima - Finnabair - Art Basics - 2 inch Mixed Media Silicone Brush, scrape some Colour Blast - Colour Paste - Lipstick through The Crafter's Workshop - 12x12 template - Cherry Blossoms. To get the effect i have here, use different parts of the stencil on either side rather than using the stencil as normal straight in the middle of the page. This gives the effect that the cherry blossom branches are coming in from the edges of the page rather than just sitting in the centre.

Step 11: When the Colour Paste is dry completely, doodle around the edges of the flowers with a Fude Ball Pen 1.5 Black and then put some Simple Stories - Life in Color Collection - Enamel Dots in the centres. I have also added some My Minds Eye - On Trend 2 Collection - Enamel Shapes around the background randomly which I also doodled around with a Fude Ball Pen 1.5 Black.

Step 12: Layer the pieces of Cocoa Vanilla Studio - Wild at Heart - Patterned Papers underneath your photographs then adhere to the background paper using a good quality adhesive. Double-sided tape does not adhere very well to the Colour Blast pastes when dry.

Step 13: Embellish the layout using items from Cocoa Vanilla Studio - Wild at Heart - Chipboard Frames, Cocoa Vanilla Studio - Wild at Heart - Chipboard Stickers, Cocoa Vanilla Studio - Wild at Heart - Ephemera, Cocoa Vanilla Studio - Wild at Heart - Rubber Charms, Cocoa Vanilla Studio - Wild at Heart - Wood Veneer Words, Cocoa Vanilla Studio - Wild at Heart - Accessory Stickers and Maggie Holmes - Bloom Collection - Tassels. I have also added some flowers from my personal stash but you could checkout the awesome range of flowers from Scrappingclearly here.

Here is the total product list for this project:
Colour Blast - Colour Shimmer Dust - Navy
Ranger - Mini Ink Blending Tool
Ranger Black Archival Ink Pad
Cocoa Vanilla Studio - Wild at Heart - Patterned Papers
Cocoa Vanilla Studio - Wild at Heart - Chipboard Frames
Cocoa Vanilla Studio - Wild at Heart - Chipboard Stickers
Cocoa Vanilla Studio - Wild at Heart - Ephemera
Cocoa Vanilla Studio - Wild at Heart - Rubber Charms
Cocoa Vanilla Studio - Wild at Heart - Wood Veneer Words
Cocoa Vanilla Studio - Wild at Heart - Accessory Stickers
Fude Ball Pen 1.5 Black
Simple Stories - Life in Color Collection - Enamel Dots
The Crafter's Workshop - 12x12 template - Cherry Blossoms
Ranger Inkssentials - Glossy Accents
Uni Posca PC - 3M Poster Marker
Maggie Holmes - Bloom Collection - Tassels
My Minds Eye - On Trend 2 Collection - Enamel Shapes
Well that's it from me today, thanks so much for stopping by and until next time, happy scrapping!
Amy Prior xx
Amy Prior xx
No comments:
Post a Comment