Thursday 31 March 2016

Teresa Collins, Life Emporium Mini Album by Tania

Hi everyone,
It's my turn here today, lucky last post for the month!!! Hope you all had a lovely Easter!
I had so many pages left in my Teresa Collins Life Emporium paper pack, that I decided to make a cute little mini album and scrap a day spent with my parents while they visited over the Christmas & New Year break. 

I surfed my Pinterest boards for a little tutorial and came up with this one from Paper Vine!
You start with 8 pieces of patterned paper, each cut to 4" x 8".

Next, you fold all the pieces in half, with the side of the paper you want to show, on the inside, then glue the pieces together, back to back to create the pages! (Make sure your folds are always aligned.)
When all pieces are dry, round the corners with a corner rounder punch!

Cut another piece of paper to 8.5" x 4" for the cover, & round the outside corners.
Make two score lines, at 4" & 4.25", to create the spine for your book!

Glue your cover to the front of book 1st, then glue the back, do not glue the spine!
That's pretty much it!!! You now have a mini book ready to decorate, and you will find the quality of these Teresa Collins papers is beautiful, and when doubled up, they make very sturdy pages.


I used the Life Emporium Decorative Stickers, label stickerscork/wood dots and the cork pieces to decorate my album! Here's a few of the inside pages!


I hope I've inspired you to create your own little mini album. So quick and easy, and when you have a few pics you want to scrap, for a special occasion, it's a great little keepsake! Using a kit or a paper pack means you will have all of your papers and pages coordinated for a cohesive look!
Till next time, Tania :)


Tuesday 29 March 2016

Simple Stories 'Heart'

Hiya Scrapping Clearly friends and fans.
Well the month is nearly over and I'm here with my last project using the Simple Stories 'Heart' range. This would not have been my pick but I have absolutely loved working with these products. I am so impressed with how versatile this range is while at the same time pushing me to create some very important and special pages about loved ones no longer here.

This 4th, and last, project was done with one full sheet from the pack. I cut the middles out of the two papers I used for mats so I could use them on my previous page. I also used up the last of my scraps, those are the strips on the background. Once they were inked and stuck down I put some Colour Blast 'Snow White' paste through a Dina Wakley stencil and then stamped using bubble wrap and dragged my edges through the excess Heidi Swapp Color Shine 'Navy'.

My page turned out like this.
Again I have used a Heidi Swapp ghost frame to draw focus to the busier photo and help tell the story. The title is BellaRouge alphas mounted on vellum and outlined with black pen to make them pop. Love me some Dymo journalling strips, and a giant date stamp.

Cannot wait to see what's in store for April, how about you?
Thanks for coming by, remember to keep those memories and tell your stories.

Monday 28 March 2016

Week 3 2016 with Melinda

Hi hi, Melinda here today sharing my next project with you using the awesome Simple Stories "Life In Color" range!

I hope you all had a fabulous Easter and that the Easter Bunny was good to you all but not too good that you over indulged ;)

So, I have jumped ahead in our PL album/s, I really wanted to do something current so I pulled out our week 3 for 2016 and got to work.

My process always starts in a notebook deciding which photo's to print and which stories I wish to tell. I then print my photo's at Big W while I do my food shopping. Photo's into pockets, cards with photos in pockets and then I get to play putting it all together!

I have lots of photo's to share today so I grab a coffee and take 5 ;)

First up, the double page spread using an K design on the left and an E design on the right.


I love this range and how it came together so easily for me!

Onto the left hand side


And some of the cards


A close up of the title card for the week. That chipboard clip is actually silver but, oh boy, silver is eve harder than gold to photograph!


I really love how this card turned out so I wanted to share a close up! I have used one of the 12x12 cut apart sheets that had the 4x4 cards pre-printed. I cut along one of the printed lines and tucked my photograph underneath. I added one of the clear coloured stickers to the printed label, did my journalling and added the date :)


And I just wanted for you to be able to see these cool clear coloured stickers again - love how they look on top of a photo - especially those paint brush strokes one!


And onto the right hand side :)


This card is actually in a flip pocket - I often use them to add an extra photo or story, so easy!


And the back side of the flip with a little embellishment and a fun collage from my oldest son's birthday :)

This week also includes a 5x7 insert - it's pretty simple but a story documented and some words written to my son :)


The front of the pocket - I printed the photo at 5x7 with a border and trimmed off alot of the border and then mounted it on one side of the patterned paper I wanted to use.


And the back of the pocket. I just ADORE this paper and did toss up using it behind the photo but decided I would see more of it if I used it this way :) Typed up my journalling, cut it up into strips and stuck it down with some wet adhesive. 


And YAY, extra space that I could do a little embellishing in! Some stickers from both the sticker sheets and the clear sticker sheets. Also a couple of strips of washi from the washi strip pack.

That's it for me for today! I have another PL spread to share here again soon but make sure you check back in to see the other girls gorgeous work!!

Melinda


Sunday 27 March 2016

Live Love Laugh - With Karyn!

Happy Easter!!!!

It's Karyn here today and I have a scrapbook page to share made using lots of goodies from Scrapping Clearly
The photo I've used was taken on our recent 9 year wedding anniversary.
I've chosen more of the fun and bright papers from the Kaisercraft #Me collection teamed with white cardstock for the background.

I used a yellow ink and the heart stamp from the #Me acrylic stamp set to personalise my background. This #Happy diecut from the Collectible pack is perfect for this page.
I've added all of the numbers from the Teresa Collins wood veneer pack and marked with a cork arrow the Anniversary year we were celebrating.
I added the other wood veneer letters/words around my photo, as well as some roses from the collectible pack and another of the stamps from the set. This stamp set is so versatile - I love adding them to my pages!  
There are so many fun diecuts to use - the black and white colours make them very versatile. 
Black glitter thickers are always perfect sparkly accents to any page - I've used them to make the word "Love" as part of my title. 
Scrapping Clearly products I've used include 

KaiserCraft #Me 12x12 collection kit
KaiserCraft #me collectables 
KaiserCraft #me acrylic stamps 
Teresa Collins "Save The Date" sequins 
Teresa Collins "Something Wonderful" wood veneer 
Heidi Swapp abc black glitter thickers  
I print my photos on an Epson XP-600 printer

Thanks so much for stopping by

Crafty Hugs xx
Karyn

Saturday 26 March 2016

" Go See Do" by Bernii Miller

Hellooooo...


Happy Easter long weekend to all of you. I hope you are enjoying the last of the warm weather with loved ones and fitting in some scrapping time. 

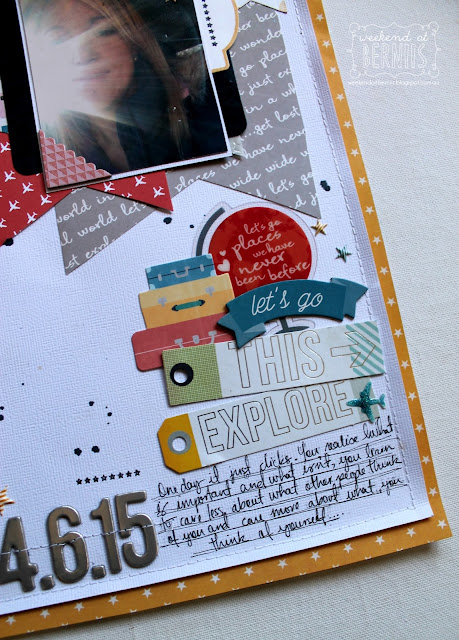
I have another Pink Paislee share with you today with the fun Atlas collection.. 


"Go see do " layout by Bernii Miller using the Pink Paislee Atlas collection.


I love using banners on my layouts and wanted to find another way to use them so decided to add them to the top of my layout..


"Go see do " layout by Bernii Miller using the Pink Paislee Atlas collection.

I then sprinkled around some ephemera and chipboard pieces to balance out the page. 

"Go see do " layout by Bernii Miller using the Pink Paislee Atlas collection.

Thanks so much for stopping by today..

Till next time

Bernii Miller

Friday 25 March 2016

The $6 Kmart Challenge

 Howdy bloggers,Lisa Here with a Friday Blog update .
I'm sure that most creative beings will be rejoicing this Easter and creating a little arty goodness.
I will be working,but I do have today off to play with some messy mixed media products.
---------------------------------------------------------------
Today I am sharing a challenge piece I completed (in the early hours of this morning).
While strolling through Kmart last week , My arty friend and I stumbled upon these canvases for $6,and I put a challenge to her that we paint/create something to give the canvas a lift.
Here is what I did with my piece.
Firstly it has a crappy plastic coating so a little Gesso to start,to allow paint to stick and out comes the House paint to create drips and add colour and interest to the canvas.
 When the house paint dried ,I found a mandala stencil and 
smeared on some shimmery Colour Blast Textured Colour Paste .
Love the sparkle in this product .
Next ,using my Signature Words Or Whatever Feather Stencil I added base feathers with Jo Sonja Black Textured Paste and then after drying I added the 2nd feather detail using Colour Blast Coloured Textured. Again super shimmery over black as well., Love this product.
  The fun is in the details here , Playing with Prima Marketing -Jamie Dougherty Stamps, beautiful Blooms , Fun Fonts and Lettering, and the beloved Posca Black Pen to add my personal touches , all create a little magic , to bring this piece to life .
Here is the finished piece (atrocious shady morning lighting)
,Oh Dream & Say Yes, Right Now,to Our New Best Ever Adventures!
I really needed to wait until the light was better to show you how glorious the Dreamcatcher shines , but this blog post is going up now .
For the curious , HERE is my arty friends challenge piece, still a work in progress.
Thanks for dropping by, Make sure ,if your in Kmart and you see the $6 canvas and would like a Challenge . I challenge you too make something fun and please don't forget to share .
See you next week .xx
Especially if your coming to the ,
Sydney Paper Craft Festival in Penrith on the 1st and 2nd of April.:)
& big love and Thanks to all those who take time and comment here ,
 I appreciate your feedback so much , THANK YOU >!!

Thursday 24 March 2016

Life Emporium Card & Tag by Tania Ballestrin

Hi everyone, Tania here again to share a couple of projects I made using my Teresa Collins Life Emporium kit.
The first one is an Anniversary card I made, using a few of the different papers from the 12x12" paper pack & a pretty chipboard topper from the Chipboard Elements pack. Other embellishments used, all from my kit were the rub ons, cardstock stickers, brads & the very pretty Kaisercraft, ribbon roses. (These are so versatile, I cut one down to make it slightly smaller than the first one.


My 2nd project is a tag! I love tags BTW!!! 
I started with the cork paper from the 12 x 12" paper pack as my base, to match the card and cut my tag shape from a template! I always make my own re-enforcement rings from patterned paper to match, using a single hole punch and small circle punch.


I then painted a rough layer of Gesso in the middle of my tag! While that was drying, I carefully cut apart one of the ribbon roses, (they are rolled and attatched to some cute netting, & if you are careful enough to cut them away from the netting, you end up with a long ribbon!) To build the layers, I used a scrap of patterned paper, attatched the ribbon to the top and bottom of the paper before sticking down, then inked the edges of whole tag with Distress ink. I wrapped a length of ribbon around the middle and made a knot, popped another length in the top and made a bow and finished off tag with these embellishments, all from my kit. Chipboard elements, brads, rub ons & some of the gorgeous little cork pieces. (These are so cute, check out this closer view below!)


Thanks for joining me, hope you have found some inspiration here!!!
Tania :)


Wednesday 23 March 2016

Not About Loss

Hi Y'all
This month I have been playing with the Simple Stories 'Heart' range. It has a theme geared towards scrapping those pictures of loved ones who are with us no longer. My last post contained two projects about this, but today I want to share with you a project that is not about loss just to show you how adaptable this range is.

I started with the pretty green ombre paper and applied some Colour Blast 'Stormy Weather' paste through a Crafters Workshop Circle Grid stencil, see the shimmer in that paste? Love it!

I layered up lots of leftover bits of pretty papers from the pack, notched out the tab in this one so it would sit over my pics. Added some triangle glitter stickers to point to my main photo.

And here is my finished page.
I'm thinking I might need to get a new black dye inkpad, this one is getting a bit too messy. Did I just say that??

Hope you're having some creative time this month.
Thanks for coming by


Tuesday 22 March 2016

Something Sweet by Lauren Hender

To create this sweet little card you need to pick up the
Glitz Design Carpe Diem range in the Scrapping Clearly store.

Ingredients
I picked two coordinating patterned papers, a Heidi Swapp frame and bow, some Teresa Collins Signature Essentials stickers, Collection and Co clouds, some clear acetate, and the sweetest little Coco Vanilla sequins.

This little card took no time at all to put together and will surely be love by who ever receives it.


The little shaker box was quick and easy to make using some
foam mount squares.

 Heidi Swapp never fails to provide us with perfect products.
This little glitter frame is perfect for the Fuji Funpix camera prints and the bow in all its sweetness creates the perfect little feature to complete the project.


If you love this card as much as I do then pop over to
Scrapping Clearly store.

Lauren xo

Monday 21 March 2016

So cute - by Chloe

Hello everyone!  It's Chloe here and I am sharing another page created with the awesome Simple Stories Carpe Diem range.


In my DT kit, I also received Heidi Swapp Clear Alphas White.  I love these!!!  I wanted to make a feature of them here, so I stuck them to my background, gesso'd over the top and misted and stamped over that.


Adds some fun texture!


Other products used:
Simple Stories Carpe Diem – Chipboard Stickers
Simple Stories Carpe Diem – Fundamental Cardstock Stickers
Cocoa Vanilla Hello Lovely -Sequins
Heidi Swapp Color Shine Blush
Cocoa Vanilla Studio Hello Lovely – Flair Pack
Maggie Holmes Crate Paper - Open Book Ephemera