Thursday 30 July 2015

Jumbo tags......

Good morning Rikki here with the last post of the month, using the last bits of Heidi Swapp Dreamy range, and this time its how to incorporate those large tags we all have in our stash. I love these tags they are over sized and lovely but I have to admit I was a little lost when I brought them so I held onto them, in hope to find inspiration... well the other day that inspiration hit me, why not make a banner.... why not cut the photos into tags and then make them blend with the banner......  


I have to say I was also inspired by Heidi Swapp clusters, and I thought it would be a great idea to mimic that to hide the top of the tags, I mean I have plenty of dies!!! Why not pull them out and create my own ''cluster banner''


                                                 Dreamy Dreams Come True

                   Dreamy Kraft Tag


                                                 Favorite Things Epoxy Stickers


Till next time, have a creative day

Rikki
xxxxxxx

Wednesday 29 July 2015

Pocket swap {Hints & Tips} - by Chloe

Hello everyone :)
Have you joined the Pocket swap craze??
Not sure what on earth I'm talking about??  Find out more info here in Rikki's blog post ...

Today, I'm going to share my Pocket swap for August and some tips and ideas to help make yours! 

Our first theme for our Pocket swap is HEIDI SWAPP.


 I loved digging in my stash to find all my HS bits and pieces to create this for my pal:


So much fun to create as well as to receive!!


I set out the 9 background pieces first to get an idea of the layout.  I moved them around until I was happy.  Then came the fun part!  Embellishing!


TIP:  Some of my embellishments are glued/stuck on, but most you'll see are just paper clipped in place so that they can be removed by my pal and used on their own creations!


TIP:  If you include tiny loose bits like sequins, you can always seal the top of the pocket shut with some washi tape to stop them falling out on their postal journey.


Here's some IDEAS of what to include in your goodies:

-Stickers-Sticky notes
-Tea bag
-Paper Ephemera and die cuts
-Photographs
-Sequins
-Ribbon/Washi
-Paper clips
-Tags
-Quotes

the list really is endless!


Remember, it's not just a chance to get rid of unwanted items, but rather a chance to put a smile on someone else's face!  If you would love to receive it, chances are, your pal will too :)


Don't forget your letter to your pal!  If you wish, you could fold it up and tuck it in a little envelope or bag - it looks so cute!


Some more HINTS and TIPS:

* try not to add too much bulk or it will be more expensive to send.

* Decorate the outside of the plastic sleeve itself if you like - stick on some stickers, or decorate with a strip of washi tape ... get creative!

Here's a mud map of a pocket swap as a GUIDE for you (you do not have to follow this exactly, it's just an idea!!)


When you are finished and ready to send, fold it up and decorate if you wish!


And it's all ready to embark on it's journey to your Pocket swap pal :)

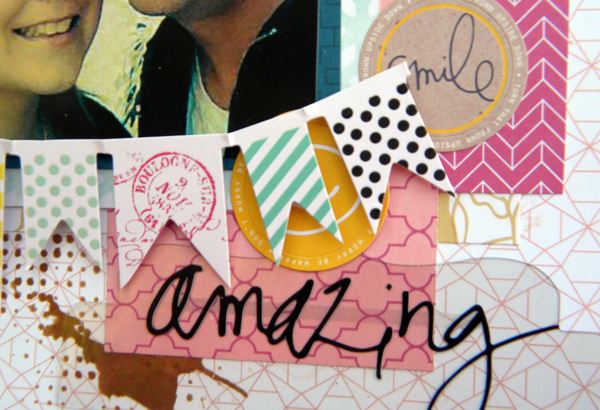
Products used in this pocket letter:
Pocket letters plastic sleeve
Heidi Swapp Favorite Things 12 x 12 Paper Pad 
Heidi Swapp Favorite Things Ephemera
Heidi Swapp Favorite Things Epoxy Stickers


Sunday 26 July 2015

July Sketch by Kim

Good morning everyone today I would like to share with you my take on the awesome sketch this month.

I have used the papers from the Heidi Swapp Wanderlust Range my title is from the Clear Pop Tabs  and Colour Pop Banners from Heidi swapp to create my LO.

This is an awesome sketch to use and we would love to see your entries this month on our facebook page 


My Lo 


 and a close up of the amazing title from the Colour Pop Tabs packets

I hope you have enjoyed my share with you

Kim


Saturday 25 July 2015

Acrylic Arrow Friendship Album


Hi there,
Marelle back with a fun, unique gift for a friend!

I had a great time working on this amazing ScrappingClearly arrow album.  I used Alcohol Inks on the acrylic which formed a lovely stained glass background.


Products used:

Tim Holtz Alcohol Inks
Bazzill Black Raven Cardstock
Bazzill White 250gsm heavy Cardstock Marshmellow
ScrappingClearly Acrylic Arrow Album


Happy Crafting!
Marelle

Friday 24 July 2015

Pocket Swap Madness

Have you seen the new craze that is taking Australia by storm that being a pocket letter, Scrapping Clearly has start a a Pocket Swap in Australia and here is my sample letter for the 1st ever swap in August.

Pocket swaps are an amazing way to use your spare bits and pieces and share the love of giving and all while forming a new friendship with your swap partner its not to late to sign up for this amazing swap.

Here is my Pocket Letter Page I have used items from the Sugar Chic range from Heidi Swapp 


The front of my Pocket  Page


The back of my pocket  page


I would love to see you in the pocket  swap and maybe we will be partners 


Thursday 23 July 2015

Multiple photos

Good Morning Rikki here today. How are you loving the design teams Pocket Letters reveals so far? 

I love this idea, a great way to pay it forward and make some new friends as you go along, not long now till we launch, if you want to keep up to date with the Pocket Letters, why not join the Scrapping Clearly Community page, where everything paper related is being discussed: https://www.facebook.com/groups/175973739217297/

Today I am sharing with you a multiple photo layout, yes I know right? I dont do it very often but a change is as good as a holiday, nothing like adding 5 photos to a page .... and of course some Heidi Swapp goodies as well.


Dreamy Dreams Come True


Till next week, have a creative day.

Rikki
xxxxxxxx

Wednesday 22 July 2015

Michelle - Pocket Swap


Hello there, how good is the idea of pocket letters!! What a fun way to share with others stash that you love to create with and learn about other creative people from reading letters from each other. Love happy mail!! I am excited to be involved in Scrapping Clearly Pocket Swap Aussie group. Here is my take on my very first pocket letter using Heidi Swapp's ranges.


The tag wouldn't fit in the pocket so I attached it with a bit of tape on the outside. Washi tape, string and a machine sewn circle banner was wrapped around a tag.


This photo frame has a clear removable envelope filled with sequins.


A metal charm is attached to the side and my letter is in the small kraft envelope in the top middle pocket, So there are a few ideas that I included in August share.

I can't wait to send mine out and continue to put together more for the following months. I look forward to see what others have created. Let the happy mail begin!!


Cheers Michelle xx