Tuesday, 24 October 2017

You had us at WOOF - by Chloe

Hello there!  Has anyone had some time to create with the challenges we have this month?

I just loved the sketch and got started on it right away!


I loved the idea of a busy patterned background so I incorporated that in my page...


I've used papers from the gorgeous Pebbles DIY Home collection ... the wood grain effect being perfect for my photos :)


I added some Gelatos to the background for a hint of colour ... I'm not great at big messy mixed media backgrounds!


I mixed and matched ranges too - using some Cocoa Vanilla Studio You Rock embellies for a masculine feel. 
They matched perfectly!

Other products used:

Monday, 23 October 2017

Beautiful Bella Blvd - Bright and Brave collection

Hello Scrapping Clearly readers.
Leonie Neal-Dawson dropping by today to share 
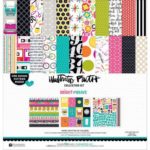
a page using the Bright and Brave Bella Blvd collection kit from the Illustrated Faith line. 
This range is on special in the Scrapping Clearly shop so if lovely bright colours appeal to you head over to the shop for a bargain. 

Last weekend my youngest had her Confirmation day so this collection has been perfect for me to scrap this religious occasion.
Naturally I took loads of Photos and my daughter was so excited 
to be celebrating this special event she happily complied.

The photo I scrapped today is perhaps my favourite from the whole day.  
It's just her to a T, she has an endearing quality of always managing to close her eyes when I take pictures and combined with her sweet smile it's just adorable (but I'm her mum and am of course completely biased).

(apologies for the reflections those transparencies are extremely hard to photograph) 

I've used a Hambly screen print with a yellow design overlaid on a turquoise patterned paper from the Collection kit.  I thought about cutting the screen print up and using the individual frames  but I just loved the yellow and Teal combo and couldn't get past it's simplistic loveliness. 
I cut the typewriter elements from another of the patterned papers and placed them under the screen print and then my photo, patterned paper matting and embellishments were adhered over the top of the screen print. 


sbc_bla-1384_0

sbc_bla-1380_0

hambly_-frame-wallpaper---yellow-overlay----12-x-12_1

Thanks for stopping by today happy crafting to you. 
Leonie Neal-Dawson


Friday, 20 October 2017

Art Journaling and Colour Swatches

 Howdy Bloggers, Lisa Here, with a Friday Mixed media update .
Its a rainy day here today , perfect weather to create some magic within a journal or 2.
How many journals are you working with/in currently?
I have too many to count, like my supply of paints, sooooooooooo much paint ..
Today I'm sharing a couple of ways I have used my 
new Kinder Kreations Art Stash stencil within my Journals .
 This piece below ,I created in my Dina Wakley Media Journal ,started from a few smeared brush clean ups from previous pages , a few more marks and colours to fill out and create the story around the page, and my background was started .
 Then I added a couple of focal points using a little black paint ,
 a foam brush and this cool KK stencil._
if you want this stencil, email / message Kylie and ask her to order it for you .
some detail with a black and white pen and a very unsuccessful stencil application of the word Art, using Jo Sonjas Black textured paste
but if you know me and my arty style , you would realize that
 this falls into the "Dont give a shit technique".
and I like it .

Secondly , using my large landscape Dylusions Journal ,I felt that I needed to bring some order to my huge supply of paints,water colours,colour palettes and mediums. So I have created a few pages of colour swatches to help bring it all together .
I really need to create some more pages now ,
 because I have only just hit the surface of my stash.
How do you organize your colour swatching?
Thanks for dropping by , I will be back next week for a new SC MM update , 
a prelude to the journey south to the yearly Gundi Scraptacular 2017.
My 1st and I'm sure not my last .
Lisa xx

Tuesday, 17 October 2017

Combining Paste and Sprays, and challenges

Good Morning Arty Peeps!

Hope y'all are well and happy creating.
This month creative play time has been at a premium for me, too much other stuff going on.
So I have combined the two Scrapping Clearly challenges into one layout.
From the mood board I took inspiration from the fire image at bottom right,
then designed my page based on the sketch.


I started by applying Colour Blast paste in Lipstick, Rose Petal, and Tangareen
through a Crafter's Workshop stencil, onto black cardstock.
I then sprayed it with Heidi Swapp Color Shine, Gold at the top, and Navy at the bottom, adding some splats of each colour reversed (Navy on top, Gold on the bottom).
With such impact in my background, all I needed was a title and a story, which I wrote in Dymo. 


You can see here, the fabulous effect of the sprays on the Colour Blast paste. You can also see that I used a piece of pre-misted (Dylusions) cardstock to mat my photos with a really thin border, just to make them pop a bit.

Here are the two challenges that inspired my page.
Play along and upload your projects into the Facebook folders by clicking on the link under each image. There is a $30 shop voucher for the winner of each challenge, gotta love that!


 Sketch                                      Mood board

Thanks for coming by,
'til next time,

Monday, 16 October 2017

Tis The Season with Melinda Sweetman

Hey, hey ScrappingClearly friends, Melinda here with you today with something a little different for you!!

Here is a sneaky peek


Any guesses as to what I've created?! Or been inspired by??

If you guessed this month's mood board you would be 100% correct! I was REALLY inspired by all of the Halloween-y type imagery and the colours, though I couldn't find a way to include the blue.

Here again if you haven't seen it is the mood board


And my completed project!


This is in a shadow box type product that hubby threw together with some spare MDF and because he made a stack I grabbed one super quick and got to creating! The frame was sprayed with some matt black spray paint and left to dry while I created my page!

I have used 3 patterned papers for this - My Mind's Eye - On Trend 2 - Little Things (the orange words) and 2 papers from the Pebbles - Spring Fling collection - Honey Bee (the black text) and Chalkboard Floral (my background sheet). I used a cut file from the Silhouette Store that I fell in love with the second I saw it and knew what I wanted to do with it so picked my papers and got my cameo working for me!

I knew I wanted some colour in the background and in order for my cut to POP I first applied a really quick, light layer of white gesso to fade those dots into the background some. Then I grabbed my Scribble Sticks in Tangerine and Ruby, some plastic packaging and got to smooshing some colour onto my background and also applying some splatters with the same mix of colour.


When that was all dry I added some splatters using my Colour Blast Colour Shimmer Spray in Bling knowing I was going to add more gold accents. While that dried I used my Black Soot Distress Ink to ink the edges of the "Tis The Season" words so they would pop a little more. And added some gold foil using my Mini Minc machine to some of the Minc Crate Paper Halloween ephemera pieces I wanted to use. I LOVE the pops of shiny gold and love the gold, orange and black & white mix of colours!


Once my background was completely dried all that was left was to glue everything down. Since I have used gesso on the background I did use my wet glue for everything to make sure it all stayed where I put it!


One final close up


How I love stars and how that they look any better than minc'd in gold foil?!?? Of course, there are a tonne of colours to choose from in the store if gold is not your thing!

Here is one final photo - this time the frame is stood up and I can't wait to find a home for it in the lead up to Halloween this year! My boys are super exited!


Remember, you still have almost 2 full weeks to enter our October challenges so head over to the ScrappingClearly FB group to find the albums with all of the details and the place to share!

Oh, I almost forgot! There is even a process video if you'd like to see this come together!


Until next time, thanks for stopping by and happy scrapping!


Melinda
xx

Sunday, 15 October 2017

Happy - with Emma.


Hi scrappingclearly peeps.
Today I'm sharing a layout I had fun creating, featuring a friend that means so much to me.
It features many great products that I have been playing a lot with of late.
(See product list at end of post)


I've been havering fun with the use of the Cedar Lane collection and On Trend 2 collection
I can never just stick to using one collection at a time but rather love to mix them together. 


My title is a Heidi Swapp chipboard word......it's so sparkly 😝 
These words are the best 'statement' pieces 😉


I used a couple of MME puffy stickers around. I think I've said it before, but I'm really not good at journaling straight onto my pages so I love stickers and journal cards to cut up and do the talking for me.


These Cedar Lane arrows are the perfect combo of sparkle, colour and texture that compliment any page.

This was a nice quick, bright layout that was fun to create.
I hope it stirs a little creativity for you.
I'll catch you all soon.
Em.xx


Products used: Pink Paislee Cedar Lane

Friday, 13 October 2017

Art Journaling is My Therapy

Howdy Folks , Lisa here with a Friday Mixed Media update .
The shop is back online and today only on Friday the 13th ,
 Scrapping Clearly are having a 40% off sale .
 I'm here and today sharing with you an Art journal piece created using 
the fab Jane Davenport Face stamp. This one here  
Sometimes its nice to be able to stamp the bones of your image and 
then just use your tools to fill in the details and add your own flair.
I started with a mottled background in my DWM journal of acrylic  Dina Wakley Media  paints
I applied them to the page using a brayer .
 Then I stamped the face image onto the dry background using permanent Black Staz On ink , drew a simple facial line and added a base coat of Art Alchemy Paints for the hair and to darken the background and make her pop a little .
 I added colour to the eyes with a posca and a white sharpie paint pen, and added more depth into her hair by darkening the area under and around her face with paint then pencils .
 A little more detail and pen work to bring more focus to the face using an Inkcredible pen.
Some darkening and colour around the eyes , high and low lights on the lips with a few prisma colour pencils . And a quote,because it is Art Journaling , and its a form of therapy to help us deal with whats happening in our on world . I created this Fierce woman , a woman with determination and perseverance. One who can take on the world and remain true to herself .
I'm sending out some strength and love to one special young woman on the other side of the world , who I cant be there to physically support atm.
" When you can't control whats happening,
challenge yourself to control the way you respond to whats happening -
That is where your power is ."
Let it be a message for us all .
 Thanks for dropping by the blog , don't forget the SC Black Friday 40 % off sale is happening today only,so jump online and order something bright and fun to kick start some creative flow .

I'll be back next week with a new SC MM blog update .

Lisa x