Showing posts with label Dylusions Ink Sprays. Show all posts

Thursday, 13 January 2022

Room for the Unimaginable - with Emma Zappone

 Hello SC friends.
Emma with you all today. I have been loving the projects coming through featuring this months mood/sketch. Amazing!! Loving all the Travellers Notebooks too. I'm hoping to start this weeks prompt today. Today's share though is featuring the sketch part of the mood board. I chose to pull the orange tone out of the moodboard also. This Layout is made as an 8"x8".


I used some great products to play along with the sketch, let's just refresh our minds of this months mood/sketch..........


Oh and I flipped the sketch! 
And I decided to place my title at the top of my design for reasons I will mention later in my blog.
Right now lets talk about what product is found on this mini layout.


After I had layered some rubons from my stash, I grabbed the beautiful  'Elegance' stencil by Aall & Create and with a makeup sponge dabbed Dina Wakley's Buff acrylic paint through it. This created a beautiful soft shadow over the patterns on the page. I did this both top and bottom of the page.


I then took one of the little script stamps by Aall & Create and with Stazon 'Spiced Chai', stamped rhythmically over the same area as the stencil. The stamping was also blended out through the page.


My paper elements needed to be small to match the image and the size of the overall project. So I tore some book paper to mount my image on and then chose a few pieces from an Ephemera Pack of Tim Holtz's. These are full of different shapes and make for great tucking and layering.


This stunning Mould that Kylie sent me is painted with another one of Dina Wakley's paints this time in 'Elephant'. Once dry I rubbed Metallique Wax - 'Bronze Age' very lightly to only pick up the raised parts of the mould. This is why I chose to move my title as I really wanted this mould to shine on it's own. I finished the page with a few more elements from my stash and then flicked watered down 'Dried Marigold' Distress Crayon and Dylusions Ink Spray 'Ground Coffee' to bring all the elements together.

I hope this has inspired you to have a go of the months sketch and make it your own.

Have fun creating everyone. I will see you all next week.

Stay safe, Em xx


Friday, 27 August 2021

Just Married by Belinda Spencer

 Hello Scrapping Clearly fans!


It's my turn on the blog today and I am sharing a layout I created for Scrapping Clearly inspired by the August Mood Board.


Here's a peek at the mood board:

To start my layout, I mounted a cropped sheet of Vicki Boutin Mixed Media Art Paper onto some patterned paper from my stash. I spritzed some water onto the page and then dropped in some Colour Blast Colour Artist Ink in Berry. I used a soft paintbrush to spread the ink around a little and then flicked some of the colour over the page with the paintbrush. I dried the page completely with a heat gun before the next step.


I spritzed some Dylusions Ink Spray in Crushed Grape onto my craft sheet, added a little water and then swiped a Vicki Boutin stencil through the colour. I then 'stamped' the stencil onto the page. I repeated this process until I was happy with the amount of 'stamping'.


I added some more stamping, this time using actual stamps from the Heidi Swapp Always Mini Stamp Set with Tim Holtz Seedless Preserves Distress Oxide and Dusty Concord Distress Ink.


I layered my patterned papers and Heidi Swapp 6x6 Die-cut papers together to create a stack under my photo and added that to the page.


I added a bunch of embellishments and my title  as well as a little more stamping to finish.


Products used:

VICKI BOUTIN Mixed Media Art Paper
VICKI BOUTIN stencil
COCOA VANILLA STUDIO Midnight Die-cuts
COLOUR BLAST Colour Artist Ink Berry
TIM HOLTZ Distress Ink Dusty Concord
DUSTY ATTIC Chipboard
UNI Posca Pen Black

Thanks for stopping by the blog today. I hope you find some time to play along with the mood board challenge too.

Cheers
Belinda


Friday, 7 May 2021

Happy with Belinda Spencer

 Hello Scrapping Clearly peeps!!

It's Belinda here today with my latest project inspired by the marvelous May moodboard and featuring fabulous product from the store.


How warm and bright are these colours? I love them.
To start my layout, I first wanted to use one of the NEW Colour Study Stencils from Vicki Boutin. I hate the straight edges showing when I spritz with colour sprays so I first masked off the edges with torn scrap paper.


After I used the stencil I then turned it over and 'printed' the design into a journal I keep on hand to use up excess inks etc. It gave a really nice image.


For the red ink spray, I made up my own concoction using some Candy Colour Blast Shimmer Dust and distilled water in a mini mister. I added about a pinch of shimmer dust and then topped up the bottle with the water and shook well.

I spritzed some of the colour over the top of the stencilled image and let it drip down the page. I flicked some of the colour over too. I added a little more stencilling at the top right too.


Next I added some more flicks of colour using Dylusions Squeezed Orange Ink Spray and Mint Green Heidi Swapp Colour Shine.


Next I added some stamping using Jet Black Ranger Archival Ink and a stamp from the NEW Vicki Boutin Colour Study Stamp Set.


I grabbed a scrap of the heavy weight Marshmallow cardstock and played with the other stencils in the Colour Study range and the same ink sprays. Once this piece was dry, I then stamped some images using the Colour Study stamp set again and the Jet Black ink. I fussy cut the images to use on the layout in the next step.


I cropped some patterned paper from the Colour Study 6x8 Paper Pad and created a paper stack including some doilies I had in my stash and the fussy cut flowers as well as a tag from the Tim Holtz Idea-ology Salvaged Tags set.


Finally I added my photo as well as the title, a Charm's Creations orange arrow and some fussy cut stars from the Vicki Boutin Let's Wander Stars patterned paper.

'Happy'


Here's a few close-ups.


I love this photo I snapped of my darling daughter when she used to let me take photos of her!!


Here's what I used:

DOODLEBUG DESIGNS Mini Paper Doilies
COLOUR BLAST Shimmer Dust Candy
TIM HOLTZ Idea-ology Salvaged Tags

Thanks so much for stopping by the blog today. I do hope you find some time to play along with the moodboard this month.

Cheers
Belinda


Saturday, 7 September 2019

Glimpse of September

Welcome to a new month of fabulous colour with the help and inspiration of the September mood board. I hope you are ready to create up a storm this Spring and have your camera charged to take some amazing photo's as we roll through September. It is one of my favourite months to capture memories... 


I am very blessed with a creative daughter, it does have its advantages and disadvantages - like amazing art created but your supplies go missing. So blessed that I get to capture these moments in time every now and again when she is deep in thought creating... I love this piece that she created, I still have it stashed away - it is adorned top and bottom of the eye space with sea glass in a light burnt orange... It is one of my most favourite & treasured pieces she has created so far, so what better way to showcase the moment than to scrapbook it with its own page. 


I sprayed Dylusions Calypso teal ink and water onto my messy mat and then placed my Cardstock on that to pick up the colour. Then I tore a few strips from the Dina Wakley collage paper and adhered it with Liquitex matte medium . Once the tissue had dried I sewed straight lines up and down the page using aqua cotton to help add more texture and interest to the page. Then Liquitex modelling paste was added through a stencil.


I then worked on the layers under and around the photo. I used black netting (tulle), sticker butterflies and I cut my title with my silhouette. 


I added some Jane Davenport washi to the bottom of the photo with some micro pom poms. Tim Holtz sticker words were then added to add more of my thoughts for this page. The final touch was the black border using a fude ball pen. 


I hope you have gathered a little inspiration to get yourself creating this month. Till next time have a fantastic Saturday. 

tracey xx

Tuesday, 3 September 2019

This is what family looks like

Hi everyone
Back with my first post for the month, inspired by this month's mood board.


I started with some old patterned paper from my stash which  I added the waste from some punched circles I had used for another LO just to add a little subtle texture.   I lightly covered the lot with gesso using an old credit card.   I then used a baby wipe to take some of the gesso off and lighten some areas.
I then used some gelatos (Cotton Candy & Orange Soda), smooshed onto my messy mat , spritzed with water and added to my background with a brush and some Lindy's Stamp Gang Starburst spray.


I added some stamping using a Colour Blast stamp and the some Colour Blast paste in Deep Water using a Darkroom Door Stencil.   I coated a few Darkroom Door chipboard pieces with gesso, then Dina Wakley Acrylic paint in Turquoise and rubbed on a little Nuvo Embellishment Mousse with my finger to highlight it in places.   I used Dylusions Squeezed Orange spray to colour some gauze.


I matted my photo with some We R Memory Keepers patterned paper from the Crush collection and then assembled my layers using some plaster tape, washi tape, Hambly Screen Prints and ephemera from the Cocoa Vanilla Happiness Is collection, Nuvo Crystal drops and finishing off with my title with a sticker from the Tim Holtz Small Talk pad. 

Hope you've been inspired and give the challenge a go this month.

'til next time 
cheers
Tracey

Wednesday, 12 June 2019

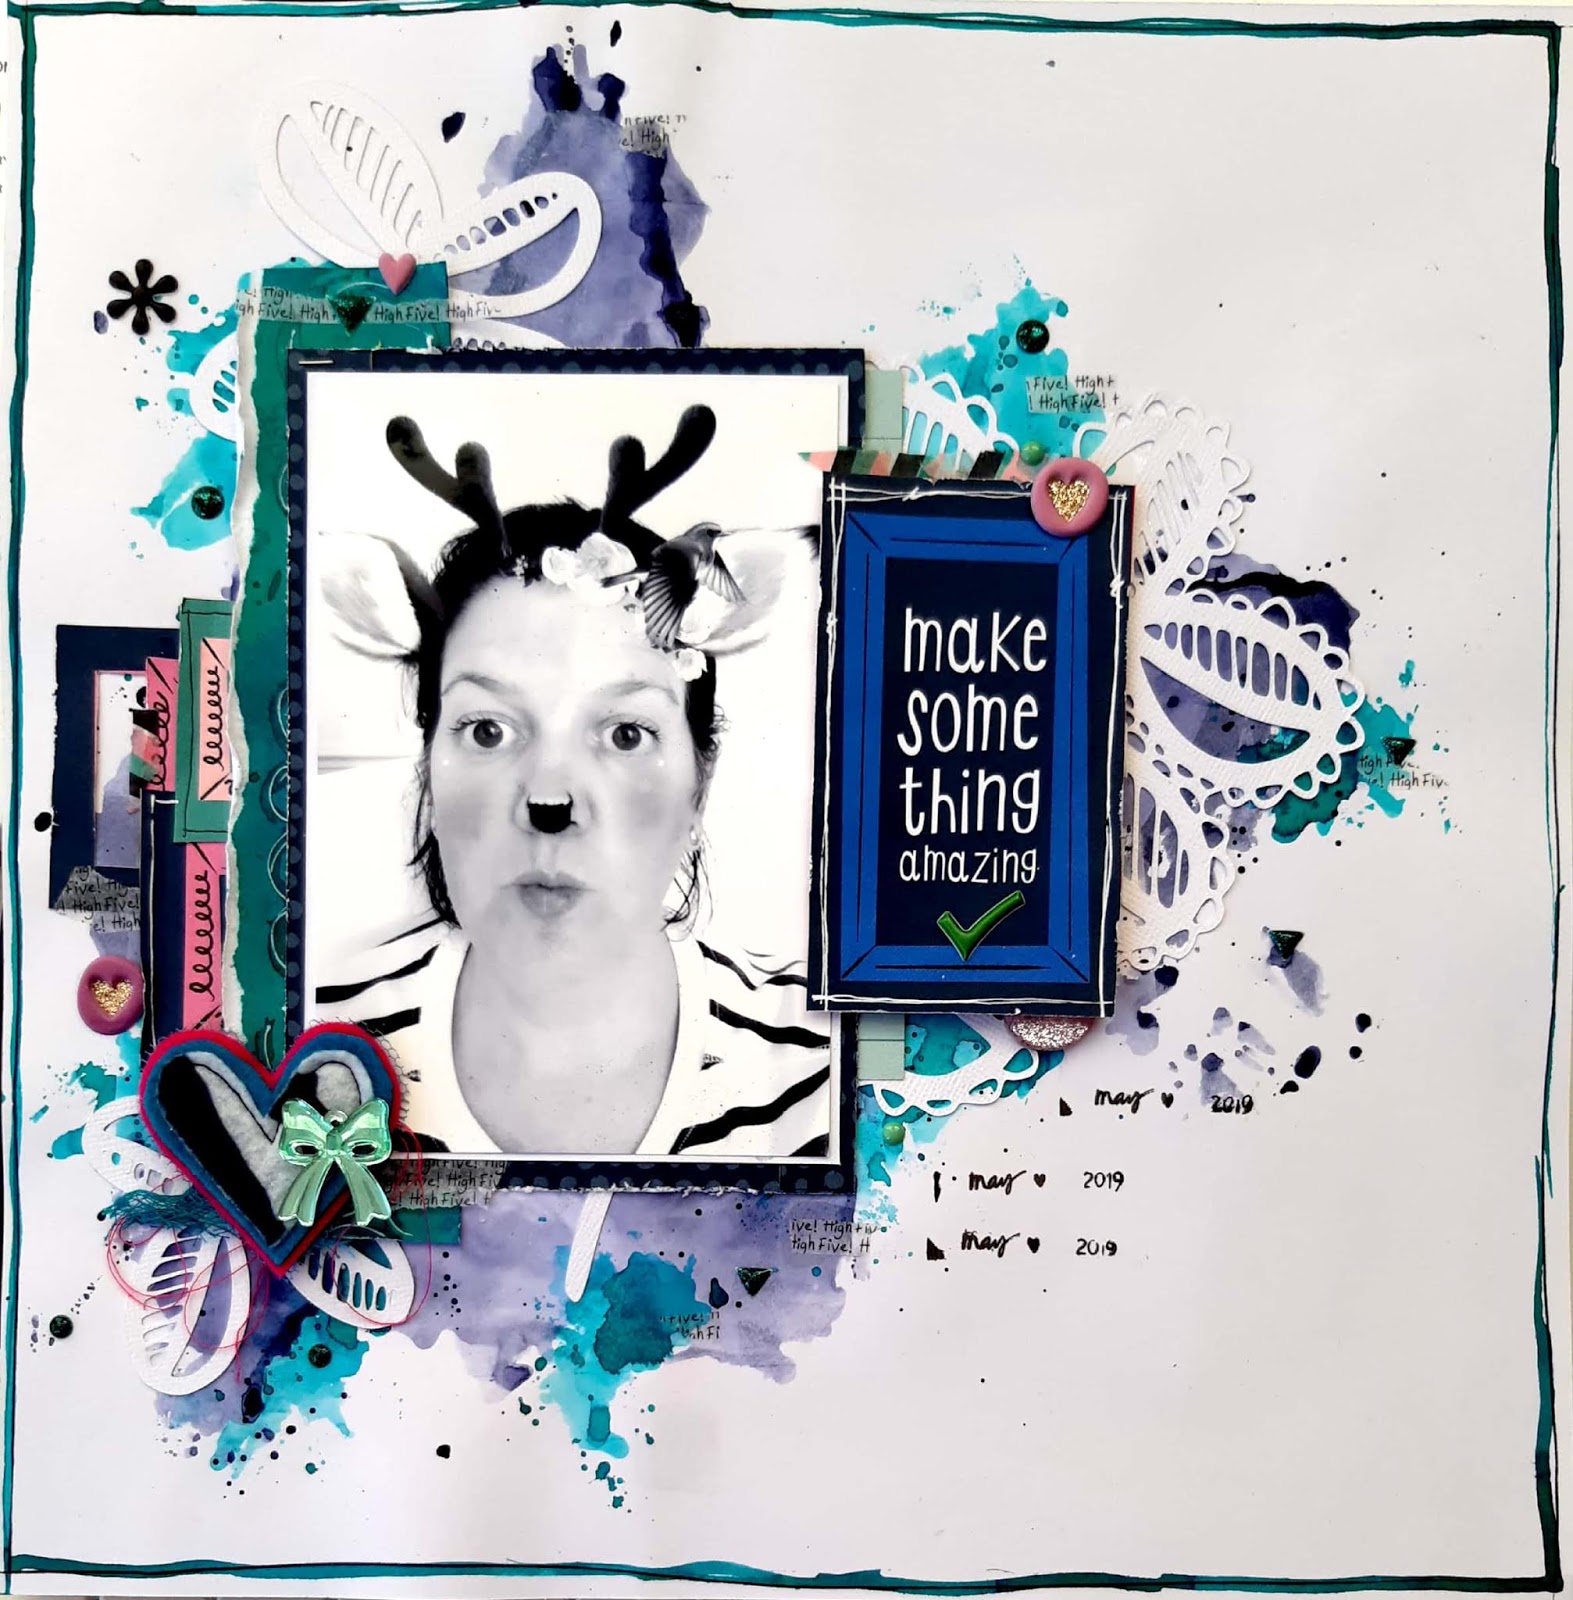
'Make Something Amazing!'

Hi everyone, it's Amy here and today I have a scrapbook page to share with you that I made using lots of goodies form the store.


I started the layout on a base of white cardstock primed with gesso. 

To add colour to the background, I applied (with packaging and water) Dina Wakley acrylic paint in 'Night' and Dylusions Ink Spray in 'Turquoise' on the page. I then heat-dried it.


I splattered the ink I had left over, over the coloured areas. Then it was time to add layers - with papers - over the coloured background. 


For the layers behind the photo I used papers from the American Crafts 'Box of Crayons' Collection from the store. This range is great, being so versitile for pages of all ranges of topics.

I also used some gorgeous cut files from Cut To You - and then adhered my photo down - and added some embellishments. 


Finally, I created a border with the Dylusions Ink Spray in 'Vibrant Turquoise' - and "voila!" - this quirky page is finished.

Here are some close ups.


Thank you for popping by, Amy

Wednesday, 22 May 2019

Handmade cards - using stencil and inks.

Hi everyone! My share today is some handmade cards using a Kaisercraft stencil and distress inks from the store.

I have made these cards with a cool but simple technique, inspired by the scrapping guru Mr Tim Holtz. This technique was introduced a few years ago but I only recently discovered it: it's so simple but effective and fun to do.


To begin, I trimmed down some Kraft and white cardstock to the size of my choice. I then primed the white cardstock with gesso - as was going to work with wet mediums.


A very useful tip here - because the stencil was to be flipped over (and you want to ensure the correct side for printing your images) then lightly mist over the coloured area -


- then flip the stencil over gently and place over the cardstock - and press down the ink with a paper towel, to ensure the paper absorbs the ink. Next, lift the stencil and heat dry the print - how cool it this!


To make the flowers, first, over a craft mat, I stamped various distress inks, as pictured, then lightly sprayed with water and placed a sheet of primed cardstock (or use watercolour paper, if you have some) over it - pressed down - and removed - voilà!


Next I heat-dried the coloured cardstock. I love how the colours blend together with the water.


With the Stazon Ink (in Jet Black) I stamped the coloured cardstock with the gorgeous Jane Davenport 'Poppy Girl' stamp. 

I then fussy-cut the flowers out. I inked the edges of the flowers and the printed the cardstock with both Distress Ink in Vintage Photo and Antique Linen.

To allow the flowers and pop out, I placed them over prepped medical gauze - I had inked the medical gauze with Dylusions Spray in 'Fresh Lime' and 'Pure Sunshine'.

I gently splattered both cards with ColourBlast 'Roadbase' Colour Spray. 

After both cards were adhered, I selected some quotes from Dina Wakley Media Collage Paper Backgrounds and added some sequins from my stash for some bling... here are some more close ups...


I am happy with how these gorgeous cards turned out. 


Thanks for stopping by!

Ciao for now, Amy