Wednesday, 19 June 2019

Bright Little Gift Cards

Hi there Scrapping Clearly fans! I hope you are keeping warm and getting plenty of craft time. 

I have here some bright gift cards to share with you.

I trimmed down heavy white cardstock to size 8.5 cm x 8.5 cm (to fit my envelopes). 

Then I used...
  • White and black pens from my stash. However, the store has Posca paint pens that are ideal.


For embellishment, I used Mambi Stickers, Fancy Pants Designs Puffy Stickers, and some handmade embellishments from Charms Creations. 

Finally, for the sentiments, I used both Tim Holtz Idealogy Collection Small Talk and Mambi Stickers.

It was a lot of fun creating these small but bright card. My highlight was using the new Dylusions Dyalog stencils. 

Have a look at these close ups!


Thank you for taking the time to read this. I hope it left you feeling inspired to do some more crafting.

Ciao for now,

Amy

Tuesday, 18 June 2019

Be your beautiful self

Hi everyone,
Don't you just love this beautiful, delicate, moody mood board this month?

It reminded me of days gone by so I decided to scrap a photo of my great great grandmother.

I started by roughly tearing a couple of different scrap papers and making a collage, sticking them down with TCW gel medium. (Any gel medium would work just as well)

When dry I covered my page with gesso and then lightly removed some with a baby wipe.
I traced on some circles using a stencil and grey lead pencil and then used a combination of Dina Wakley Scribble sticks and Silver Ice gelato to colour them in. I then gave the top of my LO a spray with Lindy's Stamp Gang spray and then dribbled some Tim Holtz Distress Ink in Milled Lavender from the top, misting with a little water to assist the drips.


I fussy cut my photo and inked the edges with Tim Holtz Distress Ink in Black Soot using a foam blending tool.


I diecut a few wings (one of which I coloured with Milled Lavender Distress Ink) and a flower.  I used a strip from Tim Holtz Idea-ology small talk stickers as my title with a little Stabilo to highlight and a little patterned paper to ground my photo.

I finished by tracing roughly around my circles using a waterproof pen and then added my journaling around one of the circles.


Thanks for stopping by. Hope you've been inspired.


Monday, 17 June 2019

Minc foil Layout

Hi Peeps,

You may have seen for the month of June we have all things Minc 50% off.

So I thought I would share a 12x12 layout I did using the Minc machine and the foil.

Also if you need to see other tutorials Heidi Swapp is doing the month of Minc on her site, so check that out as well.


It is very important that you use the right gel medium to bind the foil to your project pieces.
I have used the Heidi Swapp Magic medium as my adhesive.

I did try all my other brand gel mediums to varying success.
BUT I did not achieve total adhesion with other products.

For the background I took an old template I had, used a palette knife and applied the gel medium. Lift off your template and let sit for a bit to dry and go tacky.

Follow your Minc instructions and run it through the machine with your choice of foil. Shiny side up.

I then took a piece of marshmallow card stock. Using the magic medium as a ink. I put some onto my non stick mat and I dabbed the stamp into the medium. Again let dry and go tacky and run it through the Minc machine. Some of my stamps had matching die cuts which I used to cut the shapes out. The rose was a foam stamp and I fussy cut that one. I also used a Dina Wakley stamp Abstract blooms.


Hope you are inspired to try the minc out and to check all the possible projects you can make with it.
Tracey

Saturday, 15 June 2019

Lovely silliness

It's a lovely silliness...

I am finding a lot of pics of my girl that are just perfect for this moodboard as well as the amazing papers to compliment it also. 

I have used Cocoa Vanilla More than Words Precious... it's a beautiful grey woodgrain paper that works perfectly as a backing to this months moodboard. I have cut the edges off and backed it with a pale pink sheet of bazzill using white stitching. I then added TCW stencil mini Peacock Doily... with some Liquitex Matte Gel.


I stamped some pink tissue paper with the Carrabelle Abstract Flowers & Leaves monoprinting plate. I inked up the plate and then placed my tissue on it and used a brayer to transfer the image. 


A little of the shadowing and subtleness was added using Adirondack Ink in Pebble through a Tim Holtz stencil. I have used this on both sides of the page.


time to add more layers... a little pink muslin & white tulle have been sewn on to the page prior to adding the washi.


I have added a little butterfly washi, Crate Paper Lillian stamps & Stampers Anonymous stamps using Ranger Archival Ink.


Another fave... Finnabair Glass Glitter.... I have adhered this using Ranger Glossy Accents


other accents and ephemera I have added along the way include my own cut design in white, Kaisercraft Pen & Ink ephemera, Heidi Swapp Photo frames, Heidi Swapp acetate words, Kinder Kreations lovely word, Kaisercraft crystals.


woohoo all done ... 


I hope you have grabbed a little inspiration and  it has sparked your mojo for the weekend ... I look forward to seeing your creations come to life as you post them in the June moodboard Facebook Album ... have a fabulous weekend.

tracey 
xx

Thursday, 13 June 2019

My Cup of Care - Art Journalling with Karyn Schultz!

Hi Scrapping Clearly Lovelies!!

It's Karyn here, and today I have an art journal page to share with you made using lots of goodies available in the Scrapping Clearly Store.


I've used my Dina Wakely 8x10 media art journal and this page is a calico fabric. I've started by applying some Dina Wakley paints (Gilt, black and Silver/Medieval) to the page using a palette knife. Then I added some stencilling using TCW black modelling paste. Next I added some background stamping.
 

Once the background was thoroughly dry I added strips of DWM collage paper, strips of a white doilie, some hessian cut from from one of the pages in the DWM journal and stamped leaves from an Art by Marlene stamp.


I added a DWM sketched face stamped image as the focal point for my page. Lastly I added some Small Talk - Snarky words from Tim Holtz - these words are so fun and are my new fav word stickers! 


Thanks so much for stopping by 
Crafty Hugs xx


Wednesday, 12 June 2019

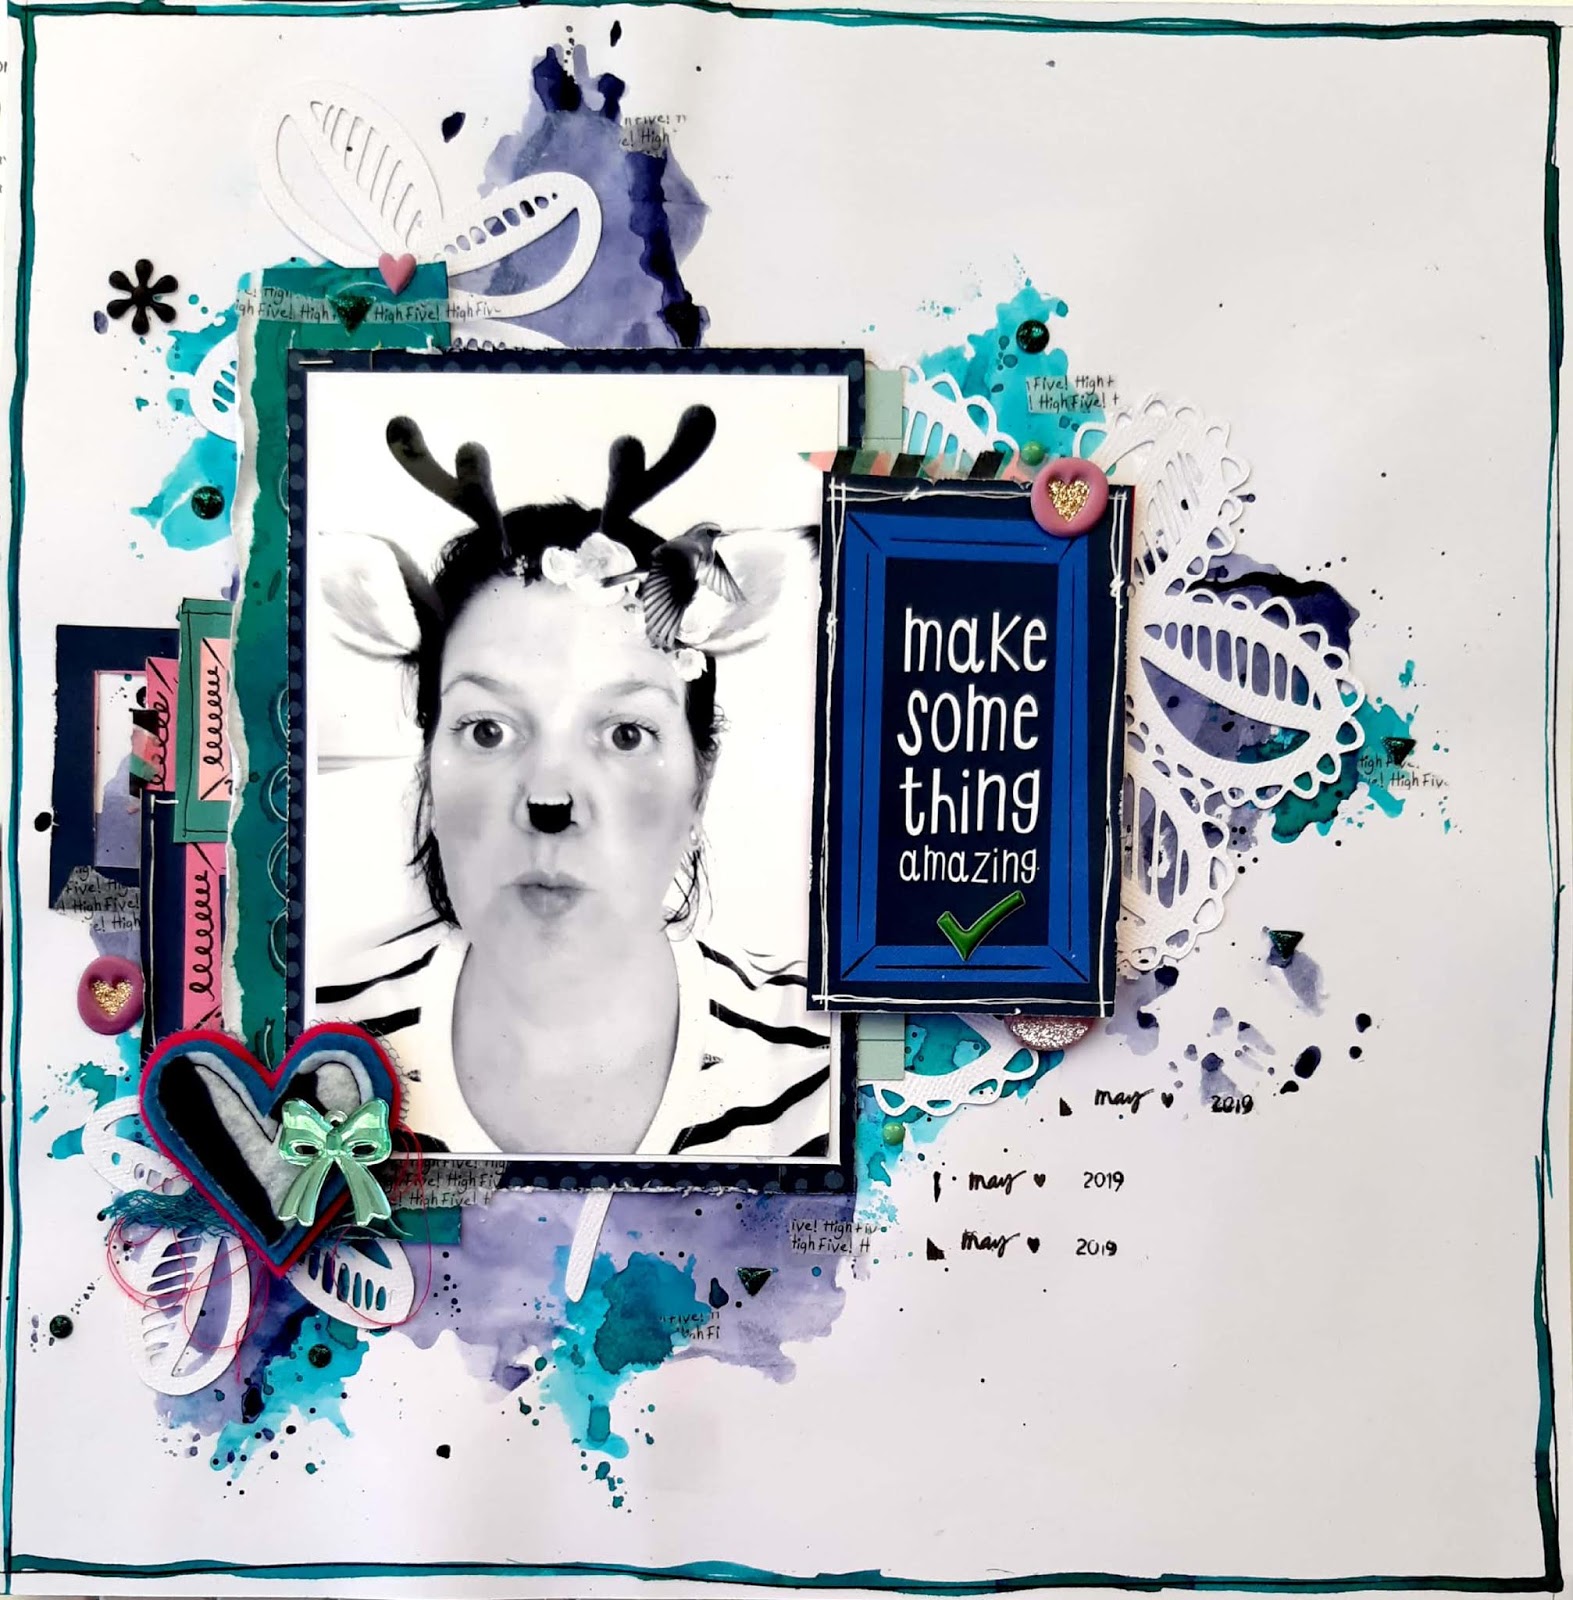
'Make Something Amazing!'

Hi everyone, it's Amy here and today I have a scrapbook page to share with you that I made using lots of goodies form the store.


I started the layout on a base of white cardstock primed with gesso. 

To add colour to the background, I applied (with packaging and water) Dina Wakley acrylic paint in 'Night' and Dylusions Ink Spray in 'Turquoise' on the page. I then heat-dried it.


I splattered the ink I had left over, over the coloured areas. Then it was time to add layers - with papers - over the coloured background. 


For the layers behind the photo I used papers from the American Crafts 'Box of Crayons' Collection from the store. This range is great, being so versitile for pages of all ranges of topics.

I also used some gorgeous cut files from Cut To You - and then adhered my photo down - and added some embellishments. 


Finally, I created a border with the Dylusions Ink Spray in 'Vibrant Turquoise' - and "voila!" - this quirky page is finished.

Here are some close ups.


Thank you for popping by, Amy

Monday, 10 June 2019

Mixed Media Canvas

Hi Peeps,

Been away with my arty friends for a 5 day retreat in the Hunter Valley.
Had a chance to do a few of my favourite style canvas's.

Finished this one off of my eldest boy.


Eclectic mix of metals, chipboard and resin.

The secret ingredient is Alchemy Metallique paints.

While I was on a roll I thought I would do a couple for my arty friends.


I have used the metallique paints on this as well, plus the alchemy waxes.


Texture on the background is achieved using Light and fluffy and a stencil.

Thanks for looking.
I am off to recoporate after a big creative weekend.