Sunday, 31 July 2016

Marquee LOVE! - by Chloe

Opening my DT kit this time was super exciting ... there was a Marquee Love Letter!!  Mine is the "N" ....

Marquee Love Kits Include:
1 DIY 8″ Tall Marquee Letter or Iconic Shape
1 LED Light Strand with on/off Battery Switch (2 AAA batteries not included)
Clear Bulb Caps (qty varies per letter or shape)
1 Tracing Template
I wondered for a while how to decorate this lovely piece .. and make it as beautiful as it deserves ... should I paint it?  Glitter it? Washi tape it?

Finally, I decided to use a piece of the gorgeous Maggie Holmes Bloom collection ... and utilise the tracing template to cut out a pretty background.


So simple!  The best thing about it is ,I can easily change the background.  Putting the bulb caps in was super easy too - then it was just a case of slipping the little lights in the back and flip the switch!


I thought it needed a little more, so I wound some flowers around some of the bulbs ... I think it looks very pretty and girly!

Thanks for visiting the blog here today :)

Saturday, 30 July 2016

Fun with Marquee Love by Tania

Happy Saturday everyone, hope the weekend is full of fun, love and laughter for you all! 
I just had me some fun, playing with the Marquee Love letter kit which was in my DT kit this month. I have to admit to having to think about this one for awhile, but after surfing Pinterest, and gaining some inspiration, my Letter 'B' was transformed!


Here's a shot of my desk, which shows you some of the products I used to decorate my light!

I used some Heidi Swapp Colorshine in Mint, Georgia Peach and Pink. The yellow was Dylusions ink. You can see my colour swatches where I tested a few different colours first. I was trying to match up the colour's of my daughter's bed covers in her room, as this is a pretty little gift for her!


The gorgeous Prima flowers are from my new DT kit and I've just pinned them on the letter with some Heidi Swapp lace ribbon and an American Crafts, clothespin. (That way, she can take them off if she doesn't like the flowers!) 
I also wanted to use the Marquee Love tape to decorate the edges, which I used in Gold. It was a little bit tricky putting the tape in the middle of the  letter, but thankfully, the tape is forgiving and I was able to peel it back up a few times and re-do!

Overall, this was a really quick and simple project!! They make great gifts and you can personalise them in many ways!! Possibilities are endless, just requires a little imagination and some inspiration!!!
There are so many gorgeous accessories in the Marquee Love range, take a look in the Scrappingclearly store!
See you next time,
Tania

Friday, 29 July 2016

Darling, You are a work of Art

Howdy Bloggers ,Lisa here with a quick Mixed media update .
I've been in retreat frenzy and its not over yet .
last weekend in Melbourne(thanks for taking care if the blog Peg)
and this weekend at Tamworth.
I actually scrapped in Melbourne, which was fun.
I've been so consumed with Art Journal work lately 
and it was so nice to get tactile with paper and embellishments .
Today i thought I would share a layout i created..
Using Marshmellow Bazzill cardstock(double thickness for Mixed Media work)
Some Dylusion ink sprays and a little water misting created this glorious colourful background to start with , then some stamping and washi tape,doddling ..
 I have used a photo matted with black cardstock,
 some tissue paper and book paper, a darkroom door photo strip, colourful thread,
and Tim Holtz sentence stickers 

Thanks for dropping by , 
I am off to get arty, 
see you next week x

Wednesday, 27 July 2016

Tag Ideas

G'day arty folks
Peg here today with some tag ideas for our upcoming tag swap.
For these two I also took inspiration from our July mood board, still a few days to play with this one.
Link up on the sidebar of on our FB page.


So this is how they came together.
I have put the product links below the relevant images.

And with a few added embellishments, here they are finished.

Happy crafting.
See you next time


Sunday, 24 July 2016

Whatever with Melinda

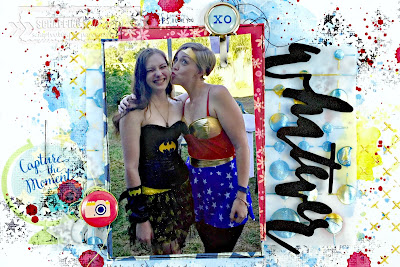
Hi there and welcome to the blog today! It's Melinda here and I'm sharing another page using my absolute fave collection so far this year, Starshine by Shimelle :)

Another page from my besties and niece's birthday party back in January :) And both my niece and myself LOVE this very candid moment that someone happened to snap!


I started this page while on retreat at the beginning of the month and am so happy with how it came together!. Because I started at retreat I can't 100% remember HOW I created the water colour background but I am about 98% sure it was using gelatos! I have a bunch of the older gelatos that don't have the names printed on them but I used  a red and yellow that I got in one pack and I have also used Blueberry for the blue. As you can see I have used a piece of plastic packaging and the very easy packaging technique with the blue and yellow - letting the colour dry between as I didn't want green! After that was dry I went in with the red and a pipette to create big splatters and also a paint brush for some smaller in all 3 colours :) After that was all dry I went in with a star texture stamp and black archival ink from my stash and then some of the Bling Colour Paste by Colour Blast and a stencil.


A bit of a close up of the detail in the middle of the page. I had to ask around at retreat but I managed to find a piece of vellum (I can't believe I didn't pack any!!)  as I had an idea!! I grabbed my Singin the Blues and my Bling colour paste by Colour Blast and a fun stencil and just stenciled the pattern onto the vellum for the last layer behind the photo cluster and as it turns out - somewhere for the title to go! I used these fun phrase thickers in an older Dear Lizzy collection but this worked perfectly for my title! Both of my stencils are from Dusty Attic and you can find them here in store or if there is one in particular you are after Kylie can order them in!

I have used the "Voyager" (red with flowers) paper and also a paper from the 12x12 paper pad to back the photo. I did outline both of those with a black pen to give a little more definition to the layers as well. 

Once that was all assembled I went in with my embellishments but didn't want to add too much as the background had so much happening!


This cluster is to the left of the photo and you can see that I have used 2 clear stickers from the collection, some of those GORGEOUS acrylic stars (it was hard sticking those down, I'm kind of hoarding them!) from the acrylic shapes, one of the flairs (these guys are little and oh so cute!) and also some black and yellow thread from my stash for more added texture.


This little cluster is at the top of the photo and again, clear stickers (hard to see but yellow star near the top right), another acrylic star and one of those cute paper clips. Oh, and more black thread :)


And onto the very bottom cluster :) I have cut the "Together" from this piece of paper, added some thread, another of those adorable flair, another yellow clear star sticker and a 3rd acrylic star.

I used one of my border punches from my stash on 2 of the sides in a really messy way and then distressed them a little. I felt the page was lacking a little something so mounted it onto that star paper from the 12x12 pad (I used this same paper as one of the mats on my photo but cut out the middle as I had a feeling I would use this to mount the whole page) and then machine stitched all around the edge in a messy fashion!

That's it for me for today. I truly do love this collection and I am so pleased I got this story told. 

Thanks for stopping by and have a great scrappy Sunday!!
Mel

Saturday, 23 July 2016

Some Birthday Cards - With Karyn!

Hi Scrapping Clearly Lovelies!!! 

It's Karyn here and today I have a set of birthday cards I made featuring lots of Minc mixed media goodness and items from the Pebbles "Spring Fling" paper and sticker collection - All available at Scrapping Clearly.
When I was making some Minc Mixed media cards for my project life pages recently the thought occurred to me that I could use similar concepts for cards - so that was the inspiration behind these cards.
On this first card I've added splatters of the Minc reactive mist as well as swiping some reactive screen ink across the card with an old itunes card. After waiting for it to dry properly I put it through my mini Minc with some gold foil. I finished the card by adding a Happy Birthday sticker from the Pebbles "Spring Fling" stickers pack and some flowers from my stash. I matted the foiled card over some kraft patterned paper from the Pebbles "Spring Fling" paper collection .  
For the second card I've added splatters of the Minc reactive mist as well as painting some reactive screen ink across the card. After waiting for it to dry properly I put it through my mini Minc with some gold foil. I finished the card by adding a Happy Birthday sticker from the Pebbles "Spring Fling" stickers pack and a flower from my stash. I matted the foiled card over some kraft patterned paper from the Pebbles "Spring Fling" paper collection .  
For the last card I've used the Minc reactive screen ink through a stencil as well as painting some reactive screen ink across the card. After waiting for it to dry properly I put it through my mini Minc with some gold foil. I finished the card by adding a Happy Birthday sticker from the Pebbles "Spring Fling" stickers pack and some flowers. I matted the foiled card over some kraft patterned paper from the Pebbles "Spring Fling" paper collection . 
 Scrapping Clearly products I've used include

cardstock  
Pebbles "Spring Fling" paper collection  
Pebbles "Spring Fling" stickers 
Heidi Swapp Minc reactive screen ink 
Heidi Swapp Minc reactive toner mist 
Heidi Swapp Minc collection paint brushes 
Heidi Swapp minc reactive foil - gold  
Heidi Swapp Minc mini  

Thanks so much for stopping by

Crafty Hugs xx

Karyn

Friday, 22 July 2016

The Prettiest Thing

Good Morning SC Peeps!
Peg here today to share some of my mixed media art, stepping in for Lisa while she is road trippin' down south to share her awesome artiness with others. 

I created this while away at retreat earlier this year. I LOVE retreats, time enough to clear my head of the mundane, immerse myself in a room full of amazing creative inspiration, and hang out with my tribe!

So, on a heavy weight cardstock (Bazzill Marshmallow) base I put this gritty black texture paste through this Prima stencil. I then did a Lisa-style rainbow vertically down the page using Ranger Dylusion sprays. The red splotches on the yellow and green come from putting my dried page face down on my messy mat to soak up excess spray.

To balance the black of the stencil I added some black stamping using mega bubble wrap and an Archival inkpad, these dry and stay put so no running when you wet it again. To draw the two sides of my piece together visually, I stamped with regular bubble wrap and yellow acrylic paint

I mounted my book quote on black card to help it stand out a bit and then sprayed the whole piece with gold shimmer (Perfect Pearls gold spray). Here is a close up of the quote so you can read it. I pick up super cheap pulp fiction at thrift stores to use for these, so much fun looking for good ones!

Thanks for coming by today, hope you have a colourful arty weekend, maybe play with one of our monthly challenges, or join our new tag swap, details in our FB group.

Til next time

Thursday, 21 July 2016

You are the reason I smile...Moodboard inspired layout by Tania

Hello again Scrappingclearly members, hope you are all flying along with your entries for our sketch and moodboard this month!!! How cool is that, 2 challenges per month now. It certainly helps having a challenge or two to inspire us DT girls each month. So here's the fab mood board again, in case you haven't seen it yet....

And here's my take on the board. No guesses here for which colour jumped out at me the most. But, if you look carefully, you will see that I was inspired by many elements of the board. The gold is obvious, the woodgrain,  you can see a hint of in my embellishments:


Once again I'm using a mix of Maggie Homes, Bloom and Dear Lizzy Happy Place collections. The gorgeous gold, foil vellum is Maggie Holmes, as is the washi tape sticker love heart. (I've mounted that onto some patterned paper to lift it off the page.)
The cute little wood dots and chipboard stickers are from the Teresa Collins, Life Emporium range! (Which are on special in the shop right now...yay!)


I am a fan of the American Crafts gold, foil thickers, love them! The little glitter dots are from my own stash, a great little $2 shop find.


For my background, I had run out of white cardstock, which is just not cool!! I go through it so fast, can't keep up. Here's me sitting in my chair thinking, what can I do. Well, hello, I have more patterned paper than you can poke a stick at, so I turned to a 12x12 pad of Heidi Swapp paper, which is only one sided, and chose a pattern that I have used before, and even though I cringed a little, I had a perfectly white background on the other side to work on! I'm sure I'm not the first person to do it!!!
So, I backed this onto a perfectly coloured piece of Maggie Holmes...My dear paper.
There's a Heidi Swapp tag on there, some twine from my stash and a doily, which you can never have enough of! I really wanted to keep this layout of my beautiful boy, clean and simple, so I typed my journaling on the computer and printed on copy paper, giving the edges a swipe with Distress ink for definition.
I hope I have inspired you to give the moodboard a whirl and come up with something. Don't forget, it doesn't have to be a scrapbook layout, you can make a card, or OTP project, Art Journal page, or even a tag, good practice for our new tag swap maybe!!! Have fun and upload your entry here with the link or over on our facebook community page!
Cheers, Tania

Wednesday, 20 July 2016

"If you think my hands are full" layout by Bernii Miller

Hellooo


Welcome Scrapping Clearly fans.. Bernii Miller here with you today to share a labour of love layout that I created with goodies from the store... I have been creating up a storm with the My Minds Eye - On Trend 2 collection and decided for this one I wanted to try my hand at some more hand stitching and watercolors... soooo inspired by Paige Taylor Evans I decided to give it a go... 

Although I have to tell you right now I made a HUGE mistake with the first layout that I created..( yeah you read that right) I was literally half way through the first version of this layout, when I was showing a friend of mine , and she had a very confused look on her face. She pointed out very quickly that I was missing a few words from my quote.. Sooooo I had to restart the layout all over again lol.. But this time I managed to create a process video to match .. that you can find at the end of this blog post :) 

So let me show you what I created ...


" If you think" layout by Bernii Miller for Scrapping Clearly using MME on trend 2 collection.


I loved creating this layout.. I chilled out with my bestie and we watched netflix all day while I re-stitched this quote.. 

" If you think" layout by Bernii Miller for Scrapping Clearly using MME on trend 2 collection.


" If you think" layout by Bernii Miller for Scrapping Clearly using MME on trend 2 collection.

If you are curious as to how I created this layout I would love for you to checkout my process video below...


Lastly, I used the My Minds Eye " On Trend 2" collection which is available inthe shop HERE if you would like to get creating :) 
Thank so much for stopping by 

Till next time 

Much love 
Bernii xx